Writing and Querying
Table of contents
- Writing Data from an Application
- Writing Line Protocol Data
- Writing Annotated CSV Data
- Writing Raw CSV Data
- Querying with the InfluxDB API v2
- Writing and Querying with Client Libraries
- Write Rate Limits and Error Handling
- Further Reading
Writing Data from an Application
However your overall application is architected, InfluxDB likely provides tooling that supports getting data into InfluxDB,including:
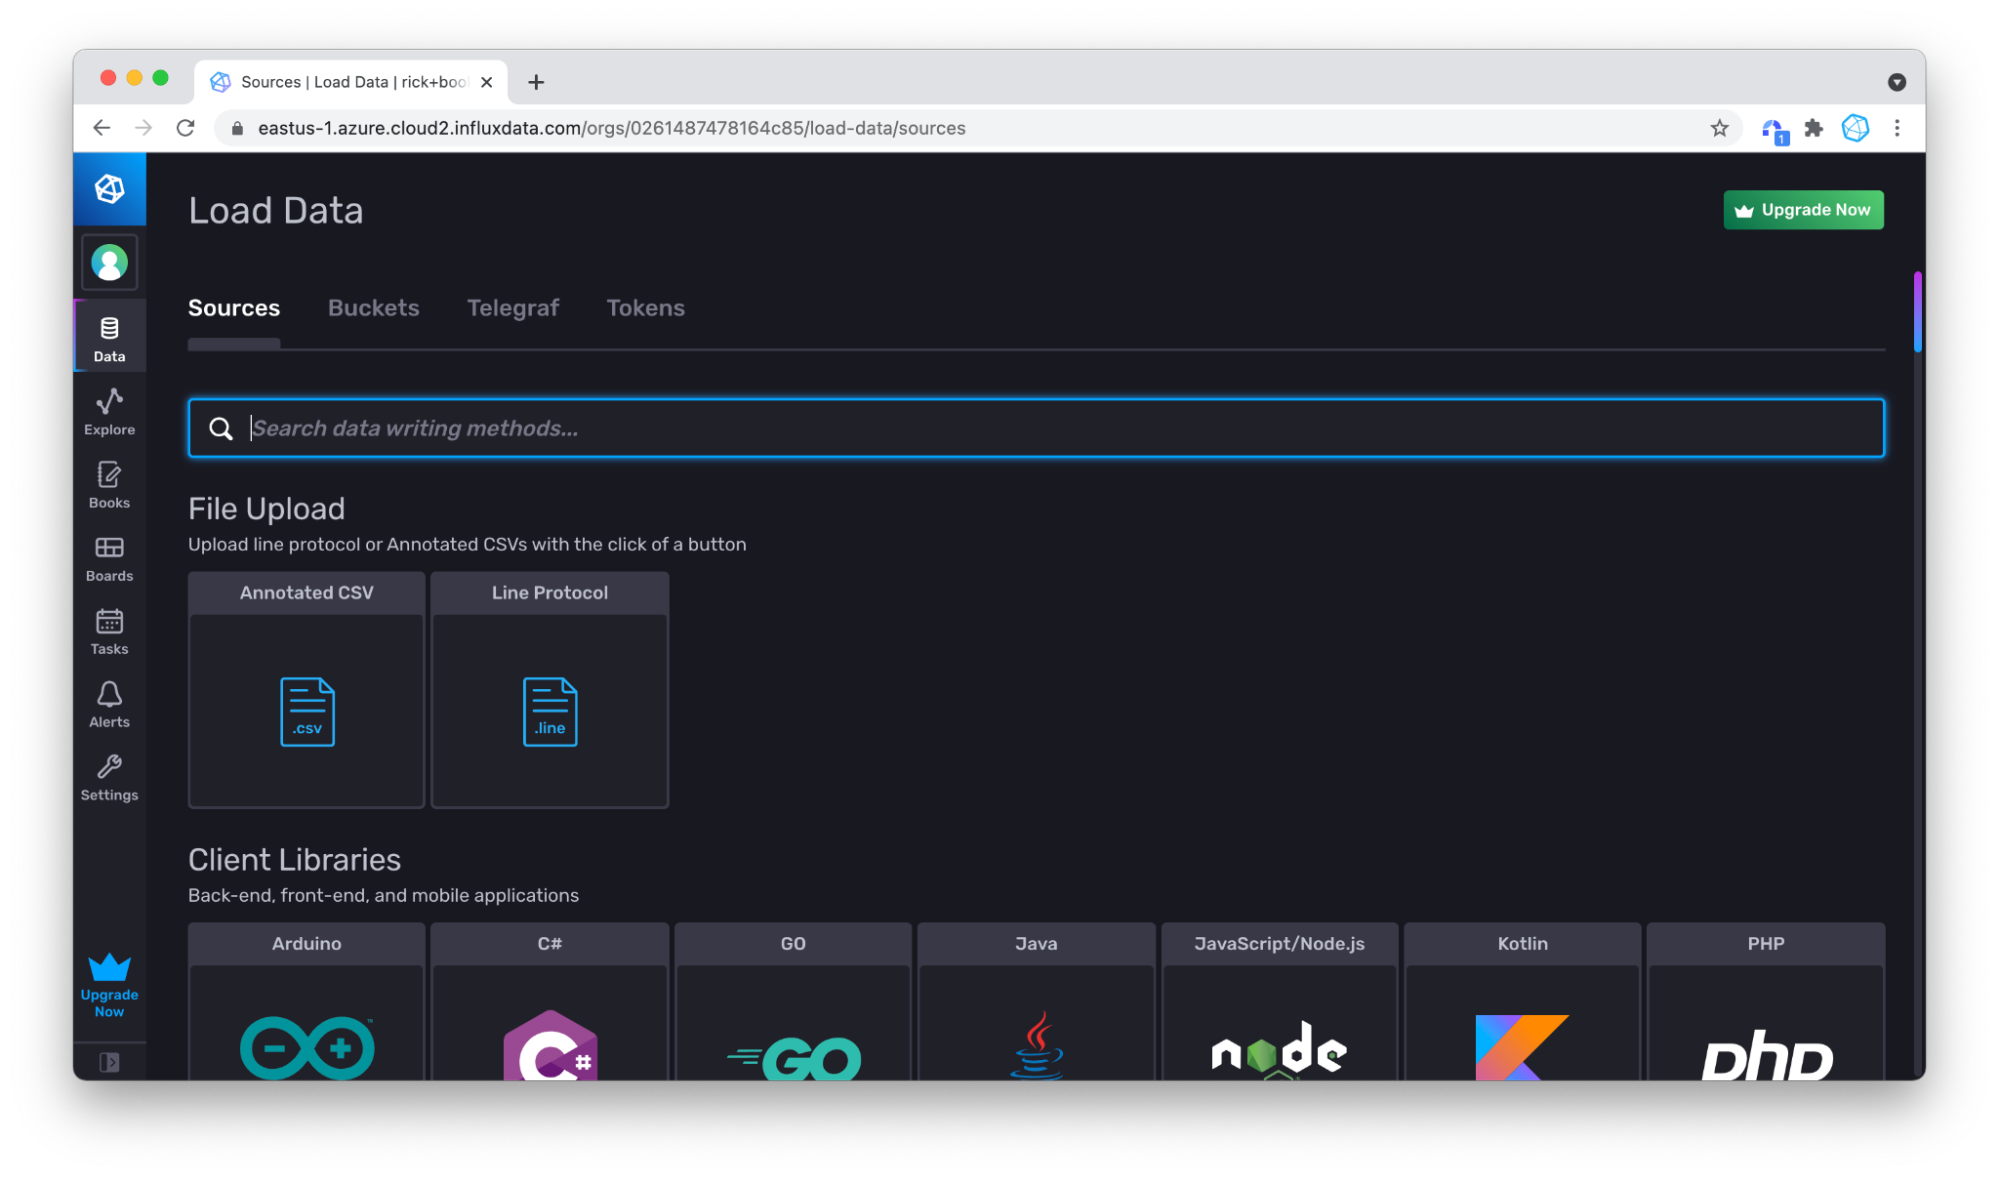
- InfluxDB UI: the InfluxDB UI allows you to write both line protocol and Annotated CSV to InfluxDB. The InfluxDB UI also provides Telegraf configuration management and getting started guides for using the Client. You can also use the InfluxDB UI to query data as described in part 1.
- Flux: You can use the csv.from() function or the array.from() function to generate Annotated CSV and write it to InfluxDB with the to() function.
- InfluxDB v2 API: The API gives you complete control over writes and queries to InfluxDB and provides more features than the UI, CLI, or Client Libraries.
- InfluxDB CLI: The CLI is easy to use and perfect for developers who typically lean away from GUIs.
- Client Libraries: A big part of prioritizing developer happiness is making sure that InfluxDB is easy to work with regardless of a developer’s language preference. That’s why InfluxDB has 13 client libraries to choose from.
- Telegraf: Telegraf is perfect for anyone with stringent write requirements who doesn’t want to write a collection server with batching and retry features for over 200 input data sources.
In this chapter we’ll focus on writing data with every method in the list above except Telegraf. Telegraf is an agent that can be installed directly on systems, and will be covered in a separate chapter.
Writing Line Protocol Data
It’s time to write some data to InfluxDB. We’ll start by writing line protocol to InfluxDB. You can choose to either write the meta-syntactic line protocol we used in the Line Protocol Section in Part Two:
my_measurement my_field=1i,my_other_field=1,yet_another_field="a"
Or you can write some line protocol from the Air sensor sample dataset for a more complete example. To write data from the Air sensor sample dataset, familiarise yourself with the air-sensor-data.lp line protocol file. We’ll copy lines from the file and upload it in its entirety.
This section assumes that you’ve already created a destination bucket that you want to write your line protocol data to. Please review the Buckets section from Part Two, for a refresher on how to create a bucket.
Writing Line Protocol Data with the InfluxDB UI
The InfluxDB UI allows writing data directly to the database without writing any code or using any tooling. This is very useful for prototyping and testing purposes.
To write line protocol data with the InfluxDB UI, we’ll first copy 20 lines from the air-sensor-data.lp line protocol file to write the line protocol manually. Then we’ll download the entire file and write it to InfluxDB.
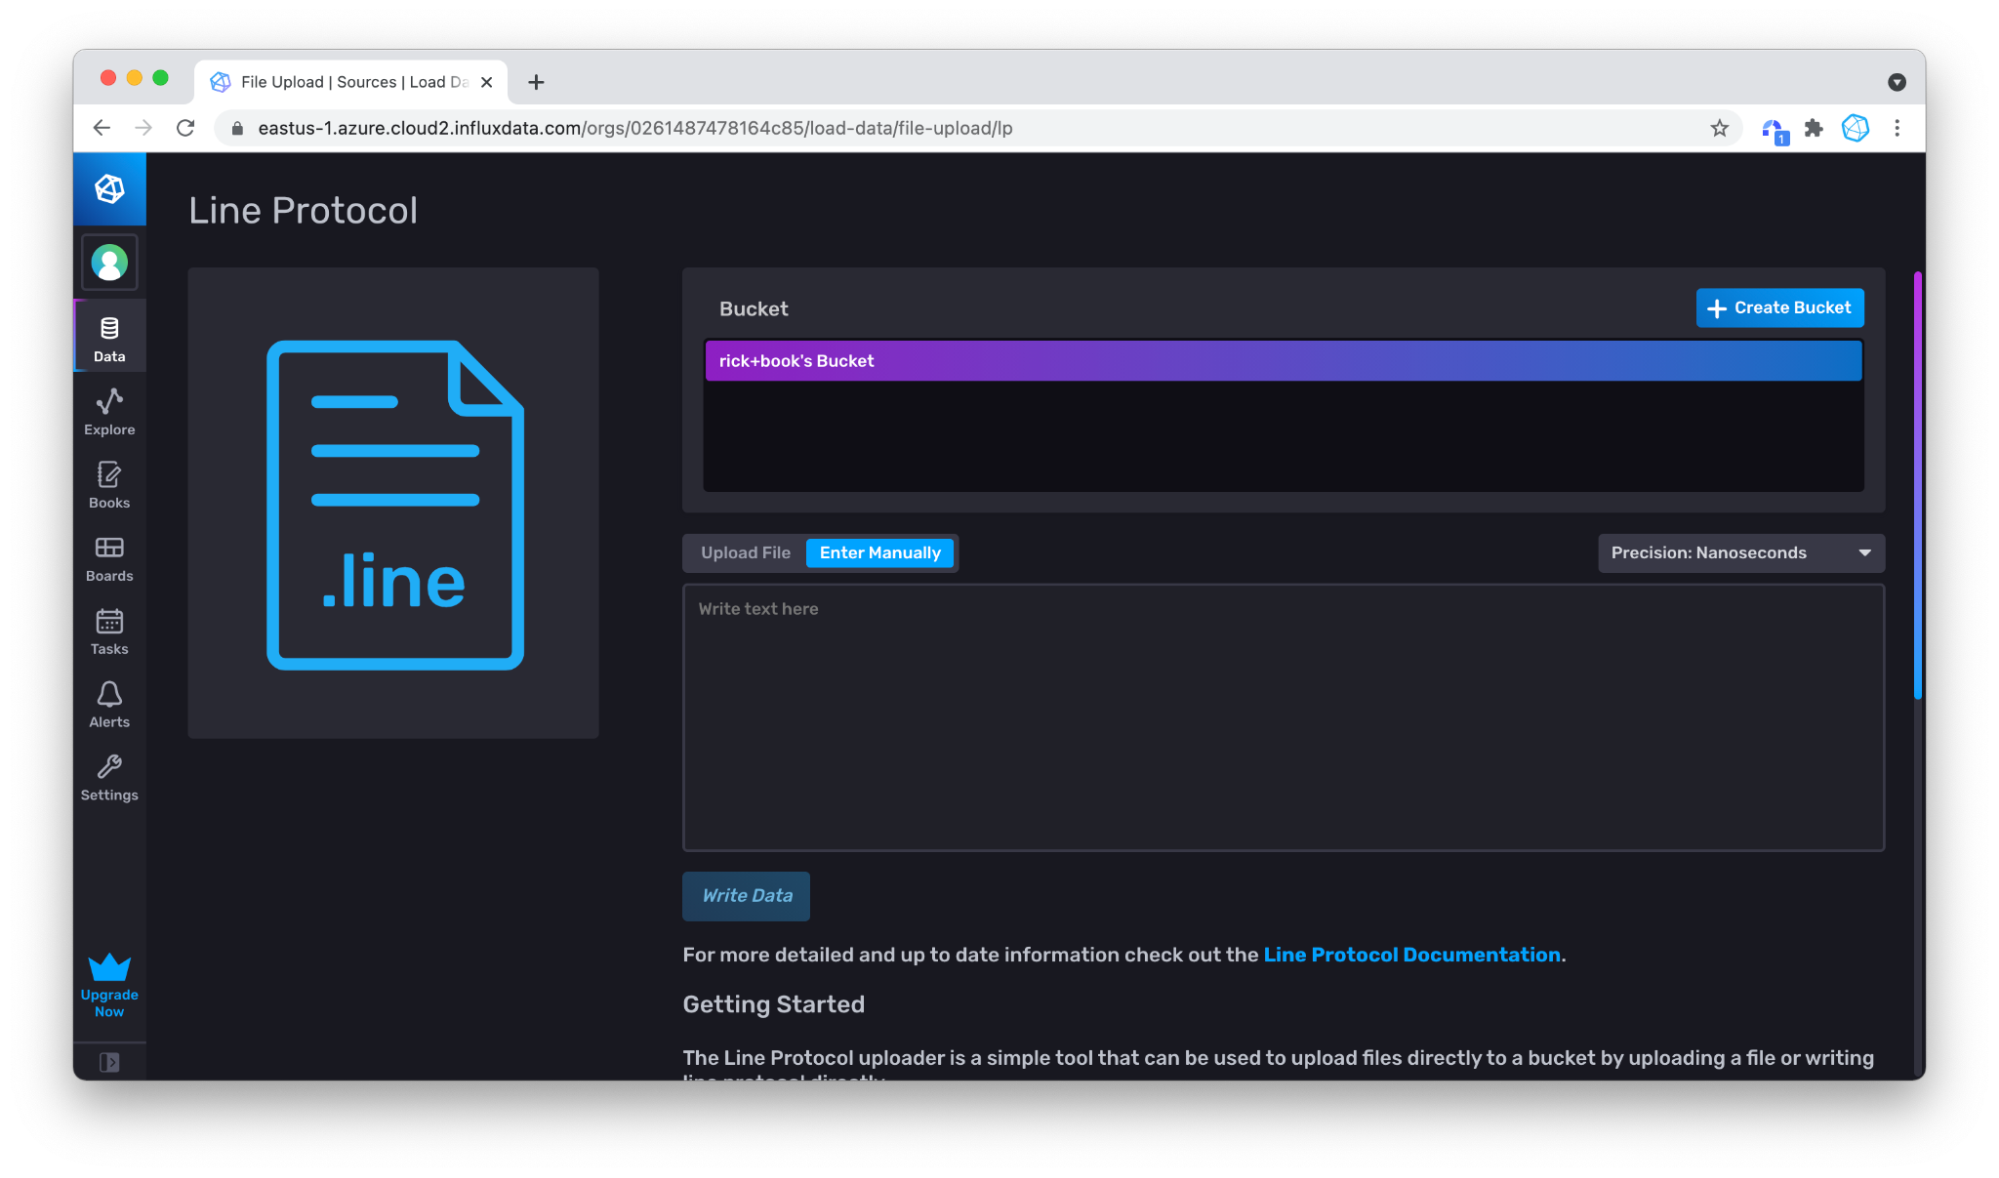
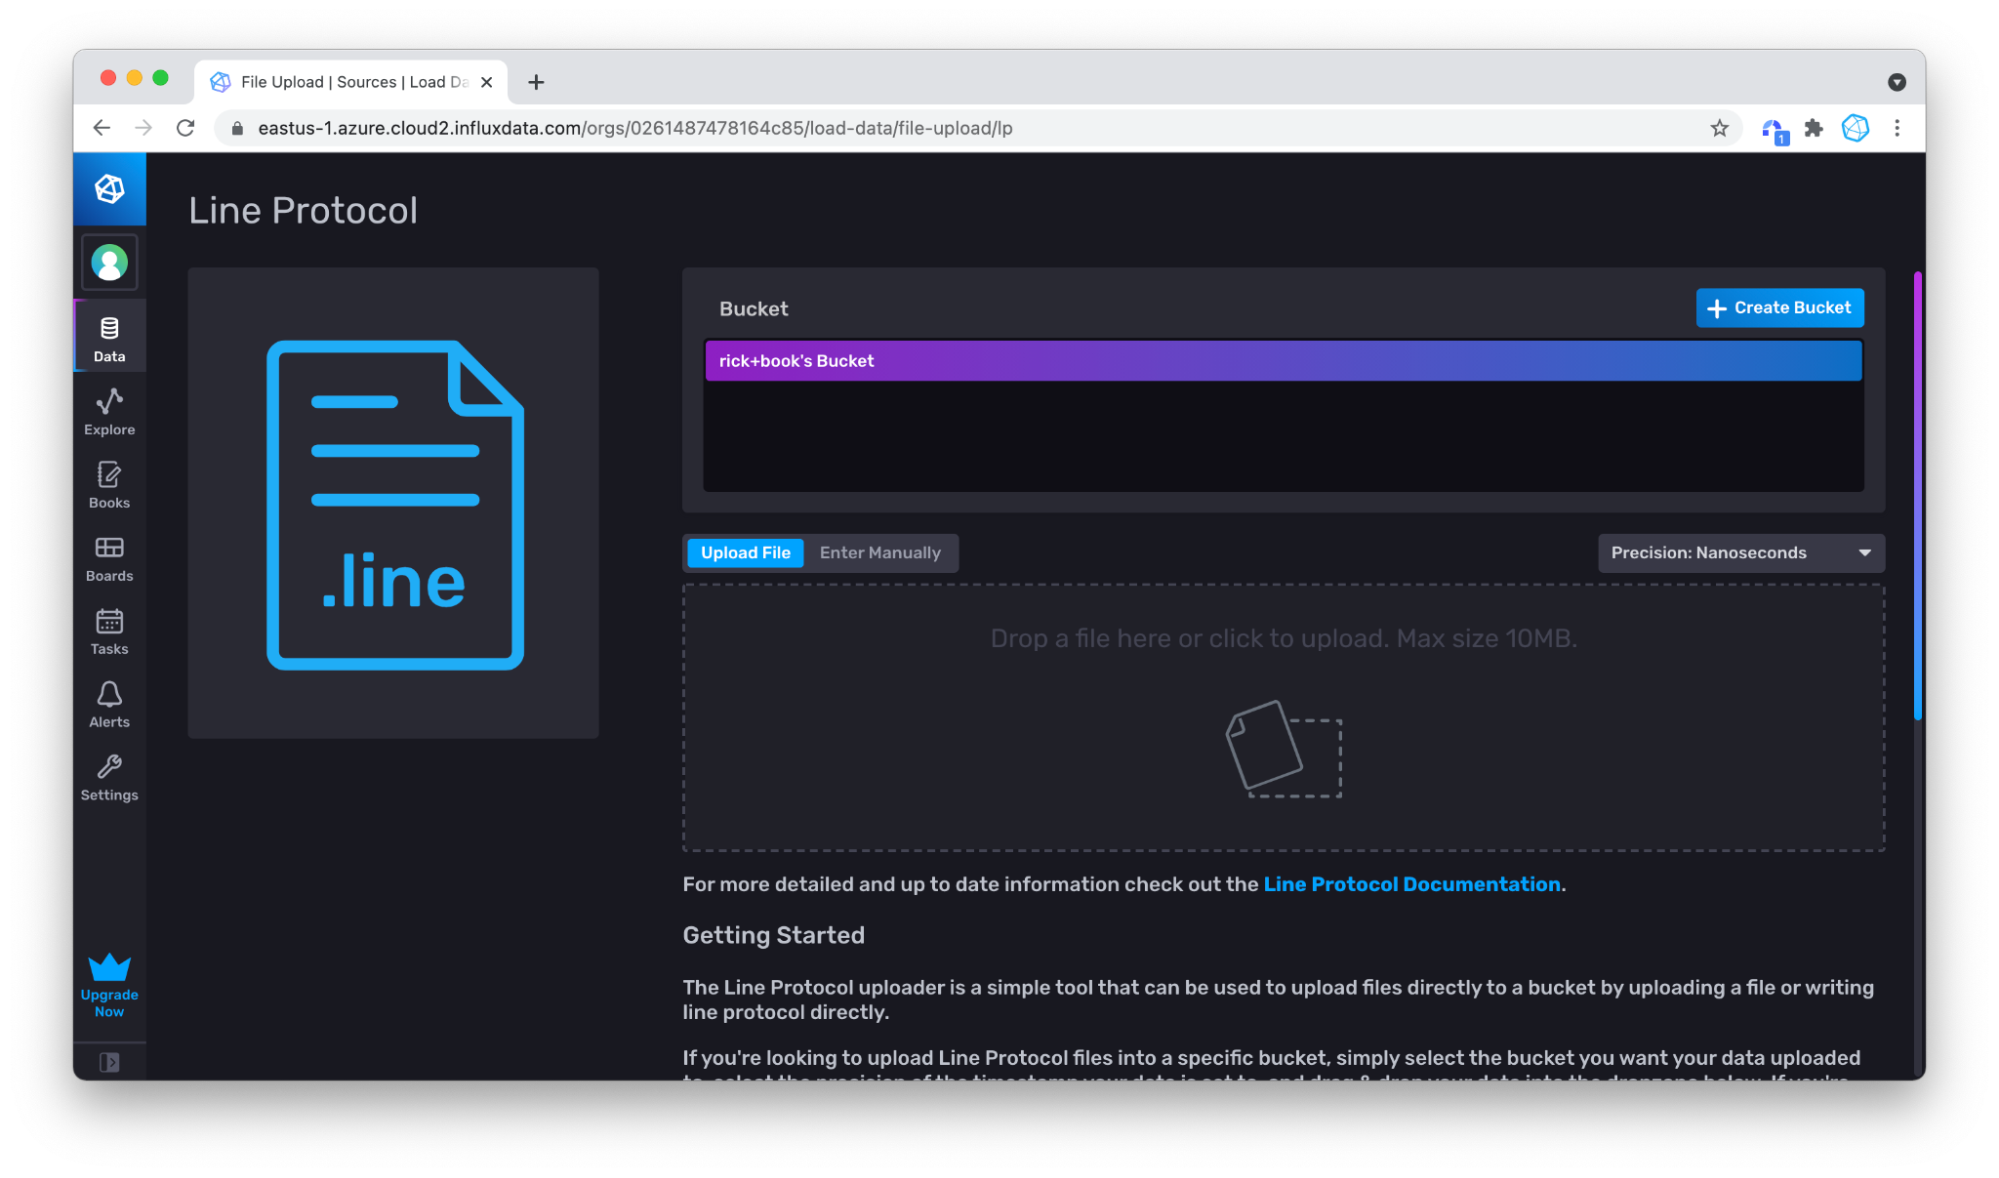
Upload Line Protocol Manually
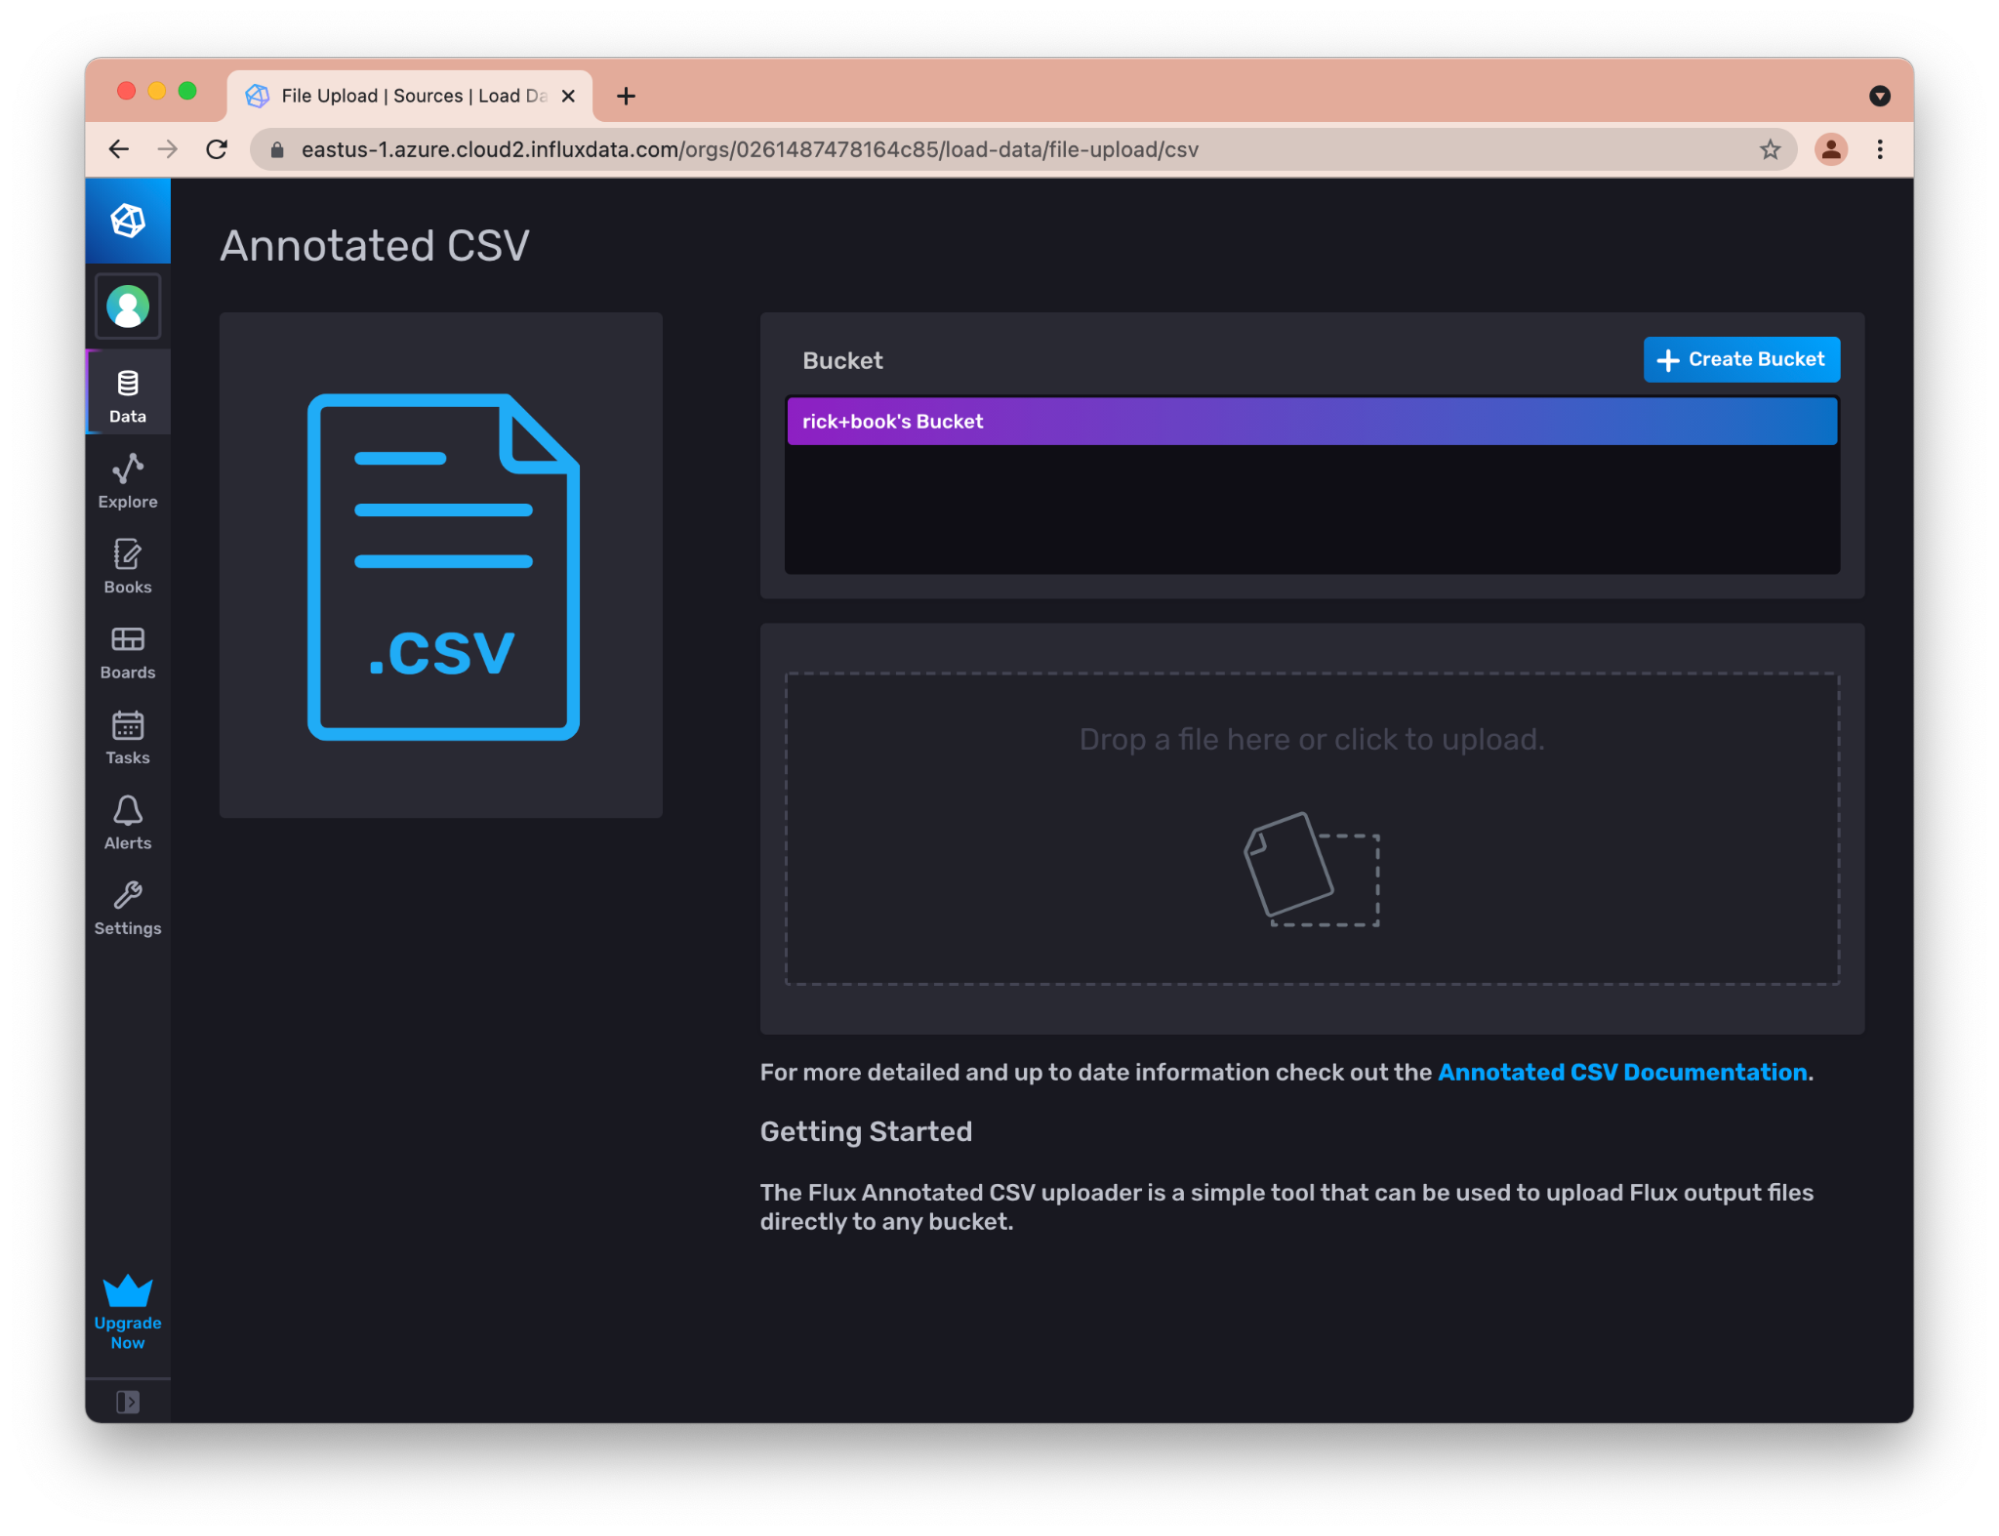
To write line protocol manually, first copy and paste some lines from the air-sensor-data.lp line protocol file. Then go to the Data tab in the left hand navigation bar of the InfluxDB UI.
 Then click on the Line Protocol box under Sources. Specify the bucket that you want to write data to. Either use an existing bucket or click + Create Bucket to create a new bucket.

Switch to Enter Manually.
Paste in some of the line protocol.
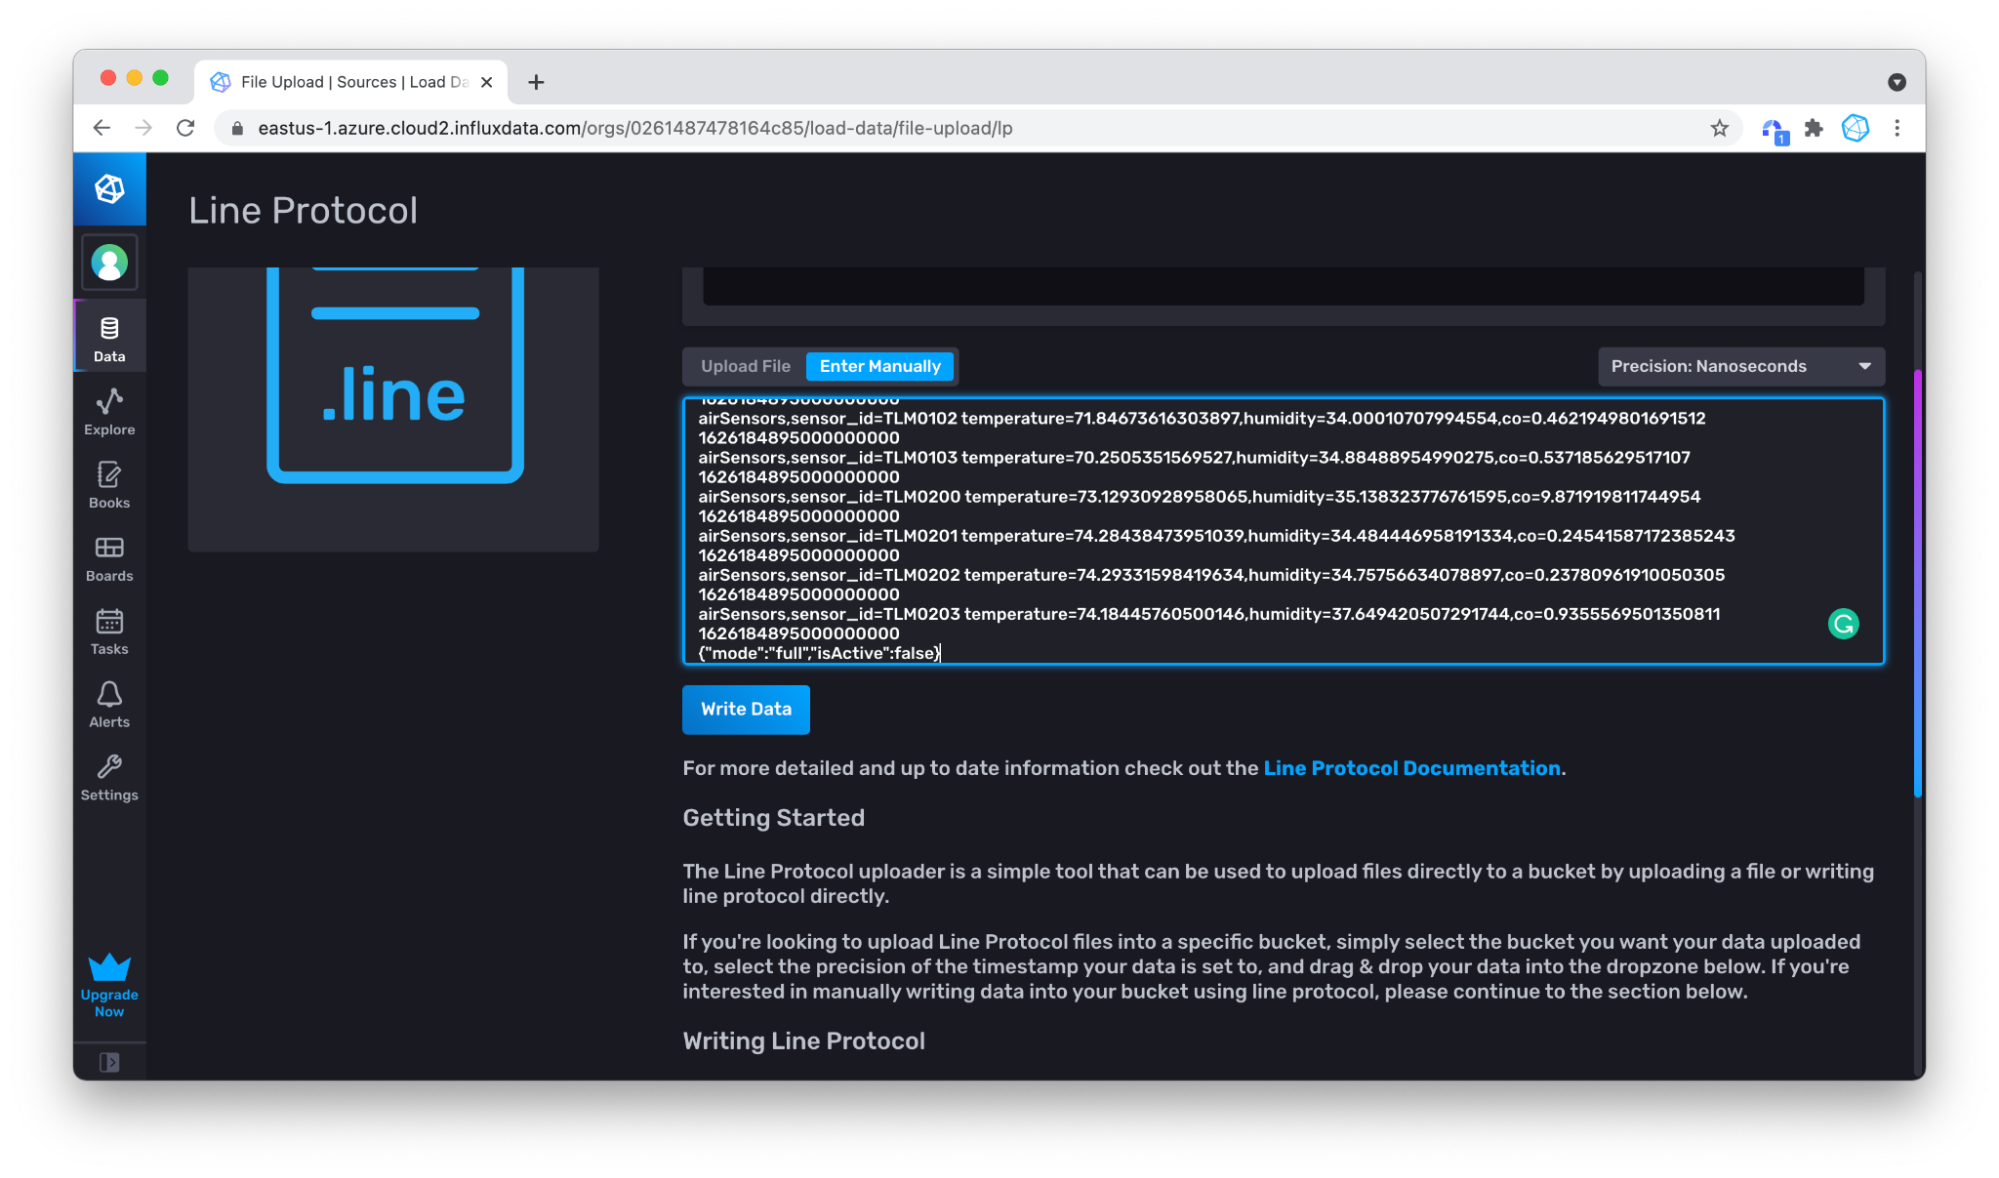
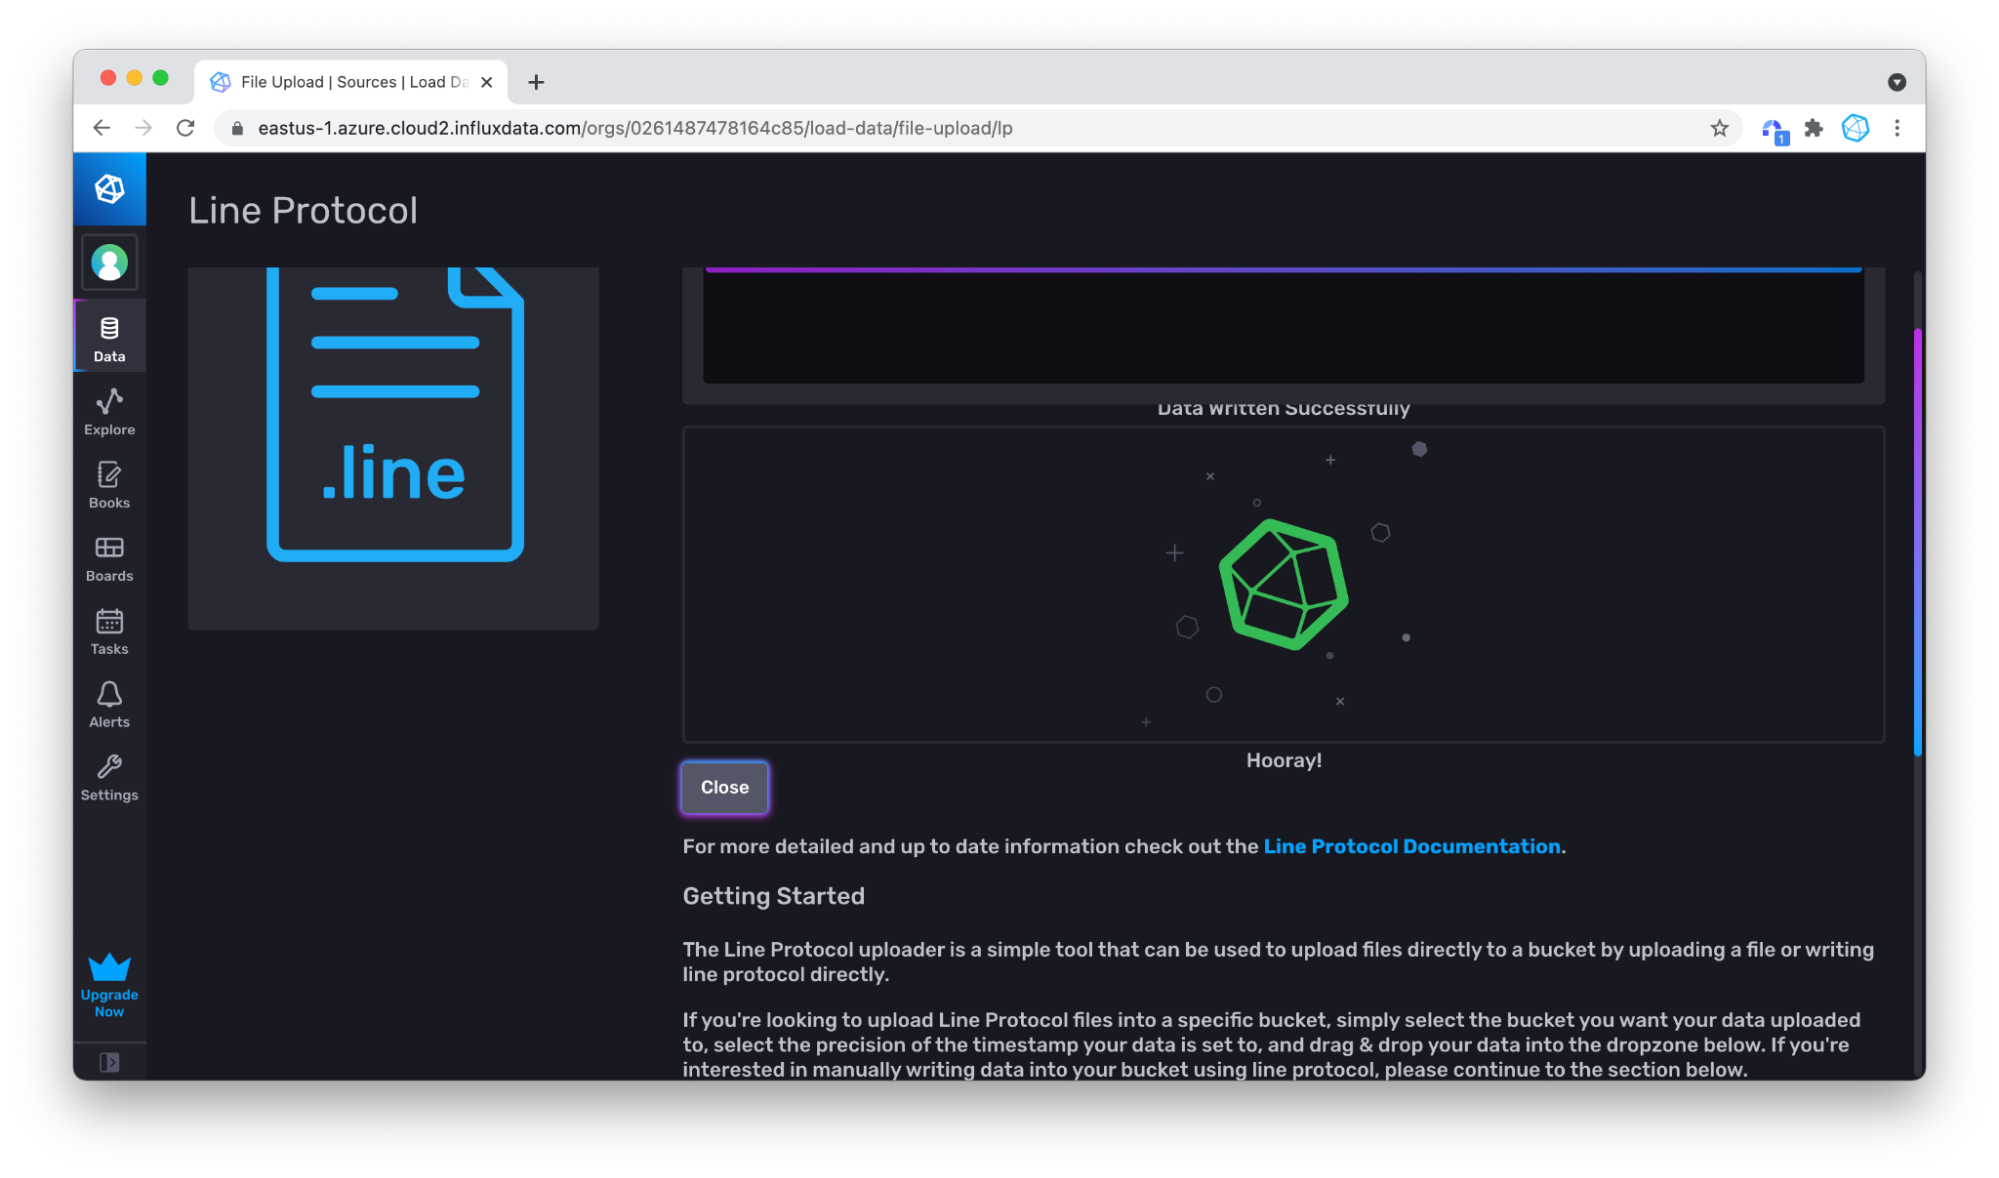
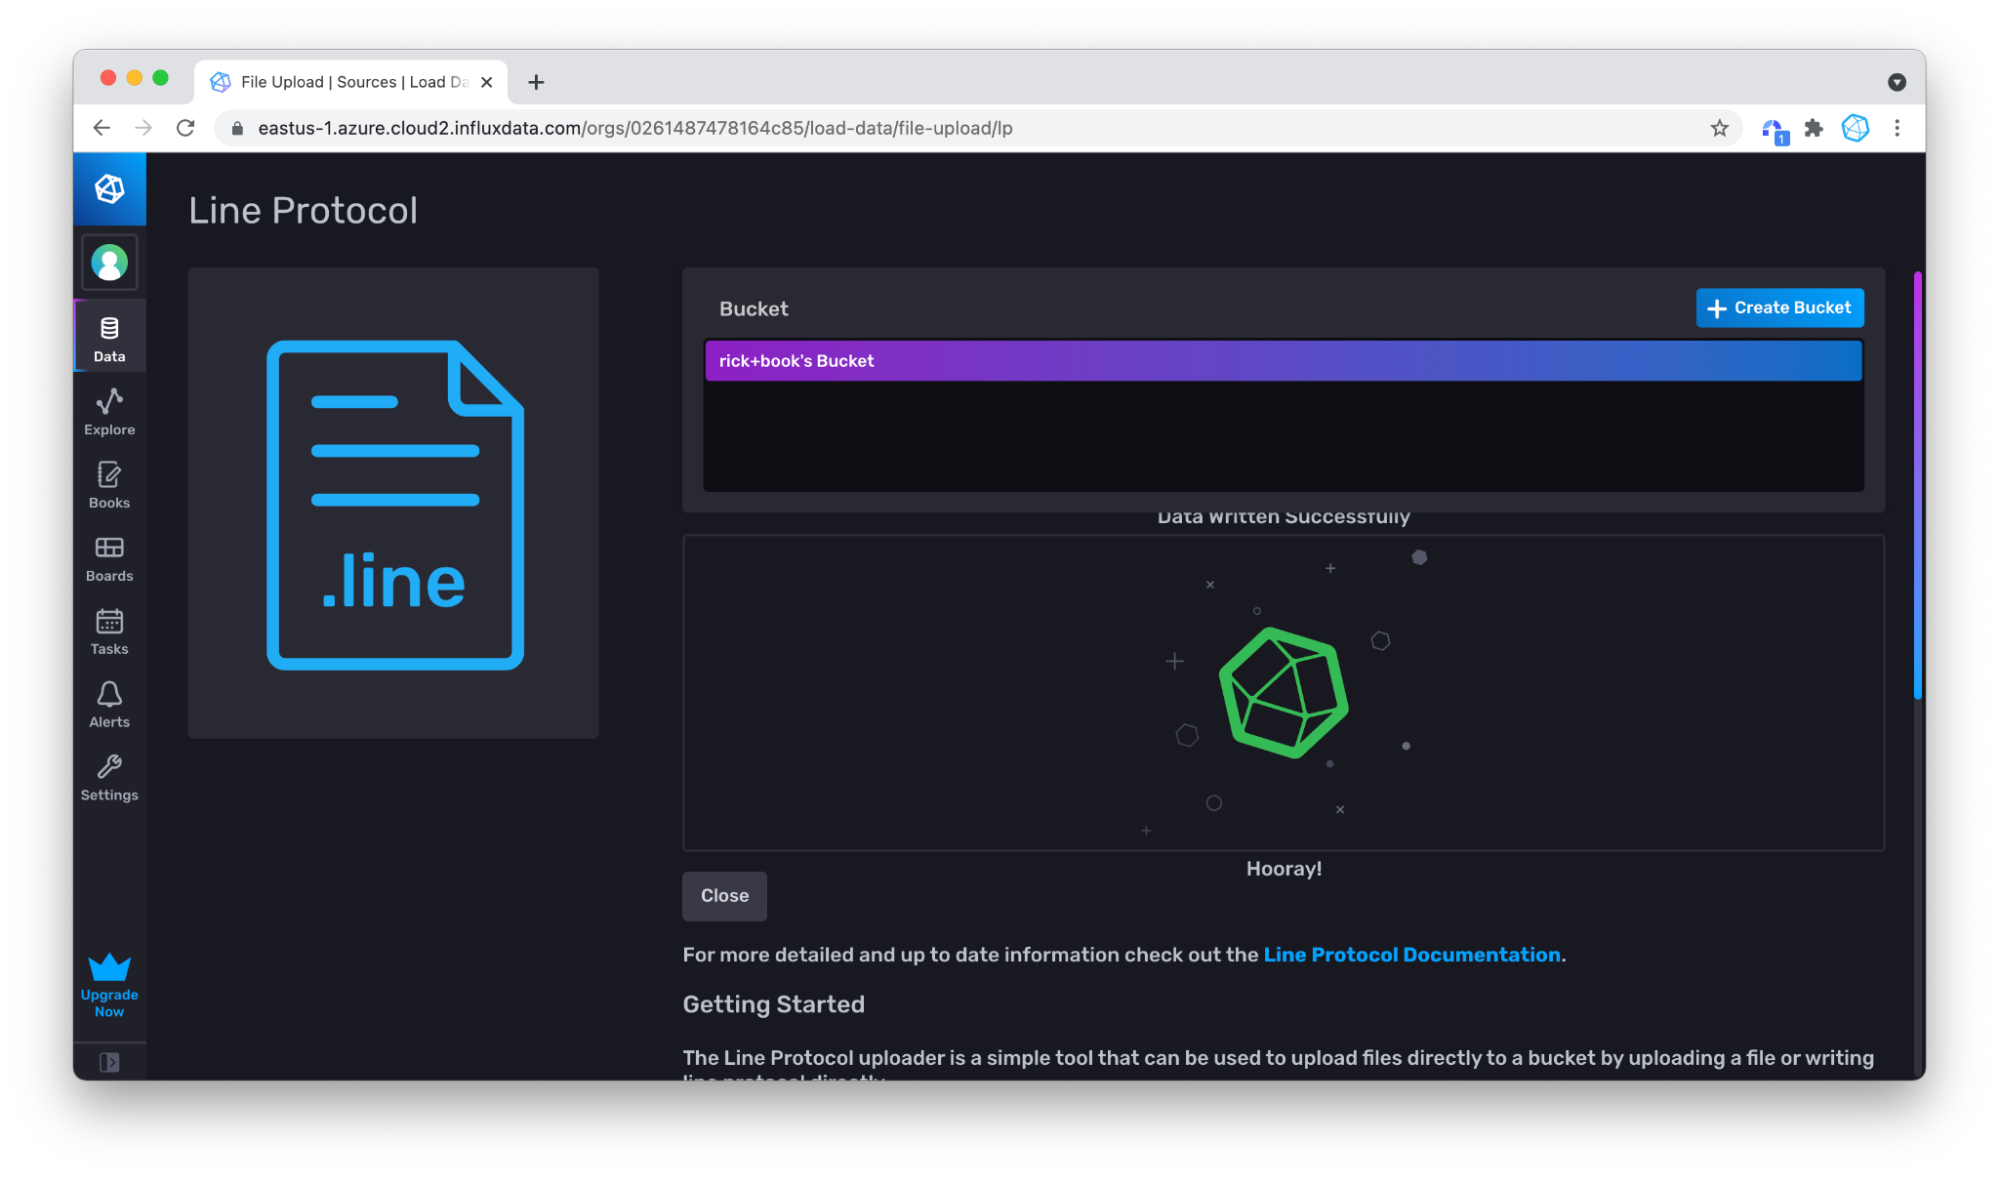
Click Write Data, and your data is written!
Upload a line protocol file
An alternative method that is easier with larger data sets is to upload a file. Start out by downloading the sample data as a file, for example, from the raw view.
Go back to the write data section, but this time stick with Upload File.
Then upload the file by dragging and dropping your file.
Now when you go back and query, you can see that there is a lot more data.
If you are wondering if you wrote some data twice, don’t worry. Remember, InfluxDB will automatically replace duplicate or updated points.
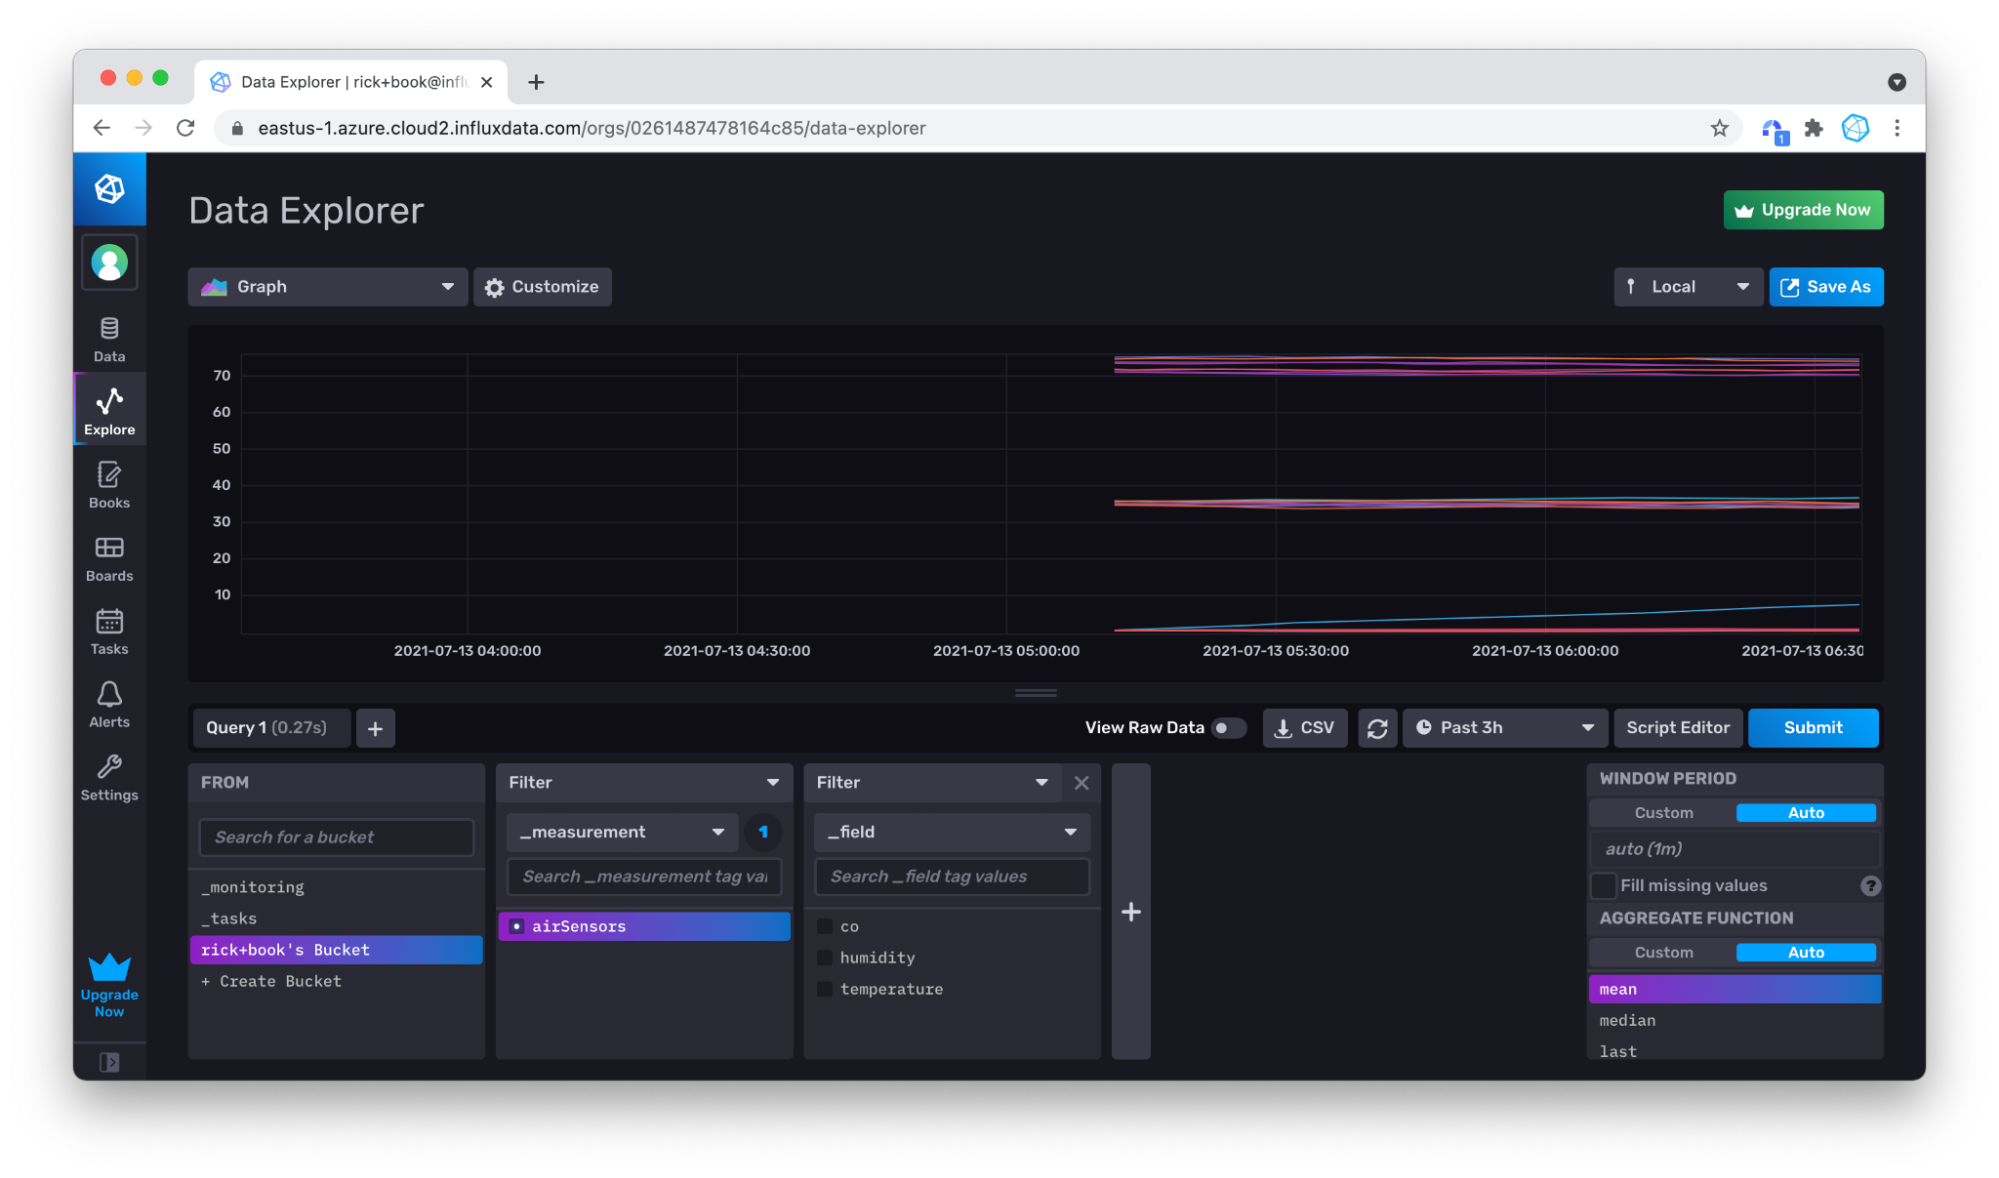
Verify Successful Writes with the Query Builder
To verify that we successfully wrote data, we’ll query it with the Query Builder. I suggest repeating this step for any tool or method you choose to write data to InfluxDB. First, click on the Explorer tab in the left navigation bar.

Then set the time drop down to a point in time that is far enough in the past to include the timestamps of the data you just wrote. For the Air sensor sampleset dataset, we’ll change the drop down to 3h.

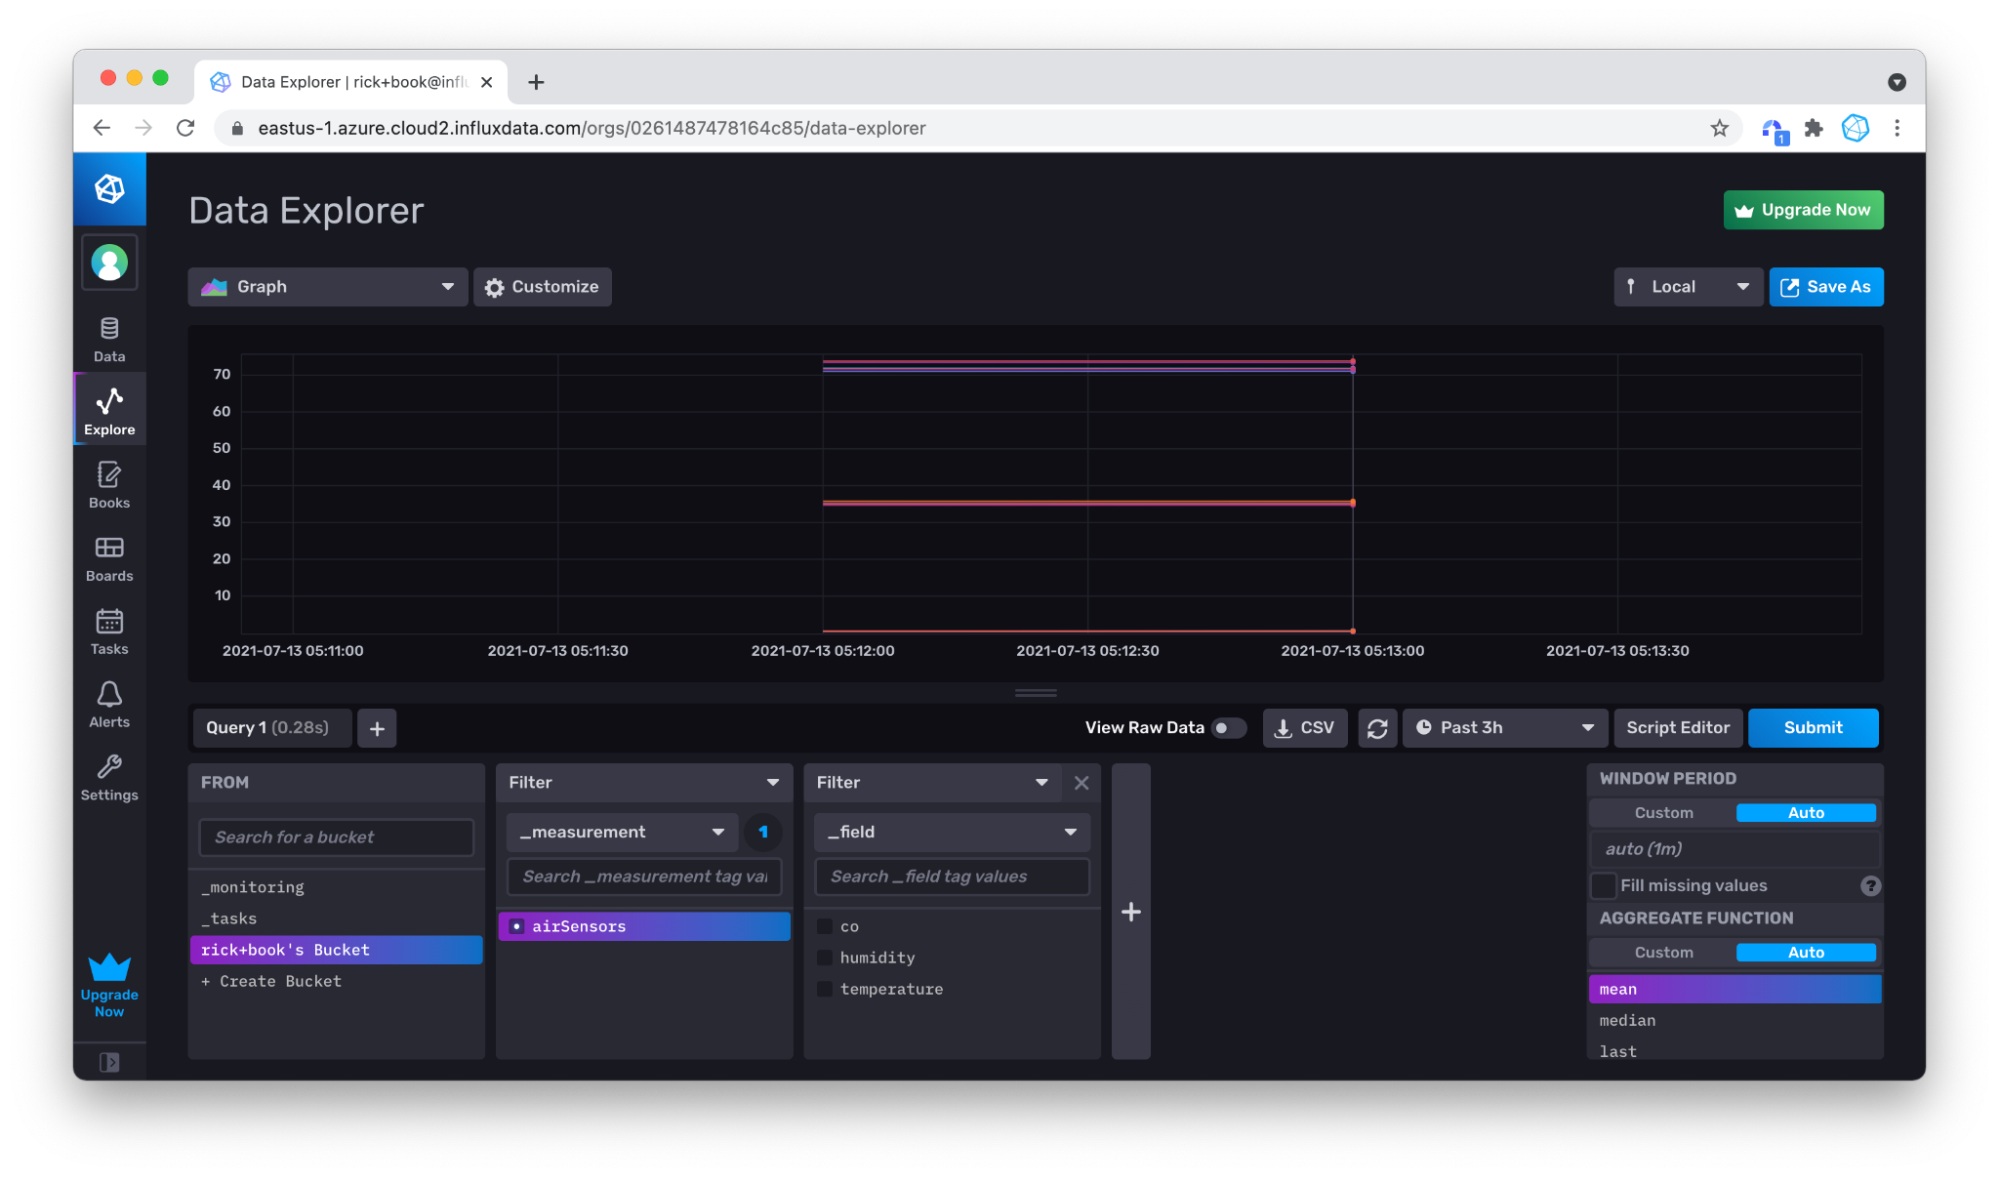
Choose your measurement (only airSensors is available), and click Submit. You can see that your data is there, but over the 3 hour window, there isn’t much data.
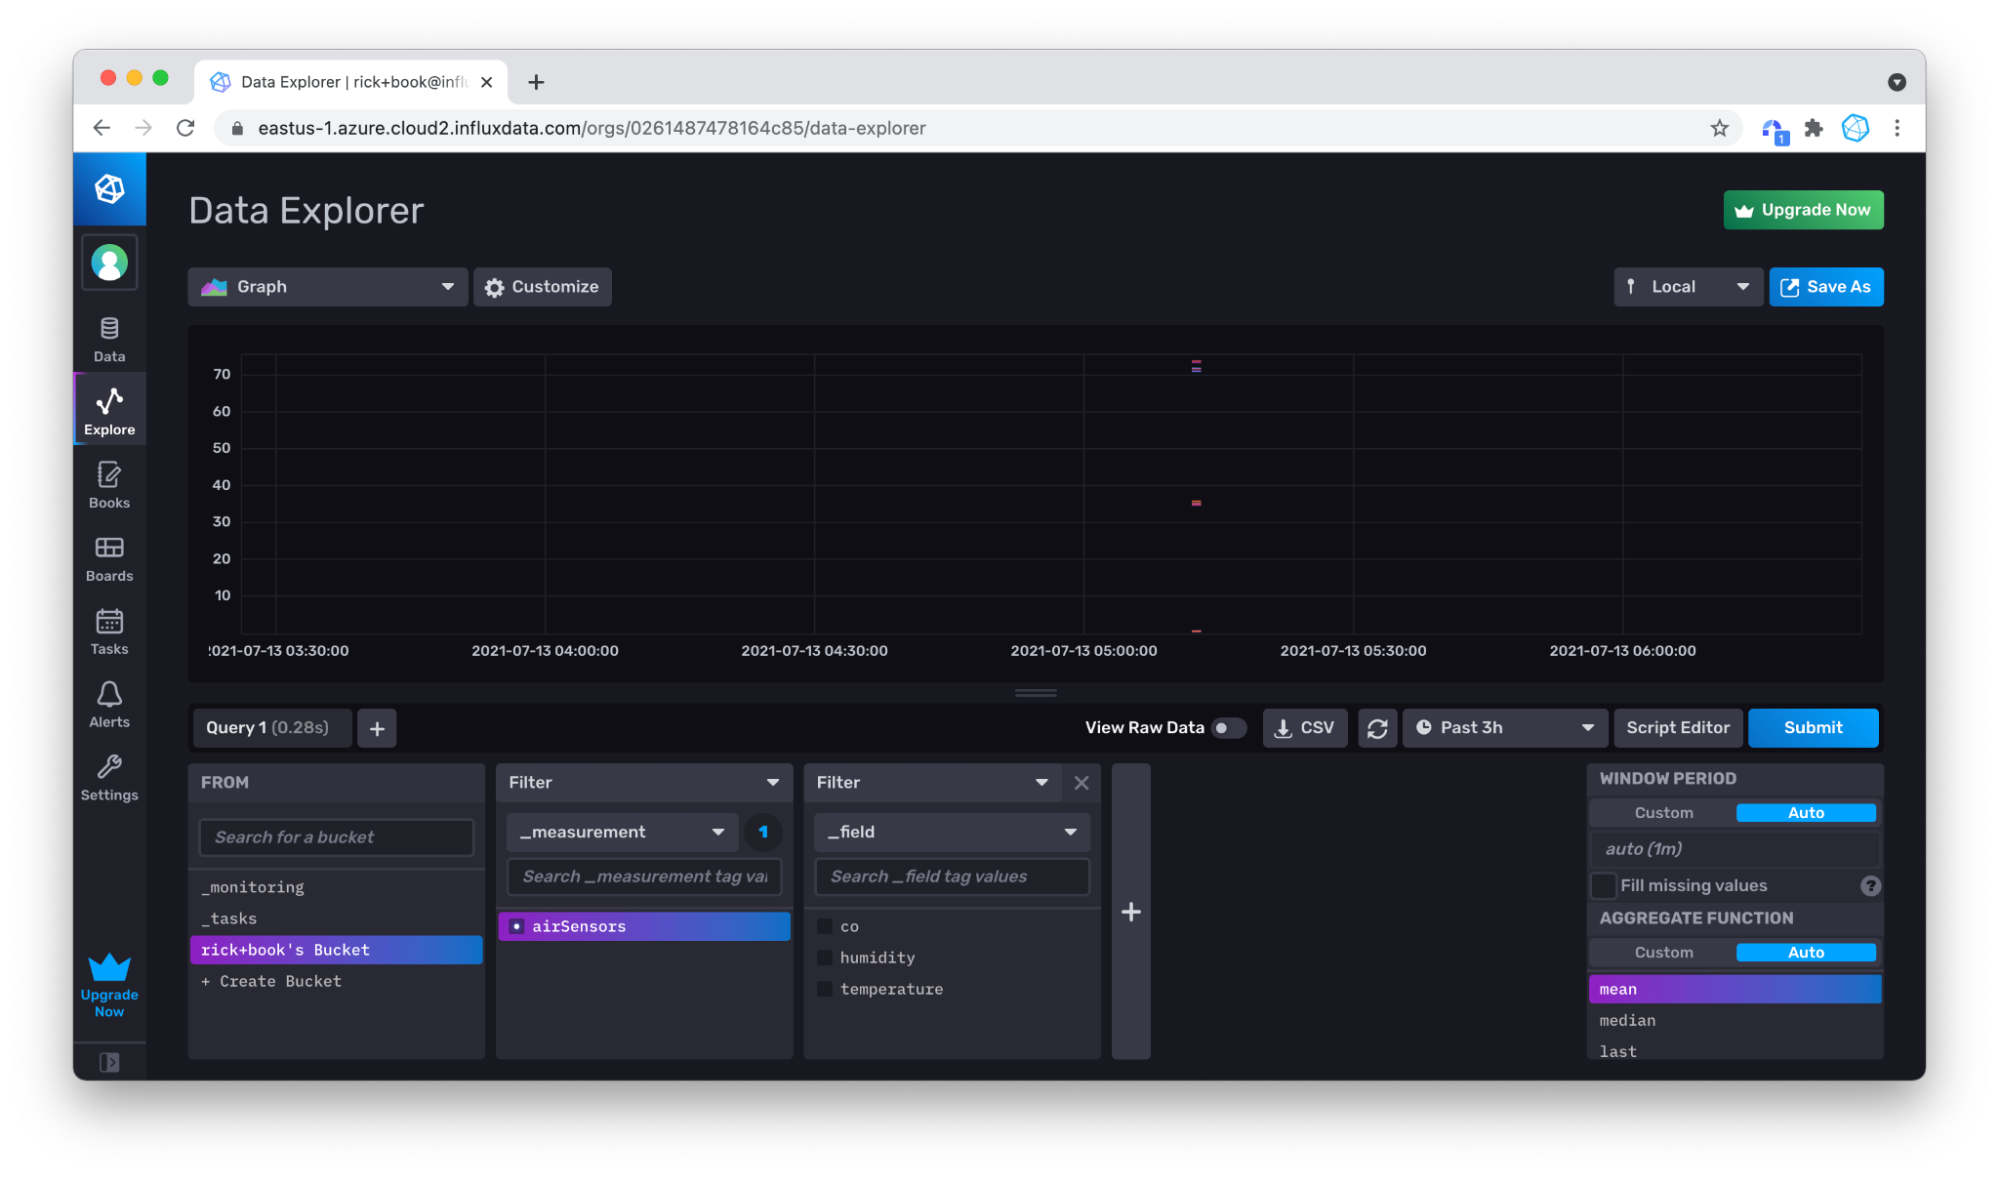
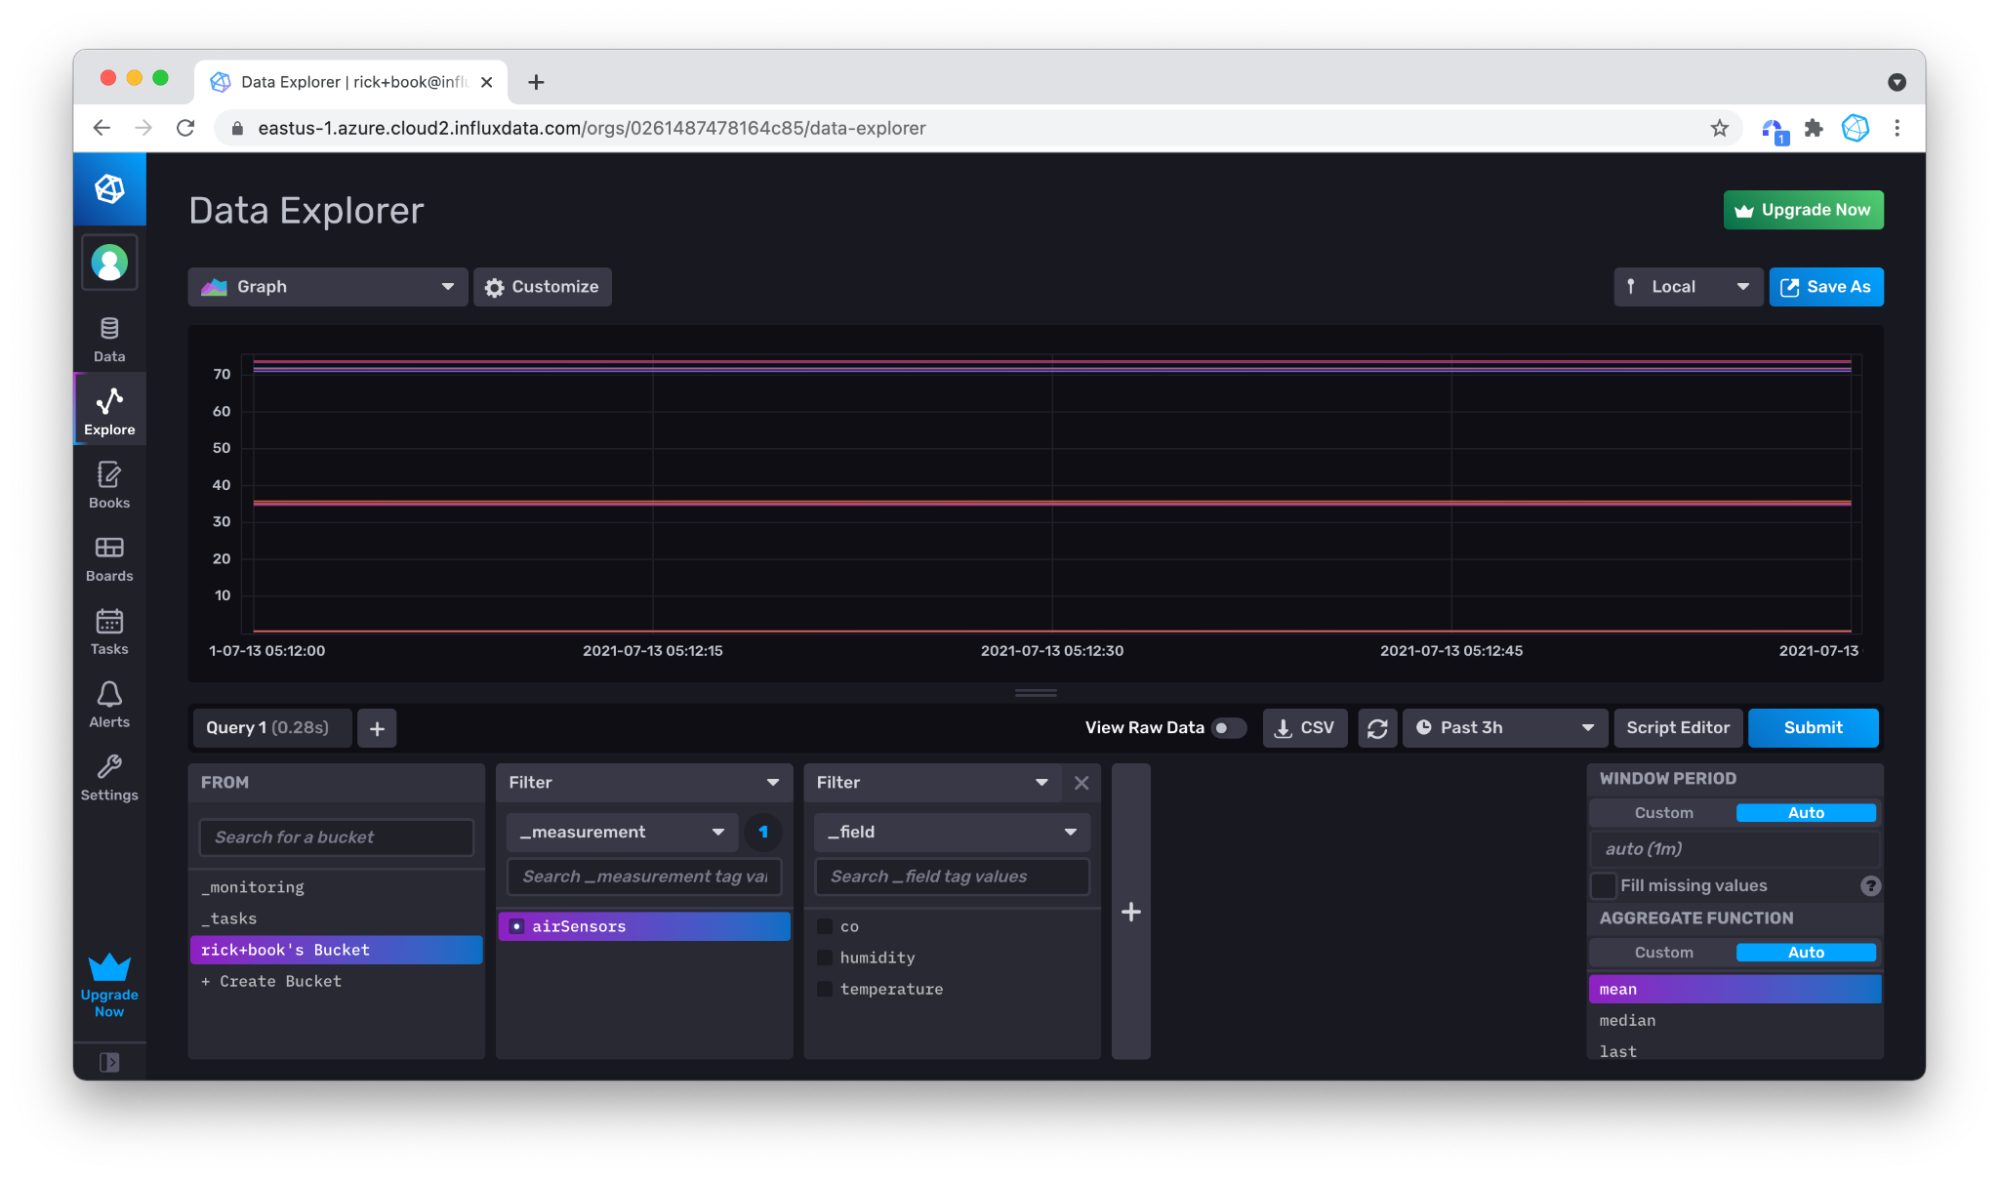
No problem, you can use your mouse in the Graph to zoom in on the data you do have by clicking and dragging over the area that you want to zoom into.
Zooming in again to produce a better visualization of our data.
Writing Line Protocol Data with the CLI
If you are building or have already built a CLI-based data pipeline, for example in bash, the InfluxDB CLI facilitates easy integrationg into that pipeline. Assuming you have already configured the CLI, the only extra information that you need is a bucket ID, which you can find with the bucket list command:
./influx bucket list
ID			Name			Retention	Shard group duration	Organization ID
964221964e8fa8ab	_monitoring		168h0m0s	  n/a			0261487478164c85
31ad8b129cd7db7a	_tasks			72h0m0s	  n/a		0261487478164c85
497b48e409406cc7	Bucket1	          720h0m0s	  n/a	0261487478164c85
InfluxDB will create a default bucket based on the organization name when the account was created. You can easily create your own buckets, but for demonstration purposes, we will simply use my default bucket, which is “rick+book’s Bucket” shown above.
Because bucket and organization names can contain special characters, and also, because they are mutable, it can be easier to use the bucket ids.
So the bucket ID is “497b48e409406cc7”. Now if you have a line of line protocol, you can write it to your default bucket with the influx write command:
./influx write --bucket-id 497b48e409406cc7 "airSensors,sensor_id=TLM0101 temperature=71.83125302870145,humidity=34.87843425604827,co=0.5177653332811699 1626383123000000000"
More likely, you have a file of line protocol, wcch you can write easily using the file flag:
./influx write --bucket-id 497b48e409406cc7 -file air-sensor-data.lp.txt
You can also use the bucket name instead of the bucket ID to write data to InfluxDB by replacing the --bucket-id flag with the --bucket flag (or --b flag for short). Use the helper flag to get a complete list of all of the write options for the InfluxDB CLI influx write command.
./influx write -h
Writing Line Protocol Data with the InfluxDB API v2
All of InfluxDB is wrapped in a REST API. This API is highly compatible between OSS and Cloud. The API allows you to write data and query data, of course, but also has everything you need to manage the database, including creating resources like authentication tokens, buckets, users, and more. To write line protocol data to InfluxDB with the InfluxDB API v2, use a post request:
curl -X POST \
  'https://eastus-1.azure.cloud2.influxdata.com/api/v2/write?bucket=bucket1&precision=ns&orgID=0261487478164c85' \
  -H 'accept: application/json' \
  -d 'airSensors,sensor_id=TLM0101 temperature=71.83125302870145,humidity=34.87843425604827,co=0.5177653332811699 1626383123000000000'
Specify the precision of your timestamp, bucket, and orgID (or org) as query parameters in your request. Import this Postman collection to help you get started using the InfluxDB API v2, if Postman is your goto API development and testing tool.
Writing Annotated CSV Data
For this section, we’ll write the meta-syntactic Annotated CSV example containing a single point from Annotated CSV in Part Two.
#group,false,false,true,true,false,false,true,true,true
#datatype,string,long,dateTime:RFC3339,dateTime:RFC3339,dateTime:RFC3339,long,string,string,string
#default,_result,,,,,,,,
,result,table,_start,_stop,_time,_value,_field,_measurement,tag1
,,0,2021-08-17T21:22:52.452072242Z,2021-08-17T21:23:52.452072242Z,2021-08-17T21:23:39.000000000Z,1,field1,Measurement1,tagvalue1
You might want to change the timestamp to today’s date so you don’t have to query back too far in time to verify that you’ve written the Annotated CSV successfully. However, that’s entirely up to you.
Writing Annotated CSV Data through the InfluxDB UI
For example, the UI allows you to easily upload annotated CSV to a bucket.
This is very useful for transferring small amounts of data between instances of InfluxDB. For example, you can export the CSV from an OSS instance, and load it into your cloud instances this way.
Writing Annotated CSV Data with Flux
Use the csv.from() function to convert an Annotated CSV to a stream of tables. Then use the to() function to write the table stream to InfluxDB. The csv.from() function supports writing Annotated CSV data directly or a file containing Annotated CSV data. However the file must exist in the same file system where the Flux daemon process is running, so you can’t use the file option in the InfluxDB UI. To use the file option you must build the REPL from source using the Flux repository. You can either use VSCode, CLI, API, or InfluxDB UI to execute the following Flux query which writes our Annotated CSV to InfluxDB:
import "csv"

csvData = "#group,false,false,true,true,false,false,true,true,true
#datatype,string,long,dateTime:RFC3339,dateTime:RFC3339,dateTime:RFC3339,long,string,string,string
#default,_result,,,,,,,,
,result,table,_start,_stop,_time,_value,_field,_measurement,tag1
,,0,2021-08-17T21:22:52.452072242Z,2021-08-17T21:23:52.452072242Z,2021-08-17T21:23:39.000000000Z,1,field1,Measurement1,tagvalue1"

csv.from(
  csv: csvData,
)
|> to(bucketID:"497b48e409406cc7")
First you must import the CSV package and store the Annotated CSV into a variable. Next, use the csv.from() function and pass your variable into the csv parameter. Finally, use the to() function to write the table stream to InfluxDB.
Writing Annotated CSV Data through the CLI
The Influx CLI understands Annotated CSV natively, so writing it is as simple as as writing line protocol:
./influx write --bucket-id 497b48e409406cc7 --file annotated_buoy_data.csv
Writing Raw CSV Data
While annotated CSV is useful for exchanging data between instances of InfluxDB, it can be cumbersome to translate raw CSV from other systems to annotated CSV.
Writing Raw CSV Data through the CLI
The Influx CLI supports writing raw CSV data to InfluxDB. The trick is to include the necessary headers as CLI options so that the CLI can accurately convert the data to line protocol. First we’ll write a simple CSV to build an understanding of how to use the CLI to write a raw CSV. Then we’ll proceed to writing a non-trivial example.
A Simple Example
To build an understanding of how to use the CLI to write a raw CSV, let’s use this simple dataset:
time,tag1,tag2,field1,measurement1
2018-05-08T20:50:00Z,tagvalue1,tagvalue2,15.43,measurement1
2018-05-08T20:50:20Z,tagvalue1,tagvalue2,59.25,measurement1
2018-05-08T20:50:40Z,tagvalue1,tagvalue2,52.62,measurement1
In order to use the CLI to write this raw CSV include the following two options at a minimum into our influx write command:
--header: the header option is where we provide information about our columns of our raw CSV to convert the columns into measurements, tags, fields, and timestamps.--bucket: the destination bucket we want to write our raw CSV to
Use the --header option to: ` `
- Specify or supply a measurement for each line to be written.
- Define which columns are fields and the types of those fields.
- Specify or define the tag columns. are tags, and the
- Specify the format of the timestamp.
Specifically, the #datatype annotation must passed into the --header option with the following types:
- Measurement (optional).
- Long (for a field).
- Unsigned Long (for a field).
- Double (for a field).
- Boolean (for a field).
- Ignored (for a field).
- Tag (optional).
- Timestamp (along with the type of timestamp).
For our simple example, we have:
- time: a timestamp column in
dateTime:2006-01-02T15:04:05Z07:00. - tag1: a
tag. - tag2: a
tag. - field1: a field as type
double. - measurement1: a
measurement.
We use the following command to write the data to InfluxDB: influx write dryrun -b mybucket -f ~/path/to/writeCSV.csv --header "#datatype dateTime:2006-01-02T15:04:05Z07:00,tag,tag,double,measurement" --skipHeader
Finally, it’s worth being aware of the --rate-limit flag. This flag allows you to throttle your write rate to avoid exceeding write rate limits. We append the previous command to include the --rate-limit flag, for demonstration purposes. This example CSV doen’t require the use of the --rate-limit flag, but to write any signifcant CSV to InfluxDB the use of that flag is recommended. influx write dryrun -b mybucket -f ~/path/to/writeCSV.csv --header "#datatype dateTime:2006-01-02T15:04:05Z07:00,tag,tag,double,measurement" --skip-header --rate-limit "1MB/s"
A Significant Example
The noaa-ndbc-data dataset provides a non-trivial example dataset. The header that comes with it defines the following fields:
wind_dir_degt, wind_speed_mps, gust_speed_mps, significant_wave_height_m, dominant_wave_period_sec, avg_wave_period_sec, wave_dir_degt, sea_level_pressure_hpa, air_temp_degc, sea_surface_temp_degc, dewpoint_temp_degc,station_visibility_nmi, pressure_tendency_hpa, water_level_ft, station_id,lat, lon, station_elev, station_name, station_owner, station_pgm, station_type, station_met, station_currents, station_waterquality, station_dart, timestamp
Since there is no column that is sensible to use for the measurement, the measurement should be defined as a constant header option:
--header "#constant measurement,noaa-buoy"
Here is a complete line of raw CSV from the dataset that can be used to deduce the correct headers:
70,8,10,1.3,6,,98,1015.9,0,28.9,28.4,,,,"41052",18.249,-64.763,0,"South of St. John, VI","Caribbean Integrated Coastal Ocean Observing System (CarICoos)","IOOS Partners","buoy","y","y","y","n",1626447600000000000
The first 13 columns appear to be fields, so they should simply be associated with their types. “wind_dir_degt” appears to always be an integer, whereas the other values appear to contain floats. So we will associate the types long and double appropriately:
--header "#datatype long,double,double,double,double,double,double,double,double,double,double,double,double,double"
“station_id” is explicitly a string(it is in quotes), so this column should probably be a tag. “latitude” and “longitude” (lat, long) must be fields as they will always be unique values. Same with station_elevation:
--header "#datatype long,double,double,double,double,double,double,double,double,double,double,double,double,double,tag,double,double,double"
The next 4 fields all appear to be tags.
--header "#datatype long,double,double,double,double,double,double,double,double,double,double,double,double,double,tag,double,double,double,tag,tag,tag,tag"
The final 4 fields all look like boolean values, but are defined by a “y” or “n” instead of true or false. This can be defined as well.
--header "#datatype long,double,double,double,double,double,double,double,double,double,double,double,double,double,tag,double,double,double,tag,tag,tag,tag,boolean:y:n,boolean:y:n,boolean:y:n,boolean:y:n"
Finally, it needs to be polished up by defining the timestamp. There are four supported timestamp formats. These timestamps are numeric, so it calls for the “number” type.
--header "#datatype long, double, double, double, double, double, double, double, double, double, double, double, double, tag, double, double, double, tag, tag, tag, tag, tag, tag, tag, tag ,boolean:y:n, boolean:y:n,boolean:y:n, boolean:y:n, dateTime:number"
In order to check one’s work, there is the very useful dryrun command that will parse the data, but rather than write the data to the database, will report any errors. Additionally, pass in the “skipHeader” option so that the CLI does not try to parse the first row as data.
It is useful to include the –skipRowOnError option in order to see all errors instead of stopping at the first error. The whole command looks like this:
influx write dryrun --file latest-observations.csv --header "#constant measurement,noaa-buoy" --header "#datatype long,double,double,double,double,double,double,double,double,double,double,double,double,double,tag,double,double,double,tag,tag,tag,tag,boolean:y:n,boolean:y:n,boolean:y:n,boolean:y:n,dateTime:number" --skipRowOnError
For reference, here are the last 3 lines of line protocol produced:
noaa-buoy,station_id=YKRV2,station_name=8637611\ -\ York\ River\ East\ Rear\ Range\ Light\,\ VA,station_owner=NOAA\ NOS\ PORTS,station_pgm=NOS/CO-OPS,station_type=fixed wind_dir_degt=200i,wind_speed_mps=4.1,gust_speed_mps=4.6,sea_surface_temp_degc=29.7,lat=37.251,lon=-76.342,station_elev=0,station_met=true,station_currents=false,station_waterquality=false,station_dart=false 1626448680000000000
noaa-buoy,station_id=YKTV2,station_name=8637689\ -\ Yorktown\ USCG\ Training\ Center\,\ VA,station_owner=NOS,station_pgm=NOS/CO-OPS,station_type=fixed wind_dir_degt=190i,wind_speed_mps=1.5,gust_speed_mps=2.6,sea_level_pressure_hpa=1016.5,sea_surface_temp_degc=29.3,dewpoint_temp_degc=27.7,lat=37.227,lon=-76.479,station_elev=3.7,station_met=true,station_currents=false,station_waterquality=false,station_dart=false 1626448680000000000
noaa-buoy,station_id=YRSV2,station_name=Taskinas\ Creek\,\ Chesapeake\ Bay\ Reserve\,\ VA,station_owner=National\ Estuarine\ Research\ Reserve\ System,station_pgm=NERRS,station_type=fixed wind_dir_degt=220i,wind_speed_mps=0.5,sea_level_pressure_hpa=1017,sea_surface_temp_degc=31.9,station_visibility_nmi=24.2,lat=37.414,lon=-76.712,station_elev=11,station_met=true,station_currents=false,station_waterquality=false,station_dart=false 1626446700000000000
In order to actually write to the database, I need to supply a bucket or bucket-id, but also remove the dryrun option:
influx write --bucket-id 497b48e409406cc7 --file latest-observations.csv --header "#constant measurement,noaa-buoy" --header "#datatype long,double,double,double,double,double,double,double,double,double,double,double,double,double,tag,double,double,double,tag,tag,tag,tag,boolean:y:n,boolean:y:n,boolean:y:n,boolean:y:n,dateTime:number"
After this, I can see and visualize the data.

Querying with the InfluxDB API v2
You can query the data you’ve written to InfluxDB in the sections above with the InfluxDB UI, a Client Library, or the InfluxDB API v2. We’ve already covered how to query InfluxDB with the UI in a previous section and we’ll dedicate the section below to client libraries. To query with the InfluxDB API v2, you’ll submit a post request with the orgID (or org) as a query parameter. You can either submit the body of your request with a “application/json” content-type or “application/vnd.flux”. I find the latter easier because you don’t have to worry about escaping double quotes in your json object.
curl -X POST \
  'https://eastus-1.azure.cloud2.influxdata.com/api/v2/query?orgID=0261487478164c85' \
  -H 'accept: application/vnd.flux' \
  -d 'from(bucket: "Air sensor sample dataset")
  |> range(start:-5m, stop: now())
  |> filter(fn: (r) => r._measurement == "airSensors")
  |> filter(fn: (r) => r._field == "humidity")
  |> filter(fn: (r) => r.sensor_id= "TLM0100")
  |> limit(n:1)
Writing and Querying with Client Libraries
If your applicaiton includes your own server code, then integration with InfluxDB is greatly eased using the InfluxDB client libraries. InfluxDB offers a variety of Client Libraries built upon the foundation of the REST APIs. These client libraries are designed to make reading from and writing to InfluxDB straightforward.
InfluxDB has a large set of officially supported client libraries, including libraries for:
And by the time you are reading this, probably others. Find the complete list here.
All of the client libraries have a similar API for writing and querying, but each also has some features specific to its own language. This book will mostly focus on the Python library for demonstration purposes The Python library offers support for Pandas, a library for data analysis and manipulation, which makes writing to and reading from InfluxDB even easier.
The InfluxDB client libraries allow you to write data in line protocol format, as you would with the UI, the CLI, or the REST API. However, they also allow you to define objects in the client’s native language and write those objects. This feature makes it very easy to integrate InfluxDB client libraries into a code base.
Using the Python Client Library
The Python Client Library is one of the most popular client libraries for InfluxDB. The Python client library enables you to perform asynchronous writes, write Pandas DataFrames, and much more. In this section we’ll learn about how to use the Python client library to generate lines of line protocol, write line protocol directly, and write a Pandas DataFrame.
First, you need to install the client library into your environment. For Python, this is typically done with the pip installer, a package manager for Python:
pip install influxdb-client
Generating and Writing Line Protocol Data
In order to generate and write line protocol data, you’ll first need to instantiate the write API. You’ll need to do this regardless of whether you want to generate line protocol data, write line protocol data directly, or write a Pandas DataFrame to InfluxDB.
Instantiate the Write API
Then instantiate a client object a write_api object:
import influxdb_client

client = influxdb_client.InfluxDBClient(
   url = "https://eastus-1.azure.cloud2.influxdata.com/",
   token = my_token,
   org = "0261487478164c85"
)

write_api = client.write_api()
Note that you should not typically include your token in your code directly! If you accidentally leak your token(f by pushing it to Github or Gitlab, for example) someone could find it and use it to damage your InfluxDB account.
Create and write Points
Now I can write Python code to create points which are Python objects (as opposed to line protocol) and the API will take care of writing them to InfluxDB. Your timestamps must be a datetime object.
p = influxdb_client.Point("airSensors").tag("sensor_id","TLM0100").field("temperature", 71.22469683255807).field("humidity",35.07660074258177).field("co",0.5156875199536168).time(time=datetime.utcnow())

write_api.write(bucket="497b48e409406cc7", org="0261487478164c85", record=p)
Using the Python Client Library to Write Line Protocol Directly
If it happens to be easier to consume and write line protocol than Python objects, the client libraries support that as well.
write_api.write(bucket="497b48e409406cc7", org="0261487478164c85", "airSensors,sensor_id=TLM0100, temperature=71.22469683255807,humidity=35.07660074258177,co=0.5156875199536168 1626443352000000000")
Or even:
write_api.write(bucket="497b48e409406cc7", org="0261487478164c85", "airSensors,sensor_id=TLM0100, [temperature=71.22469683255807,humidity=35.07660074258177,co=0.5156875199536168 1626443352000000000","airSensors,sensor_id=TLM0101 temperature=71.76112953678245,humidity=34.90324018837952,co=0.493064259899186 1626443352000000000"])
Querying with the Python Client Library
Naturally, you can also query your InfluxDB instance with the Python Client Library. First you’ll need to instantiate the query API. You’ll need to do this regardless of whether you want to return a Flux data structure or a Pandas DataFrame.
Instantiate the Query API
Then instantiate a client object a querty_api object:
import influxdb_client

client = influxdb_client.InfluxDBClient(
   url = "https://eastus-1.azure.cloud2.influxdata.com/",
   token = my_token,
   org = "0261487478164c85"
)

query_api = client.query_api()
Query Points
Now I can query InfluxDB and return the Flux data structure which consists of tables, columns and records. First, define your Flux query and pass it into the query parameter of the write method. Store the Flux Object result of the query in a variable. Iterate over the tables in the response to access the records in each table. Iterate over those records as well to access your data. The Flux Object has the following methods for accessing your data:
- .get_measurement()
- .get_field()
- .values.get(“<your tags>”)
- .get_time()
- .get_start()
- .get_stop()
- .get_measurement()
query = '''
from(bucket: "Air sensor sample dataset")
  |> range(start:-5m, stop: now())
  |> filter(fn: (r) => r._measurement == "airSensors")
  |> filter(fn: (r) => r._field == "humidity")
  |> filter(fn: (r) => r.sensor_id= "TLM0100")
  |> limit(n:1)
'''

result = client.query_api().query(org="0261487478164c85", query=query)

results = []
for table in result:
    for record in table.records:
        results.append((record.get_field(), record.get_value()))

print(results)
[(humidity, 34.90324018837952)]
Writing a Pandas DataFrame
Pandas “a fast, powerful, flexible and easy to use open source data analysis and manipulation tool, built on top of the Python programming language”, as self-described by the Pandas team themselves. It’s an extremely popular tool among Data Scientists, Data Analysts or anyone needing to perform data transformation or data engineering work. Pandas allows you to easily manipulate Pandas DataFrames, “a two-dimensional, size-mutable, potentially heterogeneous tabular data”. The InfluxDB Python Client Library allows you to write Pandas DataFrames directly to InfluxDB. After you’ve instantiated a client object and the write_api object, define your DataFrame and pass it into the write method. The timestamp column must be an index and it must be a datetime object. Finally, make sure to specify the measurement name and which columns are your tag columns.
from datetime import datetime
Data_frame = pd.DataFrame(data=[["coyote_creek", 1.0], ["coyote_creek", 2.0]],
                                   index=[_time, datetime.now(UTC)],
                                   columns=["location", "water_level"])
write_api.write("my-bucket", "my-org", record= data_frame, data_frame_measurement_name='h2o_feet', data_frame_tag_columns=['location'])
Querying and returning a Pandas DataFrame
You can also query and return Pandas DataFrame with the InfluxDB Python Client v2.0. It’s generally a good idea to apply a fieldsAsCol() or pivot() function to your data with your Flux query so that the resulting DataFrame has a expecteddata shape for many Pandas transformations or libraries. Use the query_dataframe method to return a DataFrame and pass in your query.
query_with_pivot ='''
from(bucket: "Air sensor sample dataset")
  |> range(start:-5m, stop: now())
  |> filter(fn: (r) => r._measurement == "airSensors")
  |> filter(fn: (r) => r._field == "humidity")
  |> filter(fn: (r) => r.sensor_id= "TLM0100")
  |> limit(n:1)
'''
data_frame = query_api.query_data_frame(query).
Write Rate Limits and Error Handling
InfluxDB Cloud imposes a rate limit on writes. These rate limits vary for free tier, Pay as You Go (PaYG), or Annual customers. However, in all cases you should handle these conditions in your code. Additionally, of course, InfluxDB may also return an error for a variety of reasons.
Therefore, it is important to check the return value of any call to the write end pointwhen writing through either the CLI, a client library, or against the API directly. here are roughly four different kinds of return codes you can expect:
- 204, a successful write.
- 429, a failed write due to a rate limit.
- Other errors in the 400 range, indicating other problems with your code.
- Errors in the 500 range, indicating that the server is experiencing an error.
In the case of a 429 error, the response object will contain a header (“Retry-After”) that will tell you how many seconds to wait until your rate limit has passed. In the case of another 4xx error, it is unlikely that your code will begin succeeding, so it is best to alert and exit rather than continue to retry and potentially cover up that your code is failing.
In the case of an error 500 or higher, it means that InfluxDB is having a problem. In this case, your code can wait and then try again. However, it is best to wait a little bit longer between successive failed writes of this type to avoid overwhelming the platform, or just letting your code produce a lot of noisy errors.
For reference, here is a sample Python function that implements these guidelines:
import requests
from time import sleep

bucket_id = "497b48e409406cc7"
org_id = "0261487478164c85"
token = "f7JeM4IdN8QHwiVIkBlhkYDCHXp06pa8zs6aVc9Du8aMyTCETqaHp3_glv9Bk7wqeTR2VJS4abc-k1HTMzALOA=="

url = "https://eastus-1.azure.cloud2.influxdata.com/api/v2/write?bucket={}&orgID={}".format(bucket_id, org_id)

headers = {"Authorization": "Token {}".format(token)}

back_offs = 1

def write_data(lp):
   response = requests.post(url, headers=headers, data=lp)
   if response.status_code == 429:
       # Rate limit was reached, so stall writing until rate limit is lifted
       wait_time = response.headers["Retry-After"]
       print("Encountered write rate limit, will try again in {} seconds".format(wait_time))
       sleep(wait_time)
       write_data(lp)
   elif response.status_code > 299 and response.status_code < 500:
       # This indicates a problem with your line protocol or other parameters
       # Exit the script so you can fix the problem
       sys.exit("Exiting due to error {}: {}".format(response.status_code, response.text))

   elif response.status_code > 499:
       # this indicates a server side error, so, worth retrying, but
       # increment the back off
       print("Encountered a server error, pausing writes, will retry in {} seconds".format(back_offs * 2))
       sleep(back_offs * 2)
       back_offs += 1
       write_data(lp)
   else:
       # the write succeeded, so reset the back off counter and start writing again
       back_offs = 1

def read_lp():
   f = open("lineprotocol.txt")
   lp = f.read()
   f.close()
   return lp

lp = read_lp()
while lp != "":
   write_data(lp)
   sleep(60)
   lp = read_lp()
Note that in this case, the client code always waits before resuming from where it left off. It does not try to catch up by batching up all of the failed writes and trying them all at once. It is very important that your code does not batch failed writes and then try to write them all at once. If your code tries to write with successively bigger and bigger payloads of line protocol, you will quickly hit a point where your batch size itself is rate limited, or that you get back a 503 error because the batch size is too big, and your code will never recover.
Further Reading
- Getting Started with the InfluxDB API and Postman
- https://www.influxdata.com/blog/visualizing-time-series-data-with-highcharts-library-influxdb/