VS Code Integration
Table of contents
- Managing Buckets
- Querying
- Managing Tasks
- Creating Invokable Scripts
- Creating Invokable Scripts
- Further Reading
InfluxData prides itself on its effort to prioritize developer happiness. This includes providing developers with a variety of tools to interact with InfluxDB, so they can pick the development style that works best for them. The Visual Studio Code (VS Code) Flux extension in combination with the CLI is the preferred tool for many developers. The CLI offers an easy approach to complete InfluxDB database management. The VS Code Flux extension provides an easy way to query and write Flux scripts (including Flux tasks) and some basic InfluxDB management. The VS Code Flux extension is also useful for optimizing Flux performance, as described in the section on optimizing Flux.To use the VS Code Flux extension, you must first configure it and connect to your cloud account.
Managing Buckets
To create a bucket, right-click on the Buckets dropdown and select Create bucket.
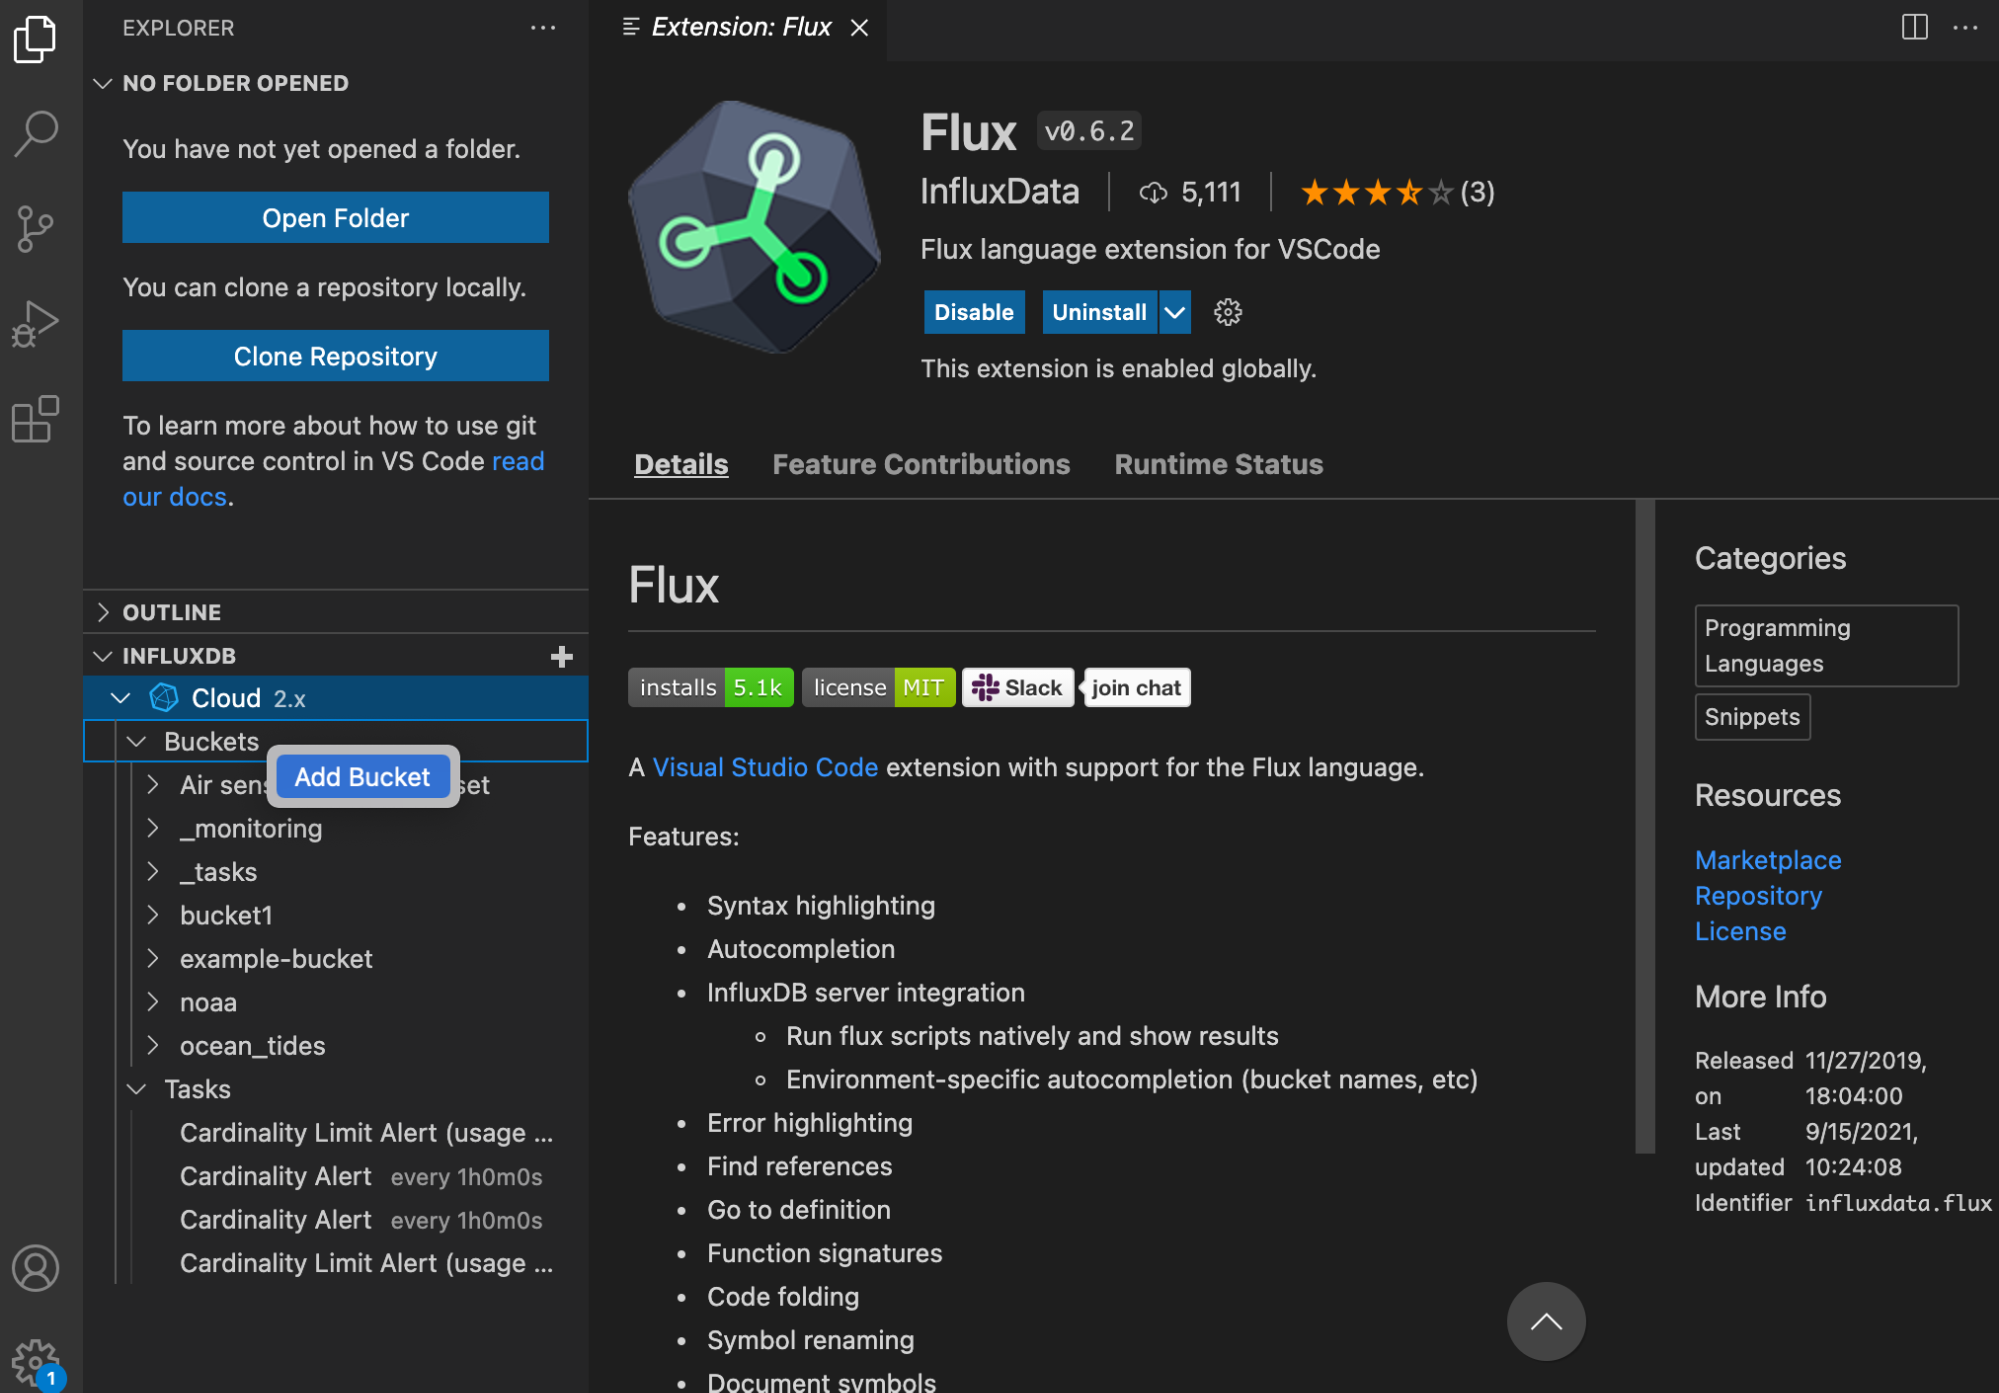
This will bring you to a configuration tab where you can name your bucket and specify the retention period of your bucket. Click Create to create your bucket.
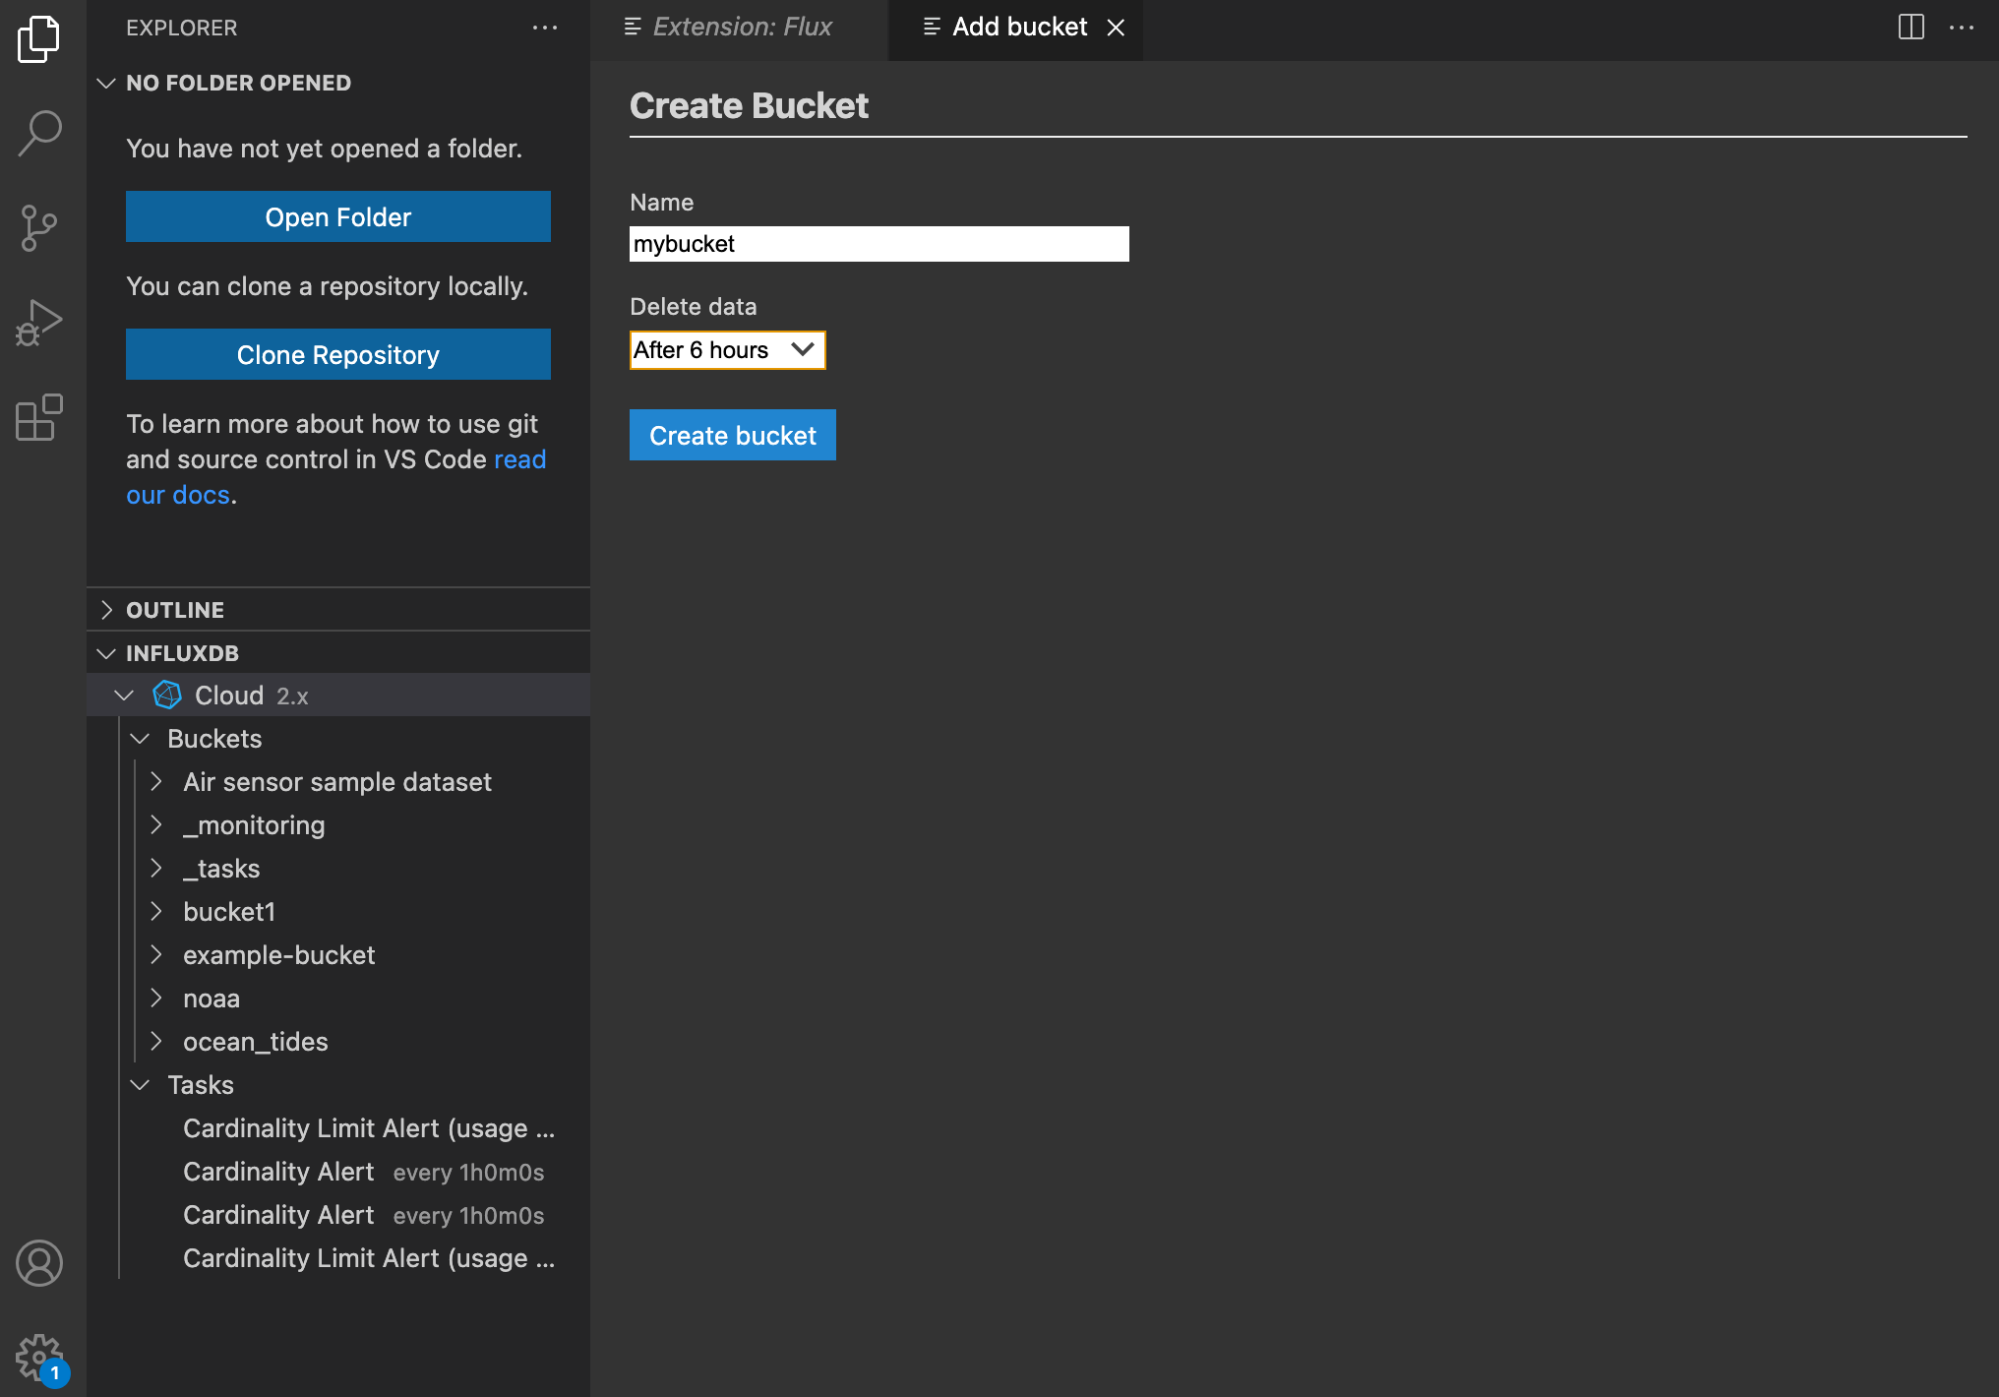
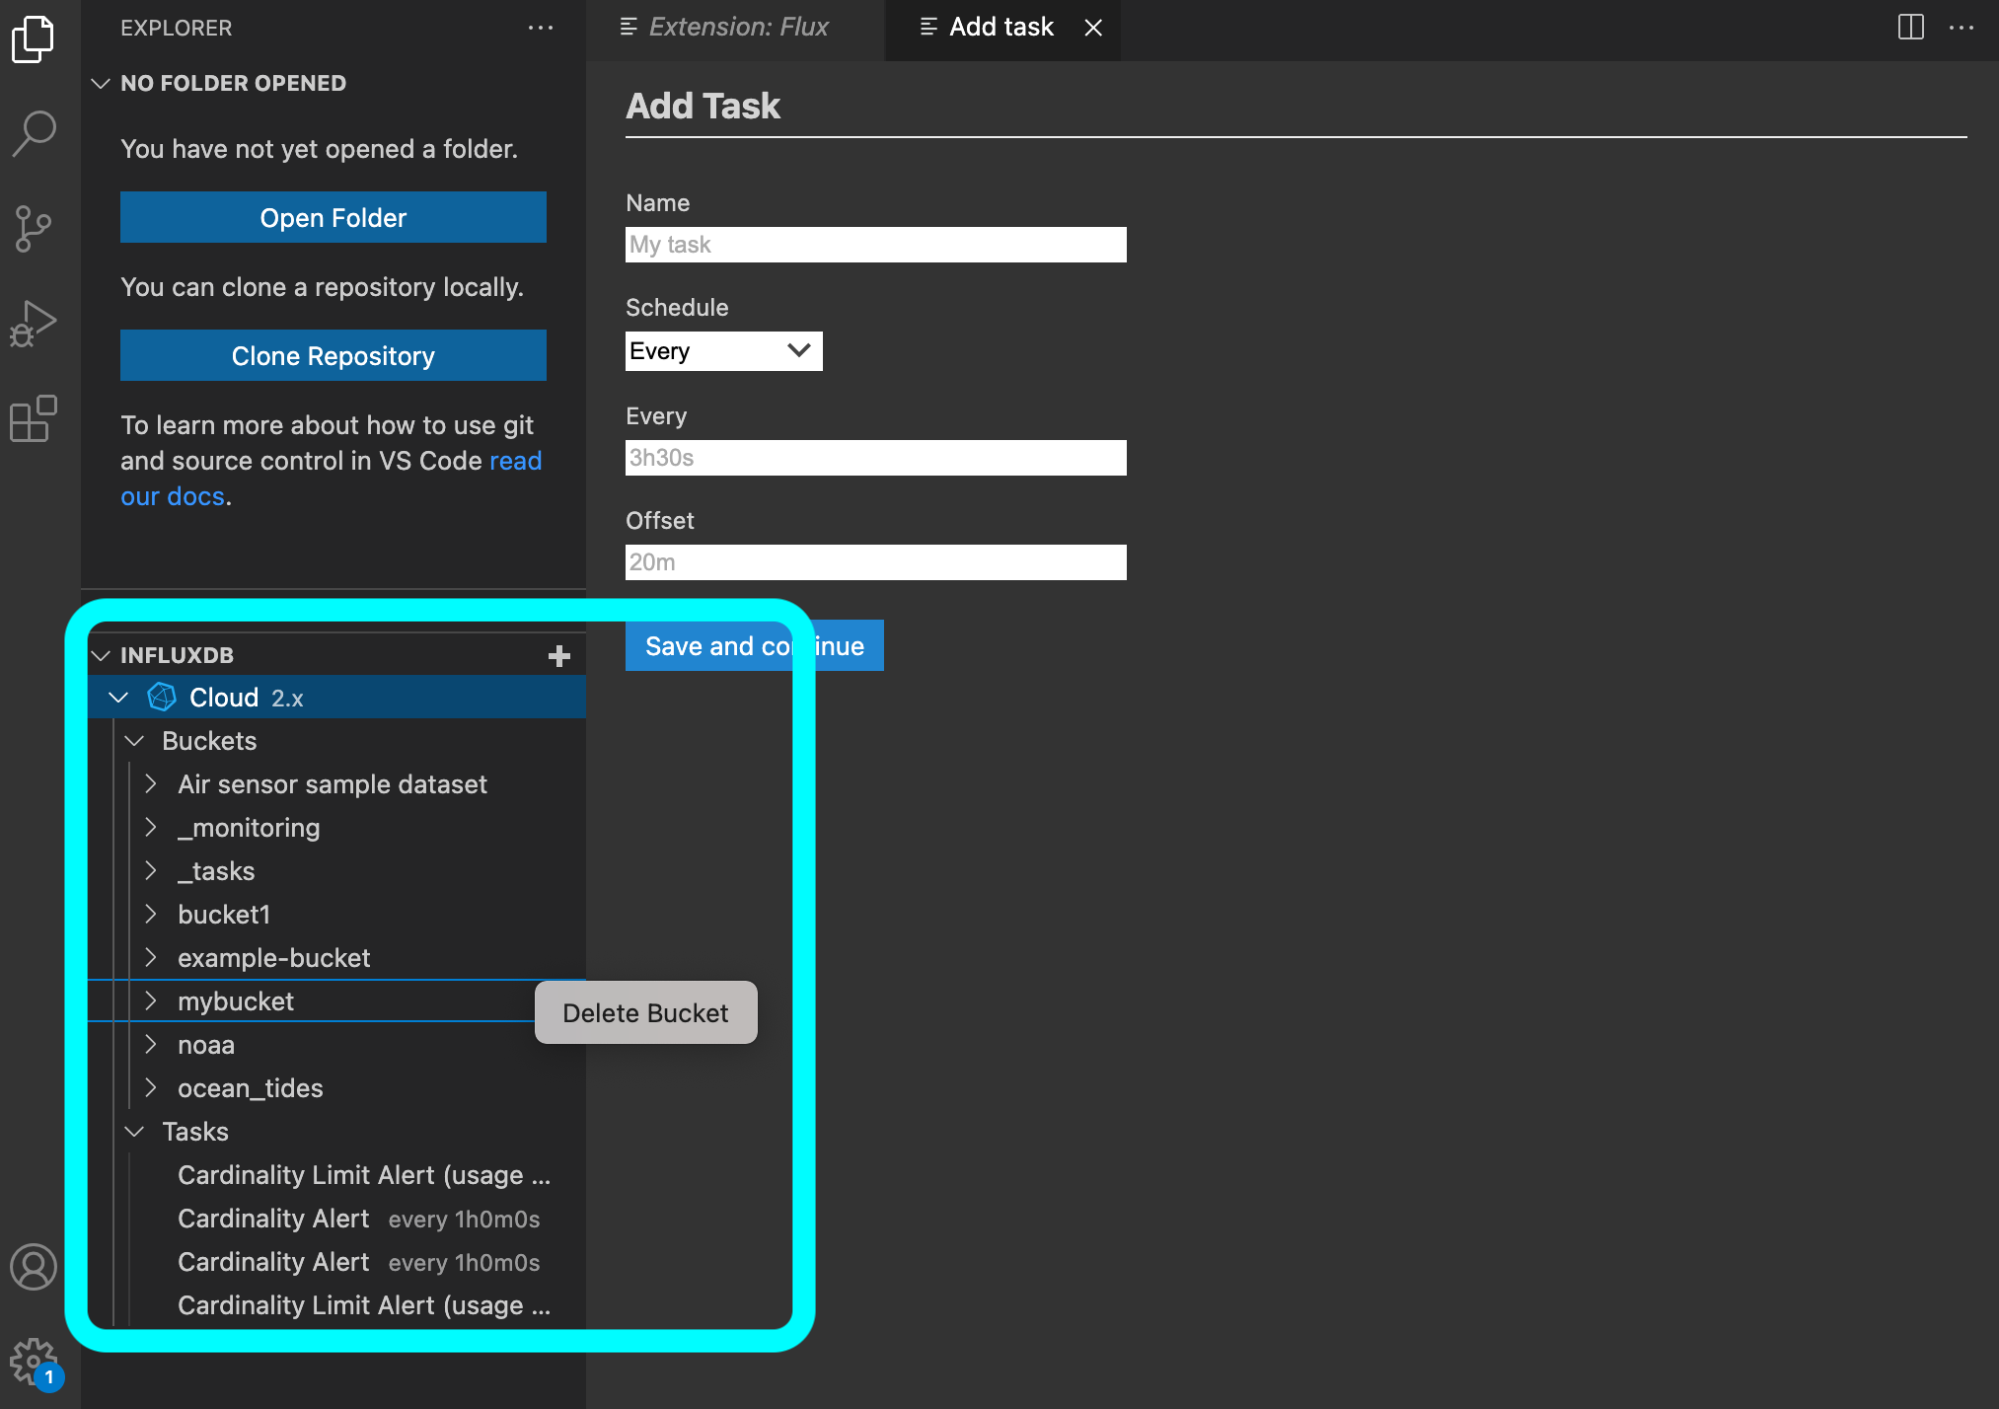
To delete a bucket, right-click on any bucket in the Buckets dropdown **and select **Delete bucket. Delete tasks in the same way you delete buckets.
Querying
To execute a query, write your query, right click, and hit Run Query. Your query results are populated in a new tab to the right.

Managing Tasks
To create a task, right click on the Tasks dropdown and select Create task, which will bring you to the following tab where you configure your task options.
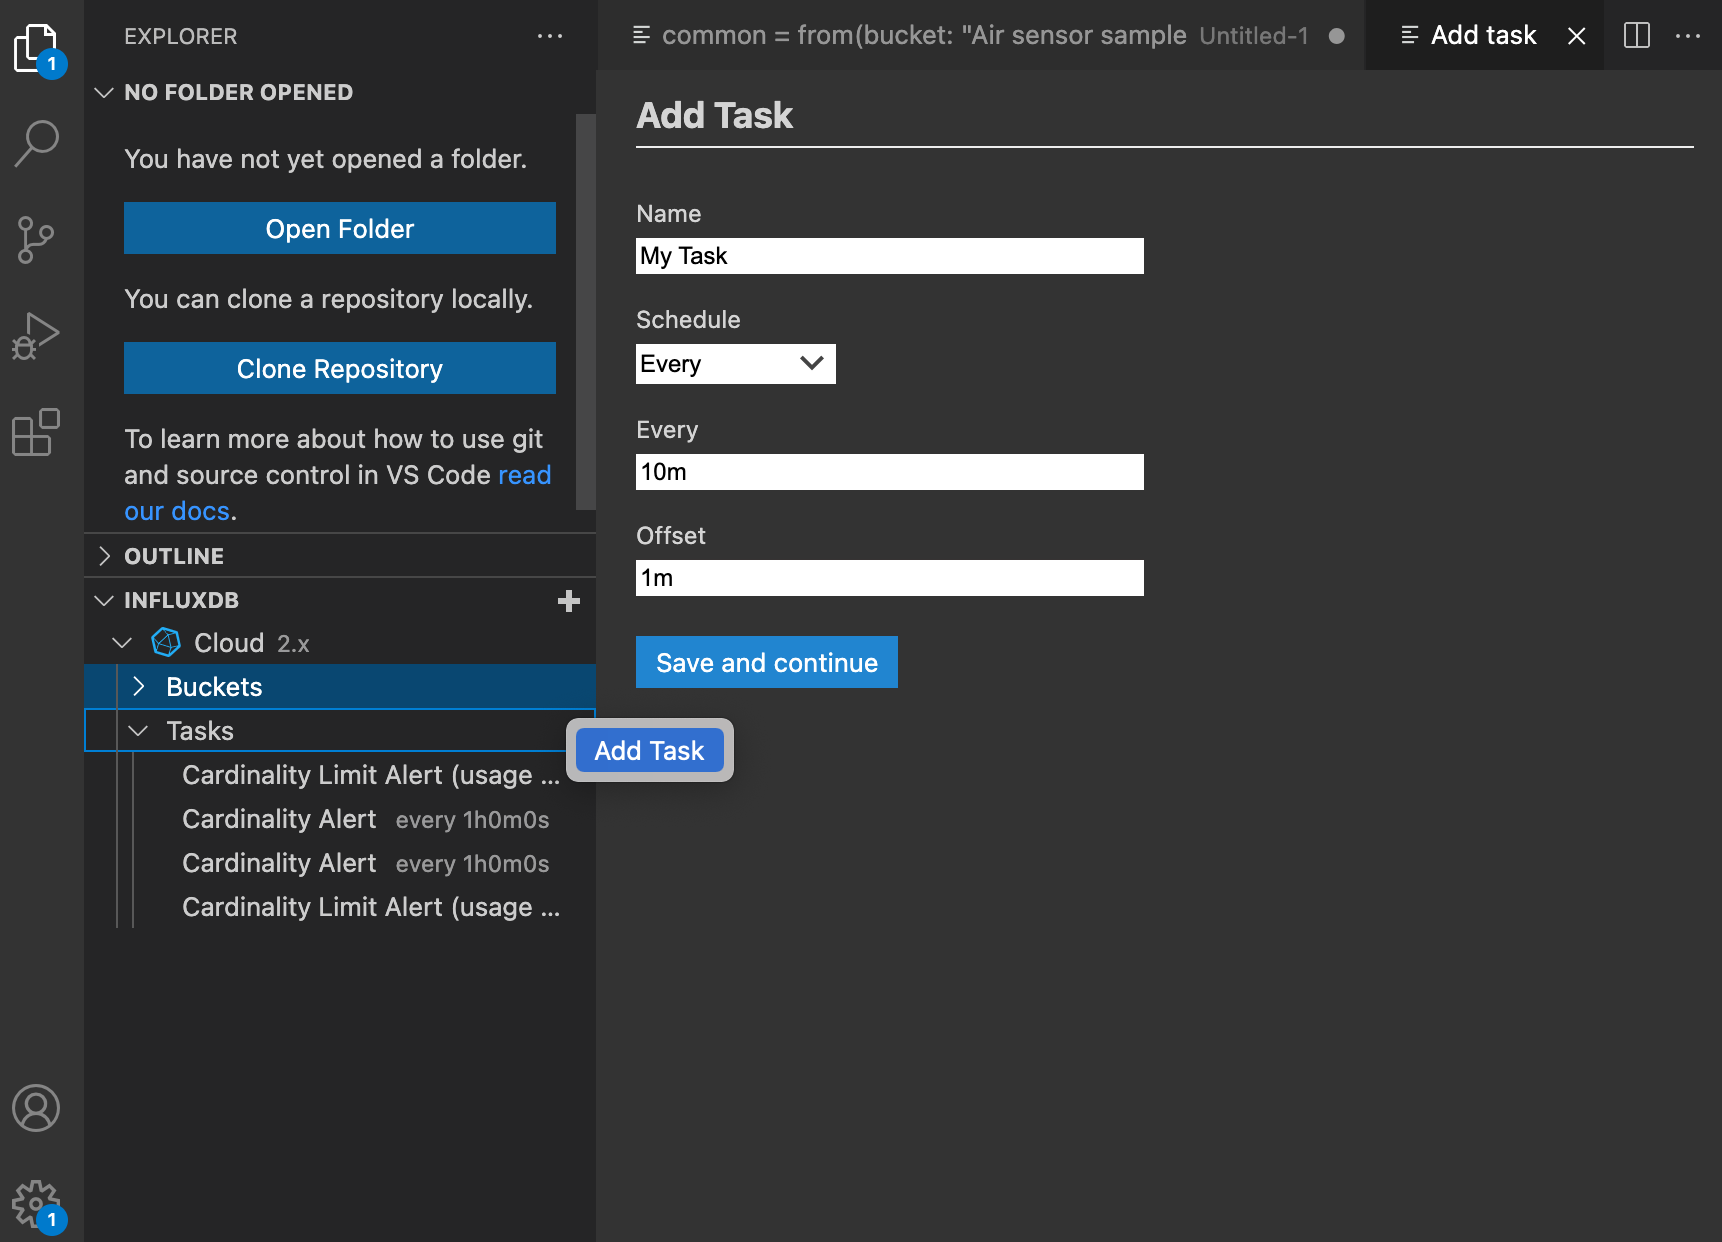
Click Save and continue to create a new task. A new tab is populated with the task options and Flux boilerplate. Write your Flux query after the task options. Right-click on the task tab to **Run Query **and verify that your Flux is transforming your data correctly. The output of your task will be populated in a tab to the right.
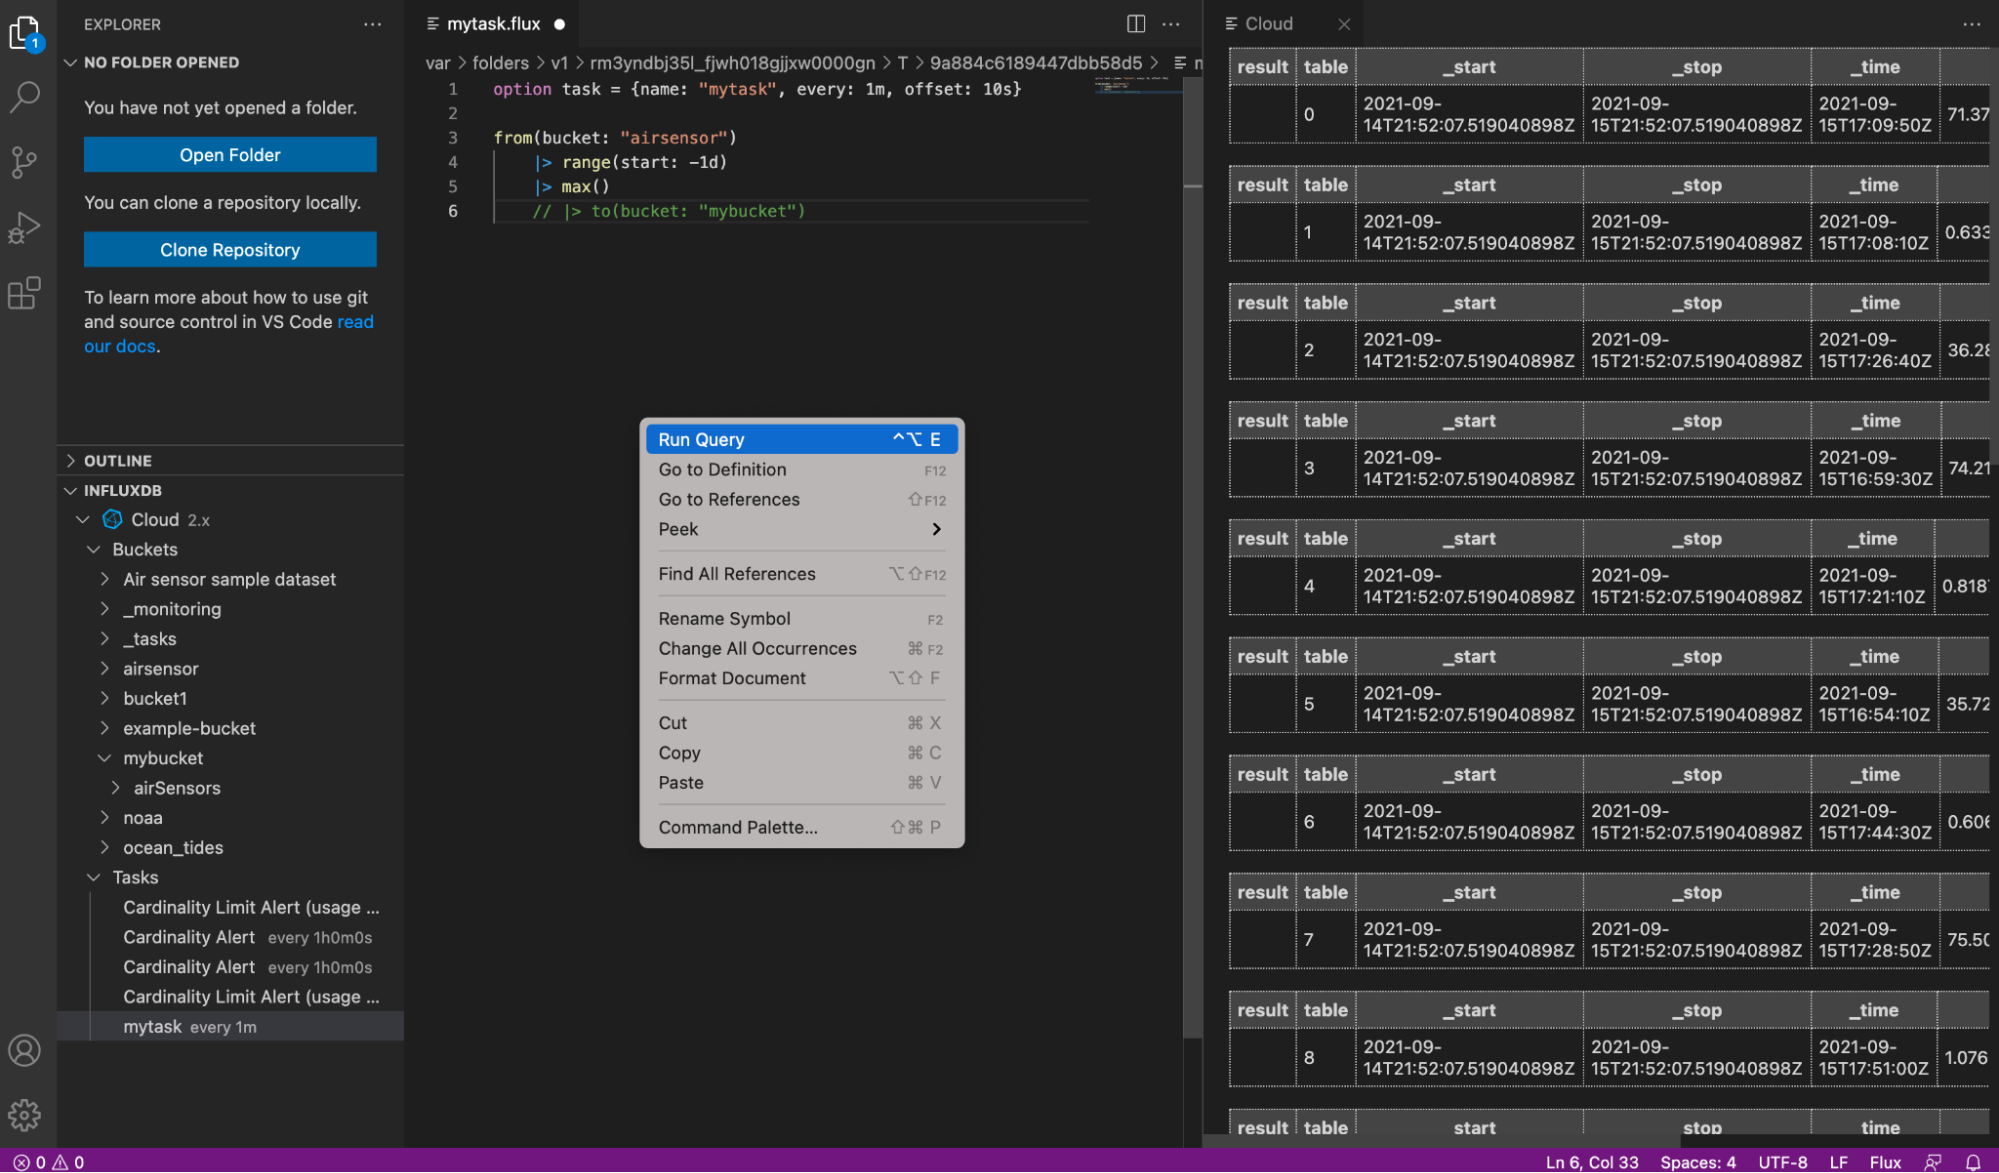
It’s best practice to use task options in your task script. To ensure that your script queries data from the last time the task was run, use the task.every option in your range() function, |> range(start:-task.every). Additionally, make sure to append the to() function to your query to write your new data to a new destination bucket or measurement. Finally, save the task script to create an active task in InfluxDB Cloud.
Creating Invokable Scripts
You can also use the Flux extension for VS Code to easily create and execute an invokable script with parameterized queries. Once you’ve installed the Flux extension for VS code and configured it, you can create a new invokable script and run it. For example, I can run the following invokable script with parameters:
params = { "mybucket": "airsensor" }
from(bucket:params.mybucket)
|> range(start: -1y)
|> limit(n:2)
First create a new script by right-clicking on the menu on the left. Name your invokable script and add a description.
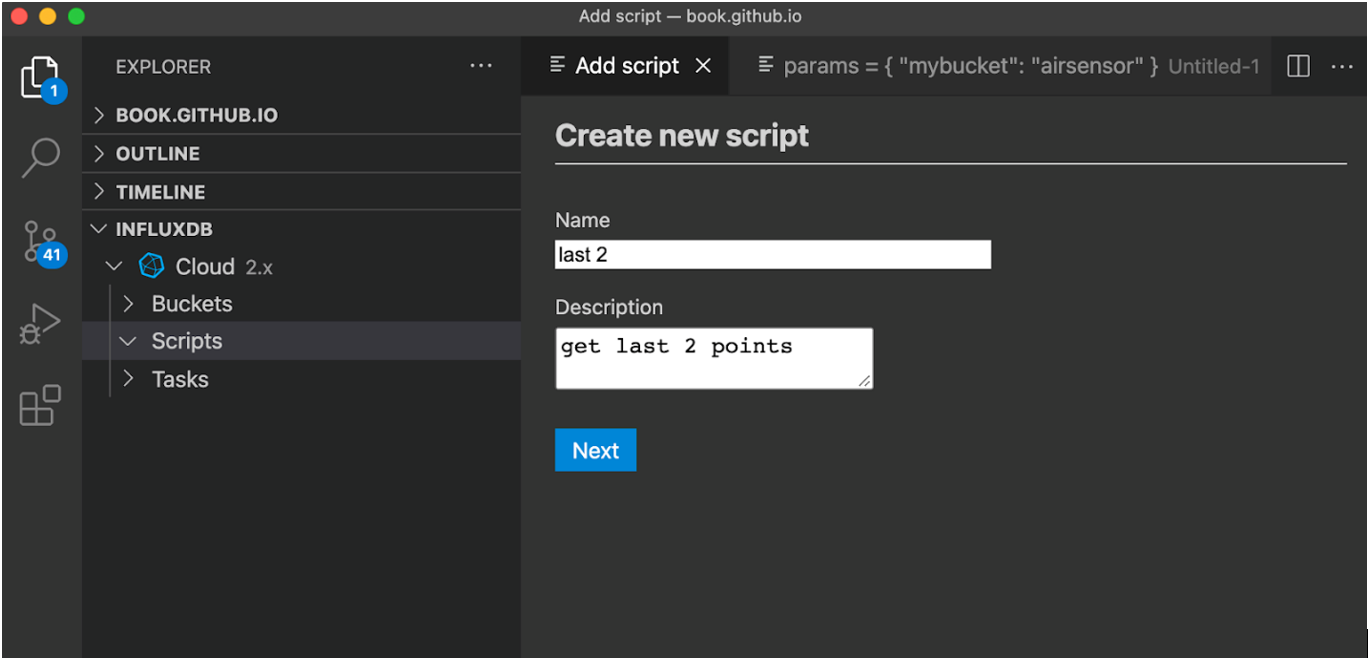
Next, write your invokable script. Right-click on your script to run the query. The output of the script will pop up in a new tab to the right by default.
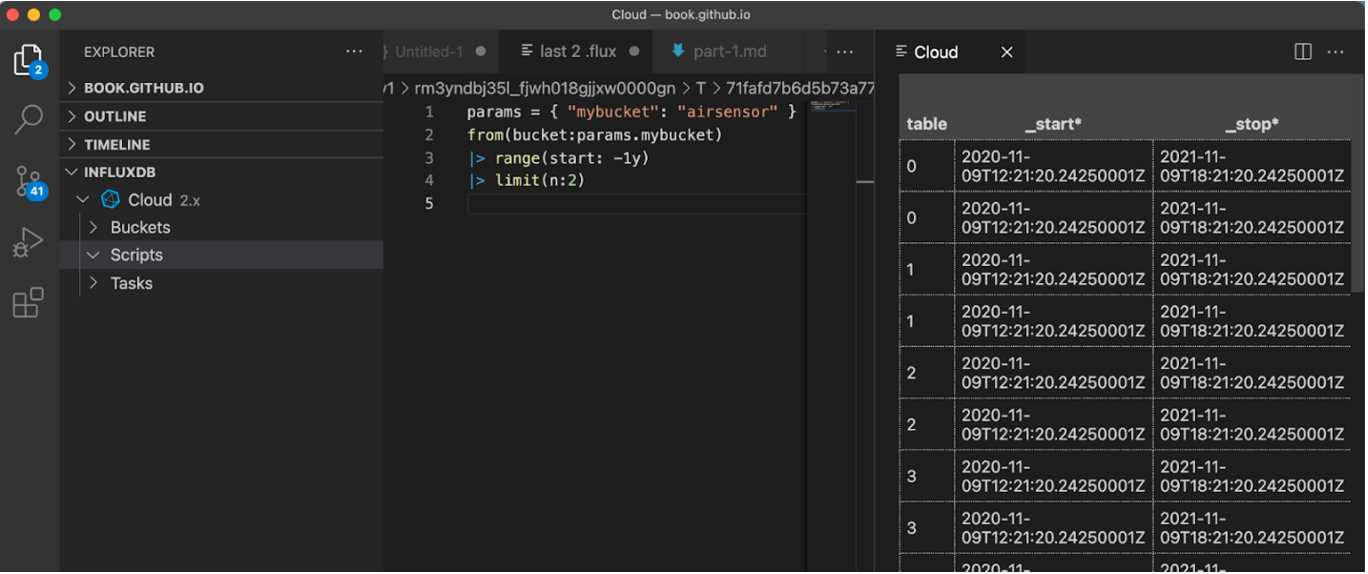 Using the Flux extension for VS code to create an invokable script with parameters and run the script. The output is provided in a separate tab to the right.
Now you can run the invokable script remotely and integrate the script into an application built on top of InfluxDB, for example. However, once you’ve verified that your script gives you the expected output, you’ll want to remove the following line: params = { "mybucket": "airsensor" }.
Now you can inject the parameters when you invoke the script via the API, like in the example above but with the correct parameter in the body of the request:
-d '{
  "params": {"mybucket":"airsensor"}
}'
Creating Invokable Scripts
You can also use the Flux extension for VS Code to easily create and execute an invokable script with parameterized queries. Once you’ve installed the Flux extension for VS code and configured it, you can create a new invokable script and run it. For example, I can run the following invokable script with parameters:
params = { "mybucket": "airsensor" }
from(bucket:params.mybucket)
|> range(start: -1y)
|> limit(n:2)
First create a new script by right-clicking on the menu on the left. Name your invokable script and add a description.
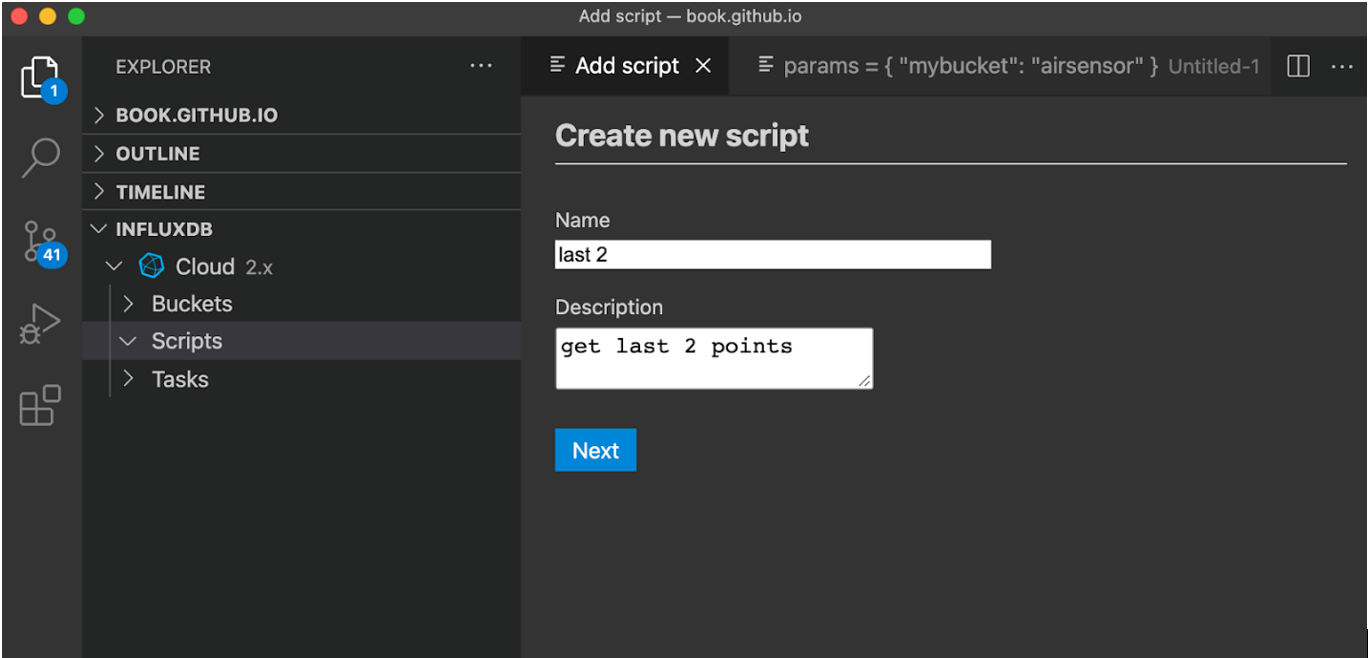
Next, write your invokable script. Right-click on your script to run the query. The output of the script will pop up in a new tab to the right by default.
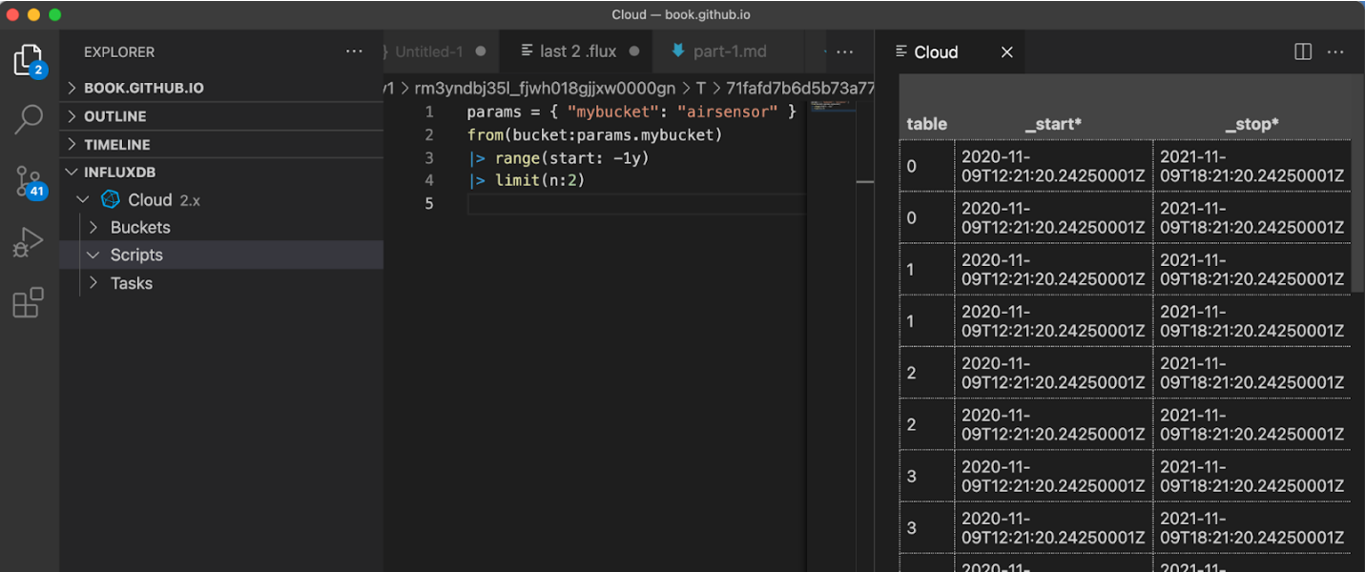 Using the Flux extension for VS code to create an invokable script with parameters and run the script. The output is provided in a separate tab to the right.
Now you can run the invokable script remotely and integrate the script into an application built on top of InfluxDB, for example. However, once you’ve verified that your script gives you the expected output, you’ll want to remove the following line: params = { "mybucket": "airsensor" }.
Now you can inject the parameters when you invoke the script via the API, like in the example above but with the correct parameter in the body of the request:
-d '{
  "params": {"mybucket":"airsensor"}
}'