Introduction to InfluxDB
Table of contents
- Setting up InfluxDB Open Source
- An introductory tour of the InfluxDB UI
- Setting Up the CLI
- Setting Up VSCode
- Further Reading
In general, I will assume that you are using the SaaS version of InfluxDB, InfluxDB Cloud. However, most of the content here should be applicable to the OSS standalone version, and when there are important differences between the two, I will point them out.
Start by visiting the InfluxDB Cloud sign up page and fill in the sign up form:
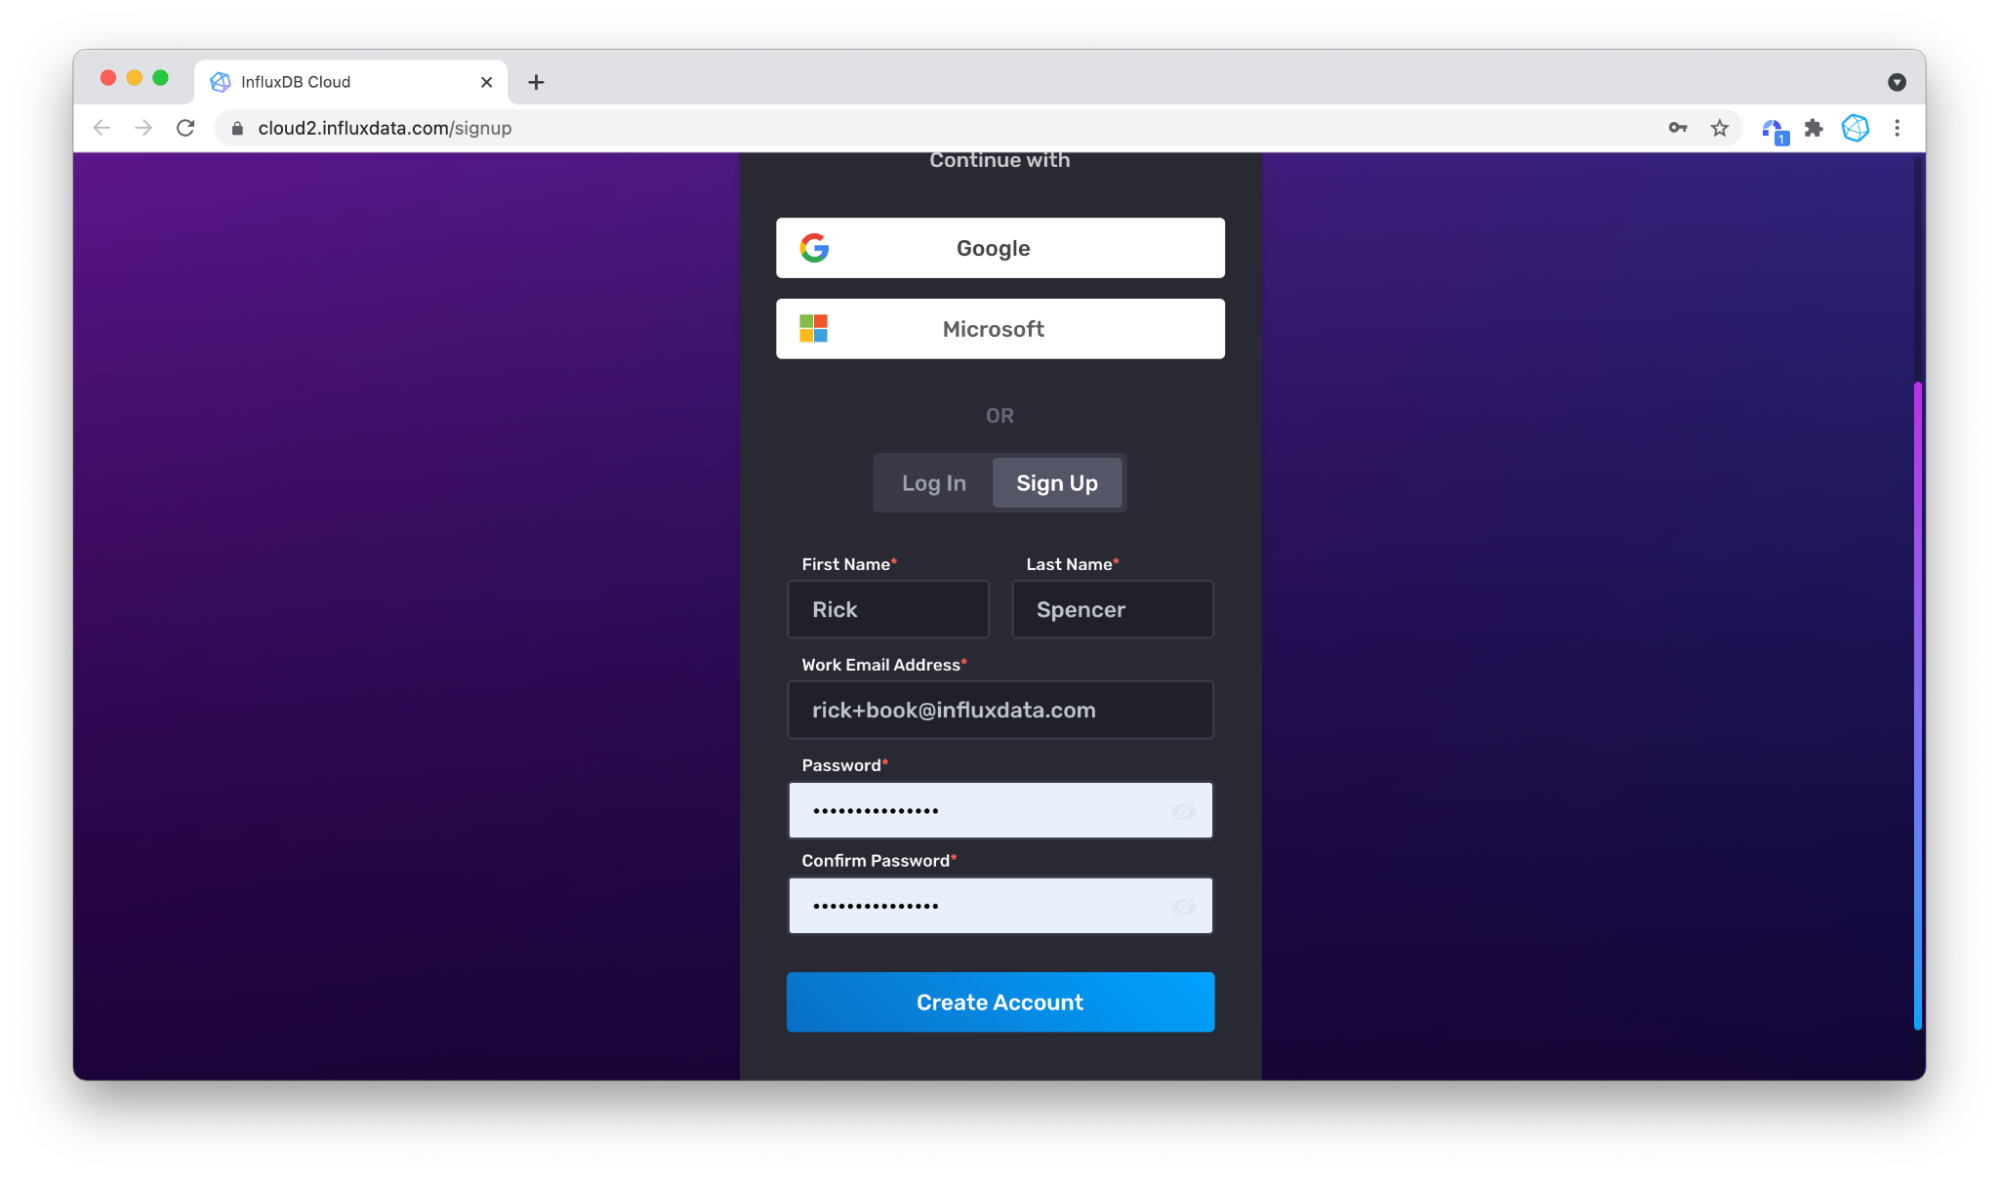
The InfluxDB Cloud sign up page.
Image 6
After acknowledging the email verification, choose a Cloud Provider and a region. This is extremely useful if you are already running cloud-based services. InfluxDB Cloud account because InfluxDB Cloud runs in multiple regions across Google, Azure, and AWS clouds. If you don’t have a preference, just look for a region close to your locality. It’s possible to migrate data and the rest of the account later, but the process is not particularly streamlined, so if you do have a preference, keep that in mind. Note that you don’t need your own account with any of these providers to create an InfluxDB Cloud account.
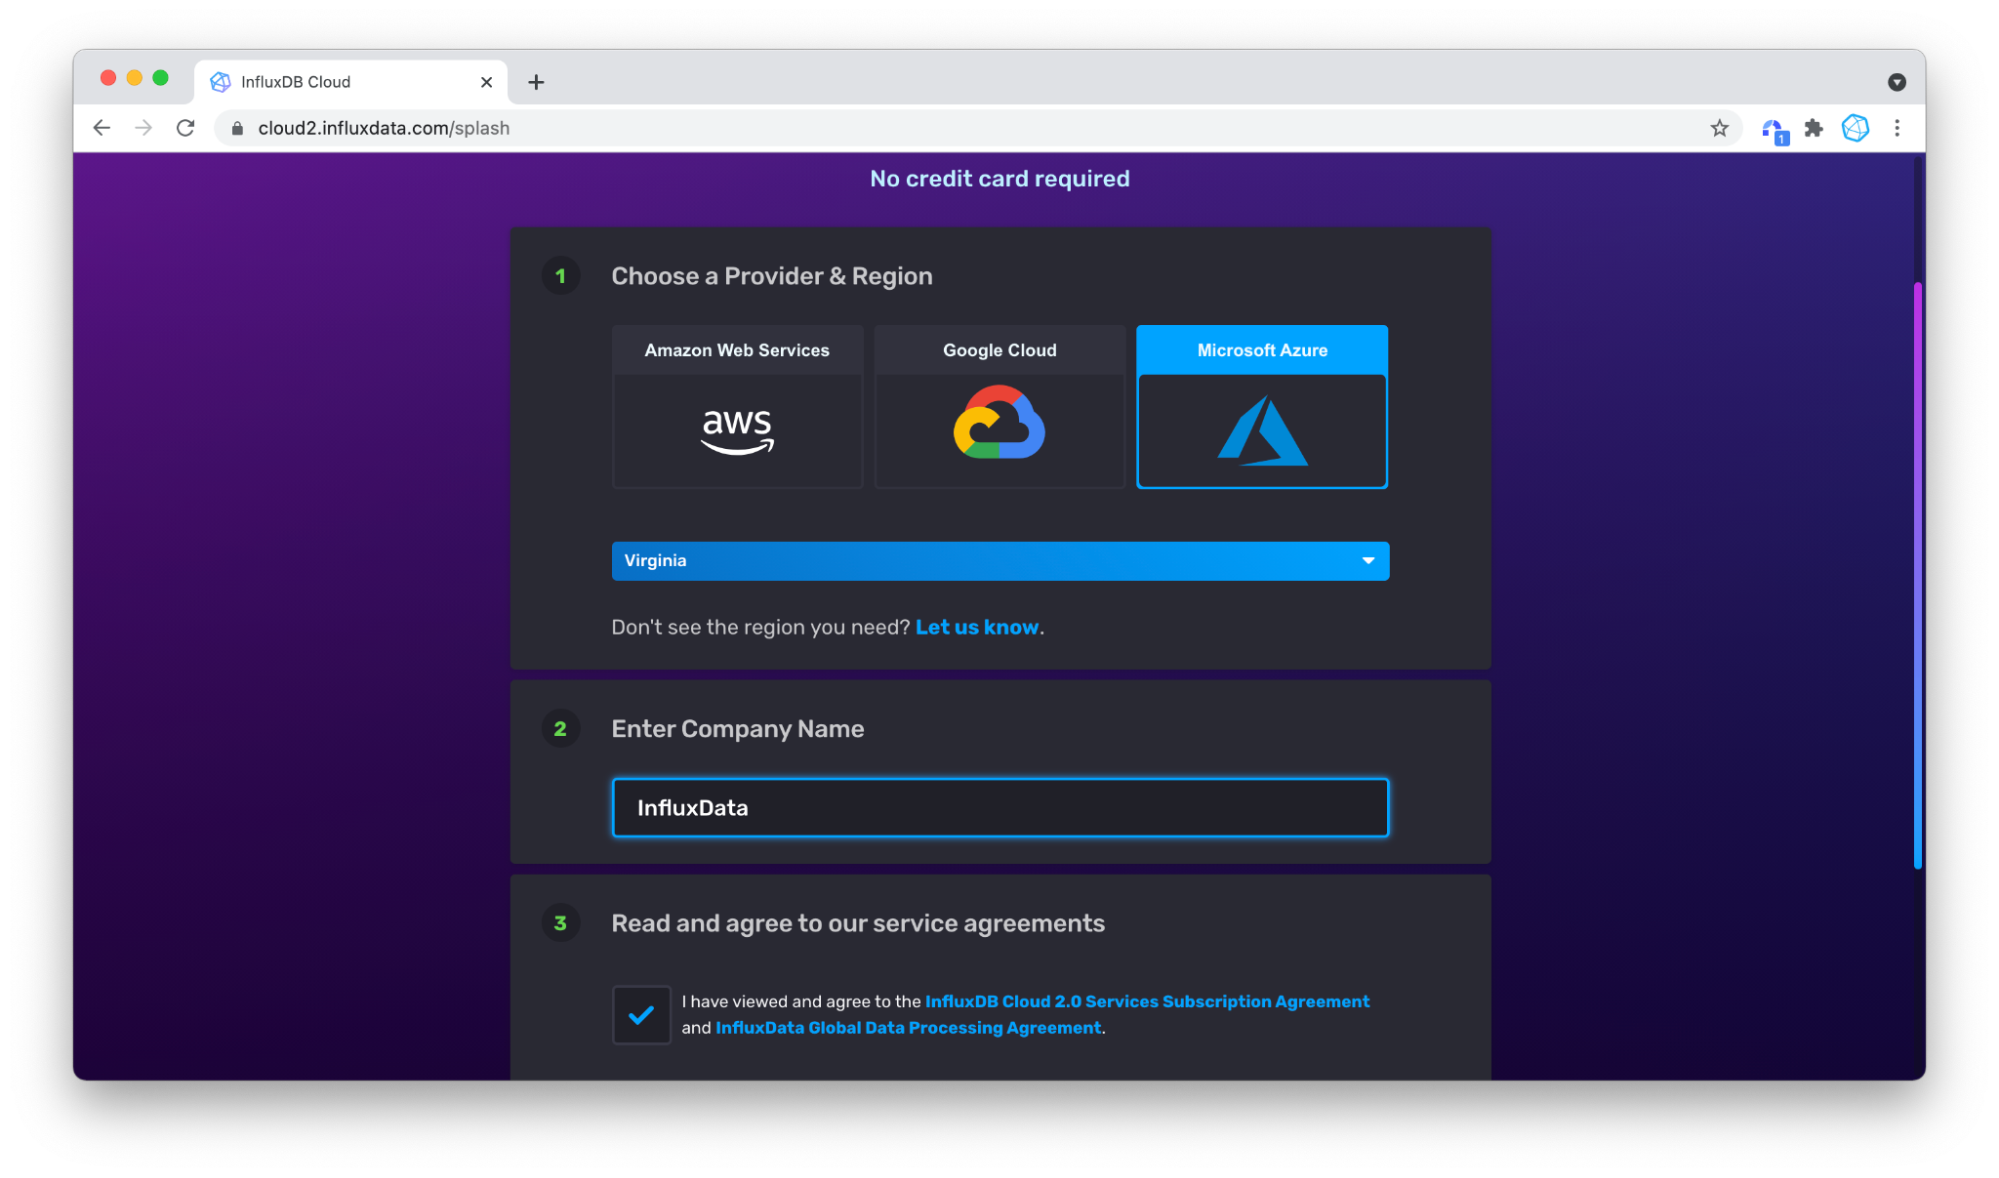
Next, choose a plan. A free tier plan is perfect for light workloads and getting started with your application. Converting a free tier plan to a paid plan is easy if you need more resources or if you are going into production later. A free tier plan does not require a credit card–just create a free InfluxDB Cloud account and get started.
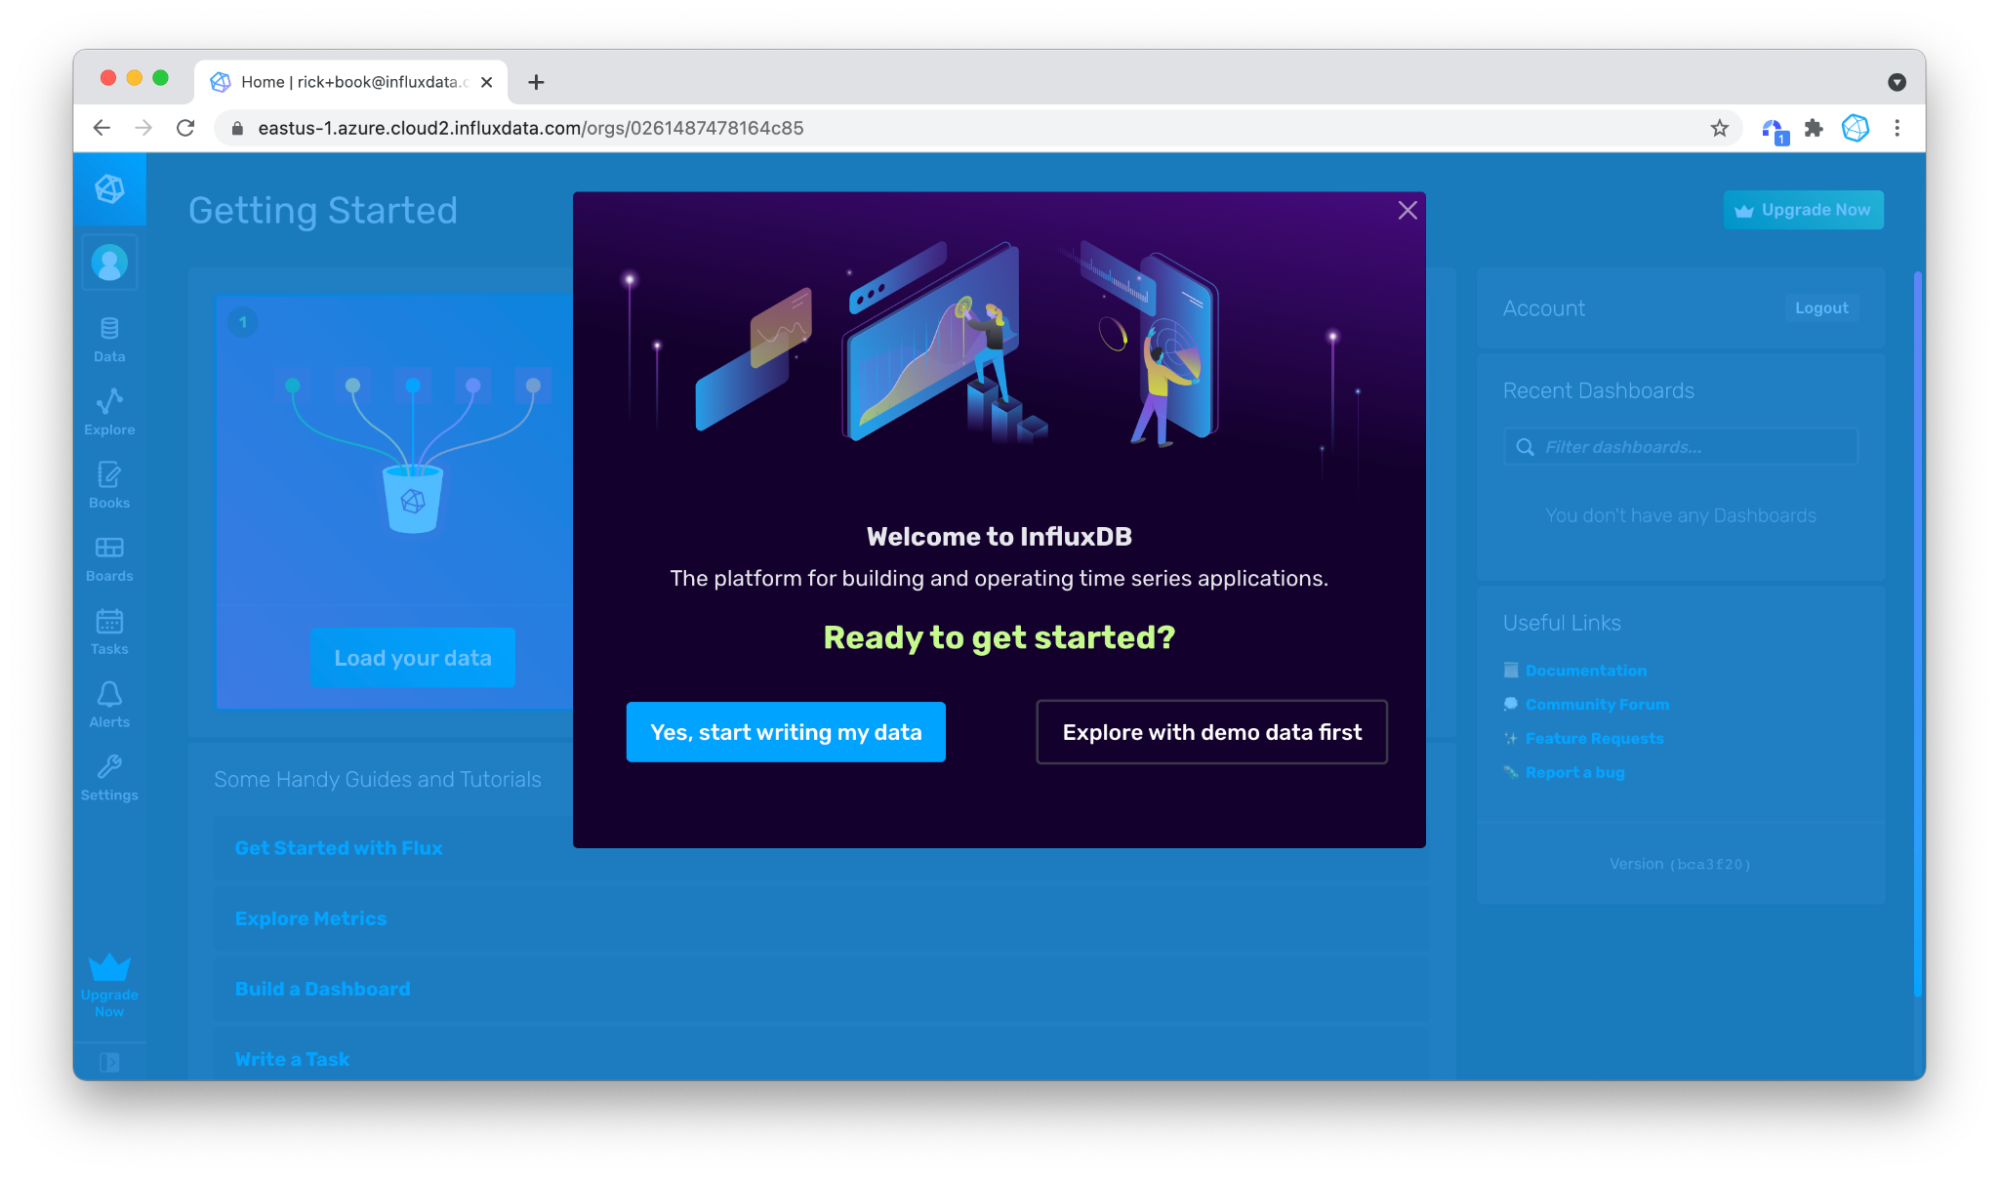
Now your account is ready to use. You’ll explore some options for uploading sample data or your real data in the next section.
Setting up InfluxDB Open Source
Running InfluxDB OSS is not much more involved than creating an InfluxDB Cloud account. Simply download the InfluxDB OSS single binary, run InfluxDB, and then access the InfluxDB UI in your browser.
There are a few options for installing InfluxDB on the install page of the docs depending on your OS A few things to note:
- The Linux Arm versions are limited to 64 bit architectures, so they require a later version of Raspberry Pi, for example, if you are seeking to run it there.
- InfluxDB is packaged in brew for the Mac, and many Linux distributions have native package manager support. However, some repositories still have an older 1.x version of InfluxDB in their repositories.
Because InfluxDB is available as one simple binary, you can also download the latest release from the downloads portal.
Depending on your installation method, influxdb may already be running. If not, run InfluxDB with with the influxd command:
$ influxd
And then access it at http://localhost:8086. You’ll be prompted to create an initial account to get started, and then the set up experience is pretty much identical to InfluxDB Cloud.
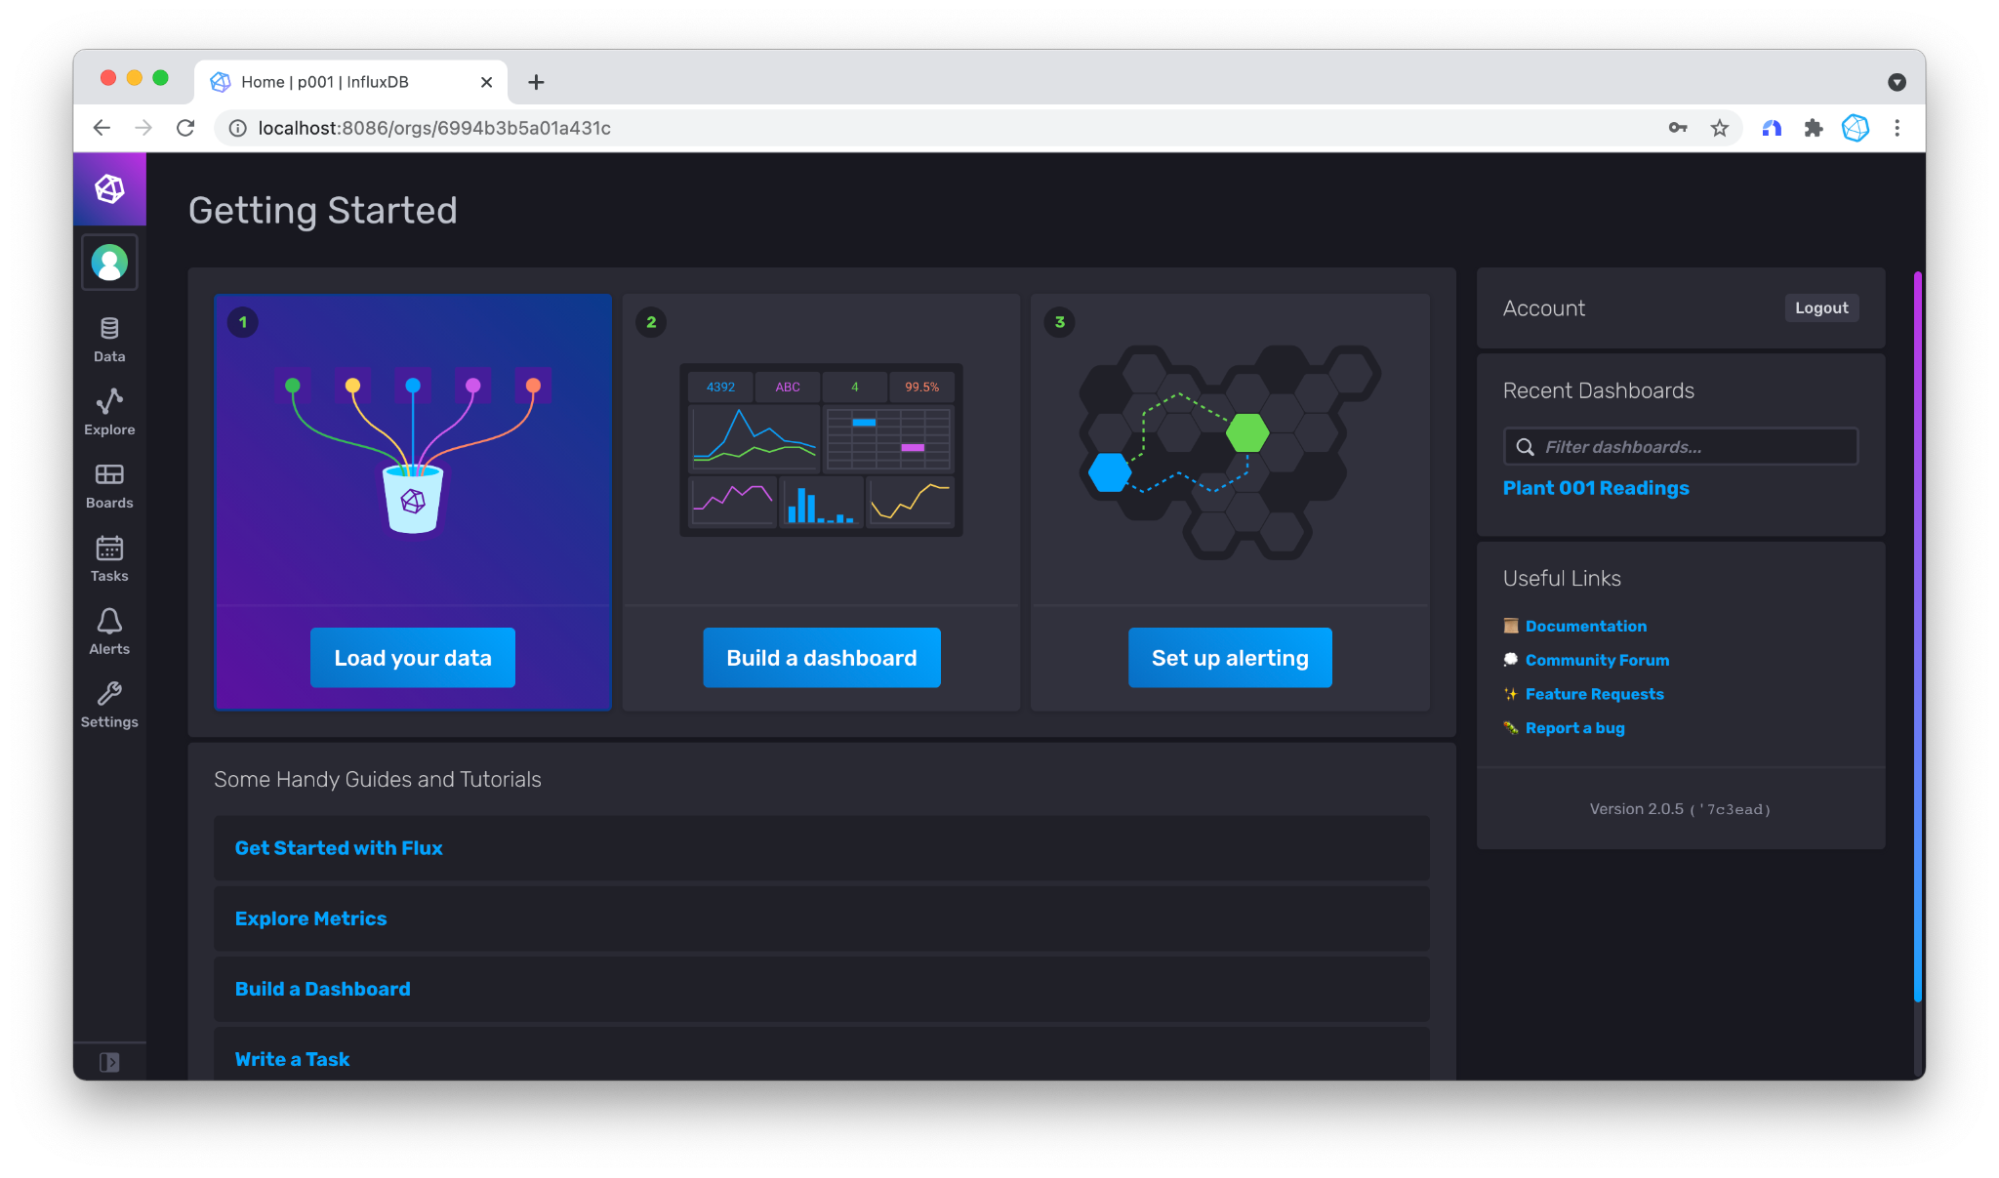
The **Getting Started **page in the InfluxDB UI
An introductory tour of the InfluxDB UI
Now that you’ve set up your InfluxDB account, take a moment to familiarize yourself with the InfluxDB UI. When you first log into your InfluxDB Account you should see the Getting Started home page.
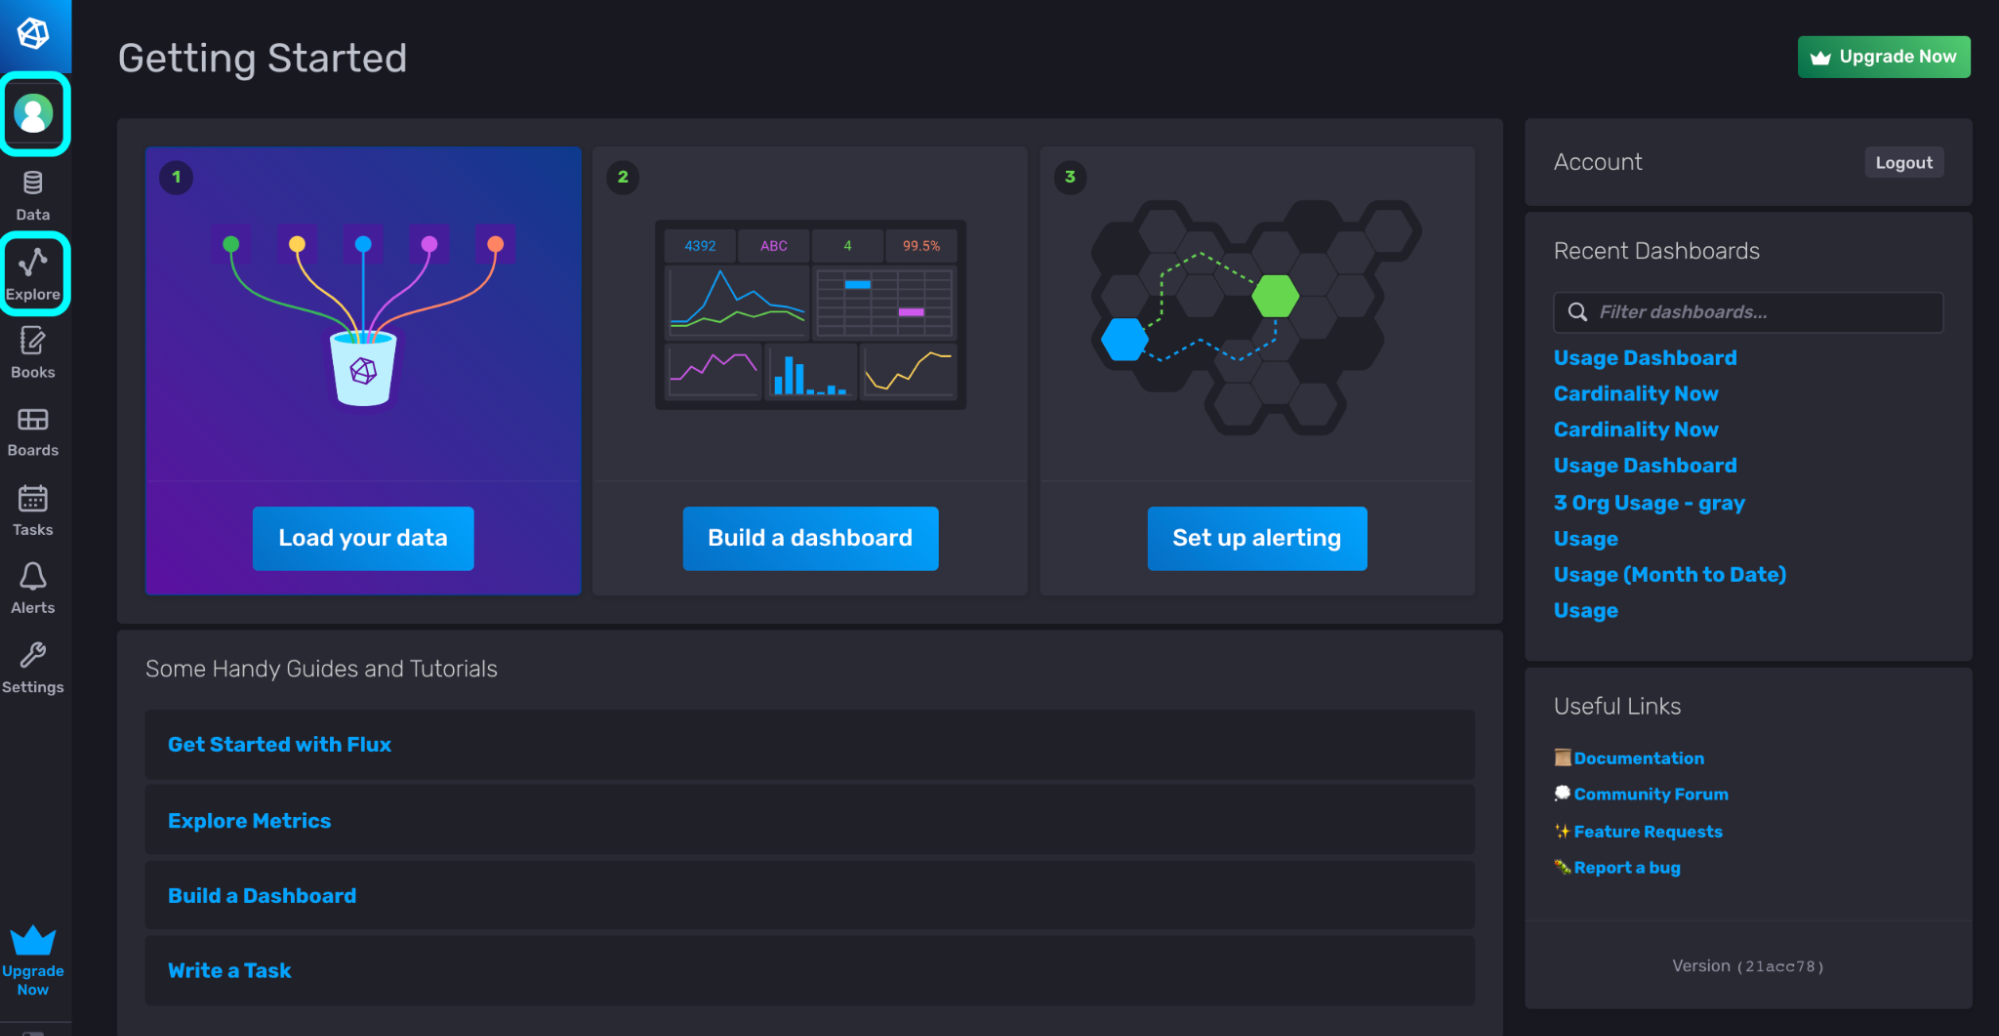
Navigate the User and Account Information icon and the Explorer page from the navigation bar to the right.
The Getting Started home page highlights some of the key functionality of InfluxDB including the ability to:
- Load data
- Build a dashboard
- Set up alerting
These panels will redirect you to corresponding pages available through the navigation bar to the right. In this section we’ll focus on the most critical areas of the InfluxDB UI for getting started with InfluxDB:
- User and Account Information icon
- Explorer
We’ll dive into the other areas later on.
User and Account Information
The User and Account Information icon redirects you to corresponding Account and Organization pages:
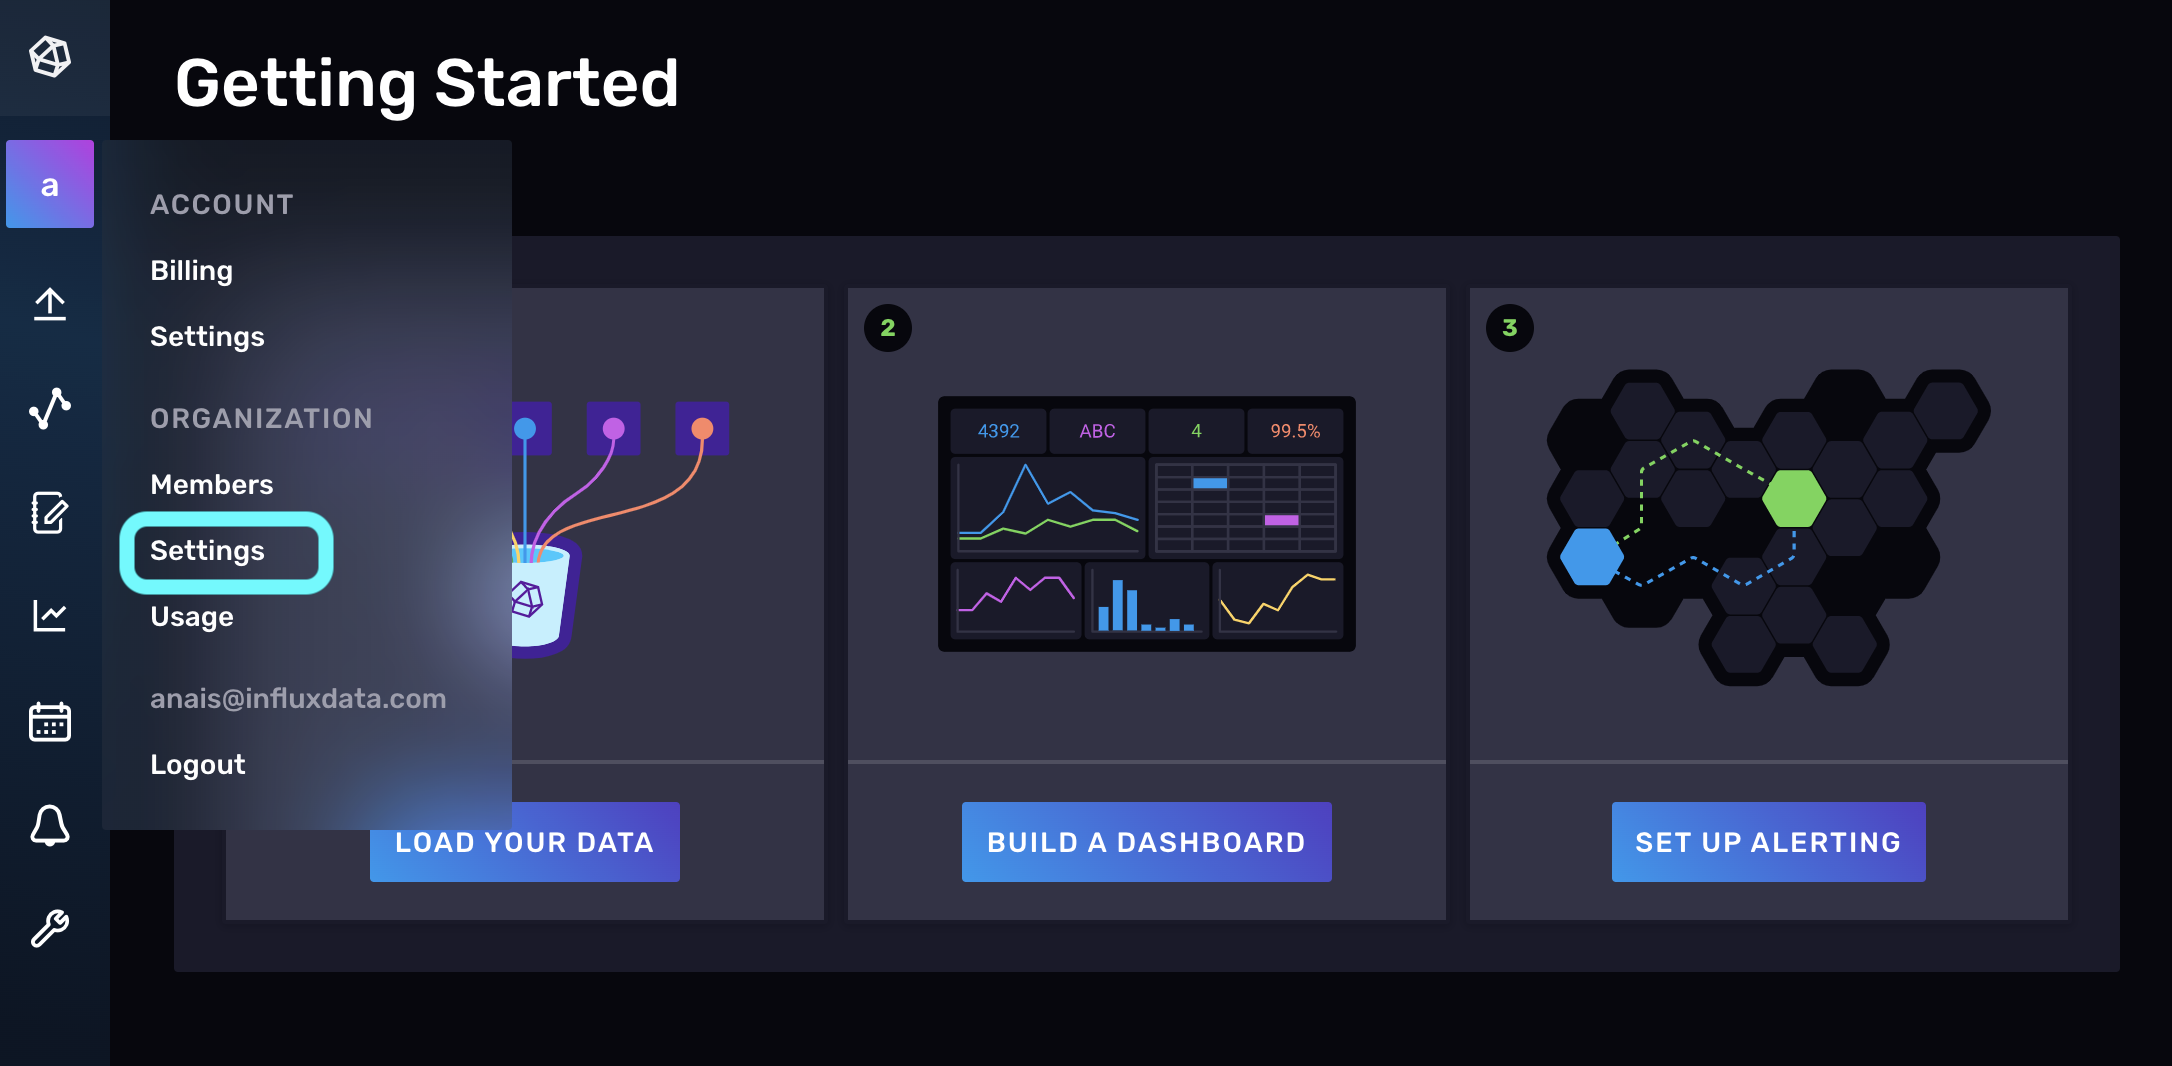
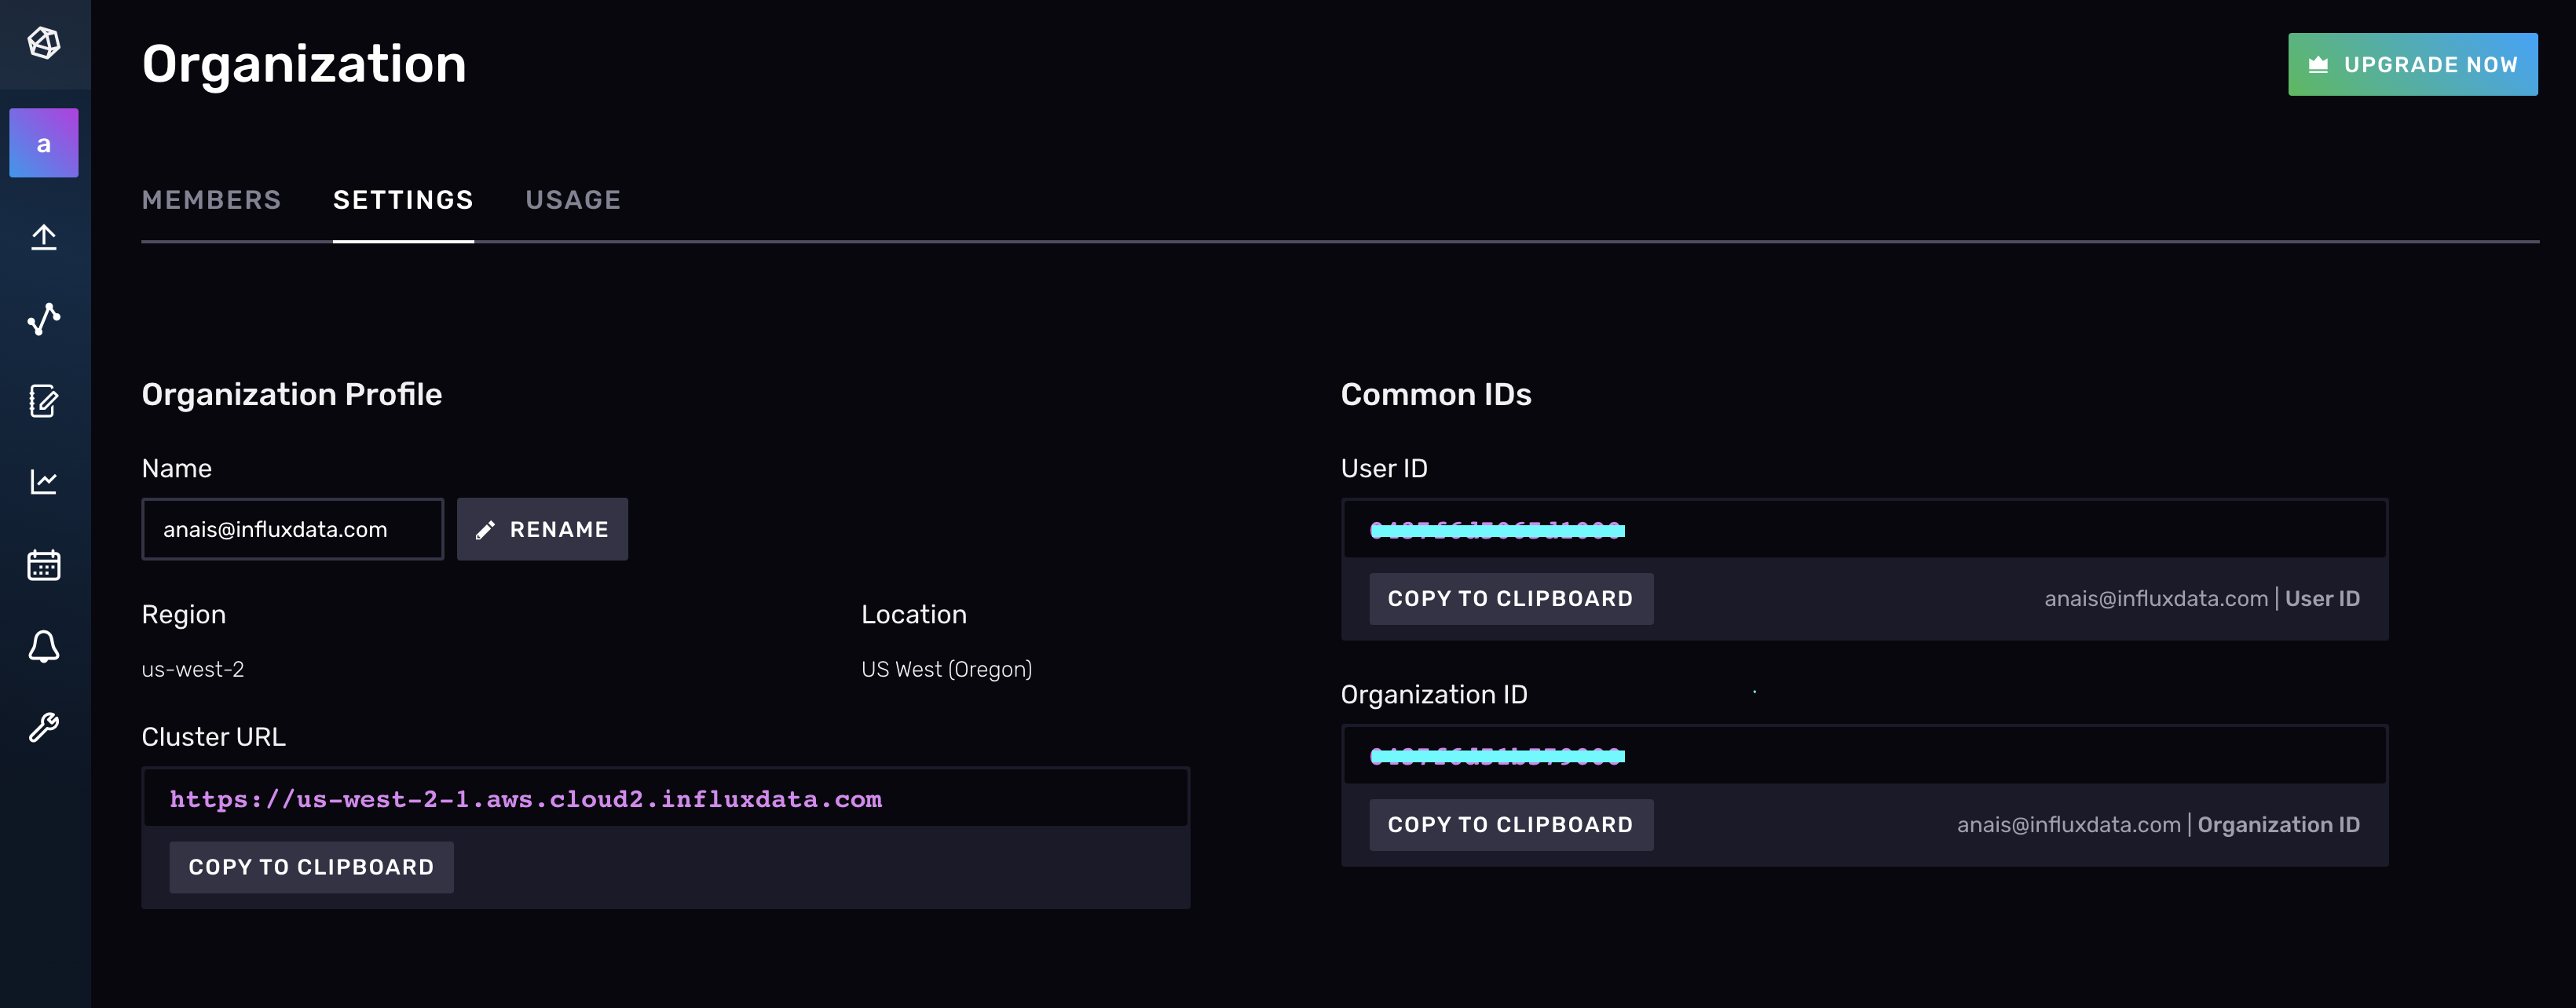
Settings
The Settings tab in the Organization page provides Common ID’s that you’ll need for Authentication and Authorization within InfluxDB. These ID’s include your User ID and Organization ID (org ID). You’ll need these ID’s to configure the CLI, use a Client, and more.
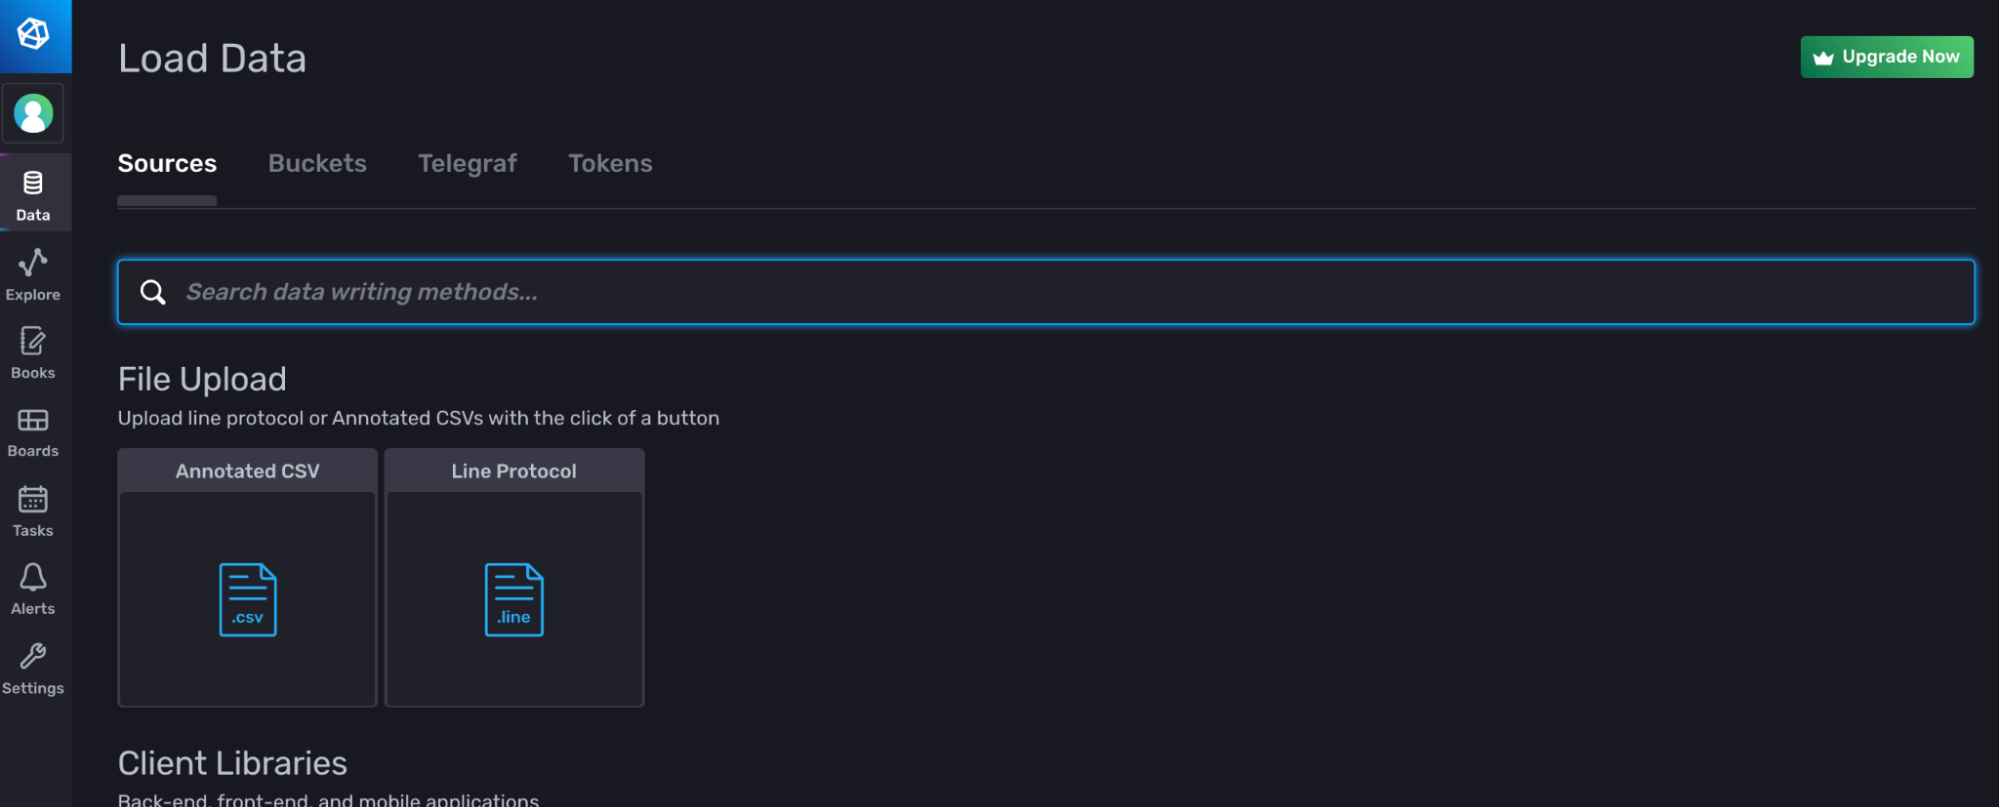
Data
The Data page provides you with multiple solutions for loading your data into InfluxDB including file upload, Client Libraries, and Telegraf. It also contains tabs for all the necessary resource management to successfully write data through those solutions. Specifically, the Data page allows you to:
- Load data from a variety of sources including file upload, client libraries, and Telegraf.
- Create and manage your buckets.
- Create and manage your Telegraf configurations.
- Create and manage your Authentication tokens. Authentication tokens are required for a variety of InfluxDB tools. You’ll need an Authentication token to configure the CLI, use a Client, and more.
Buckets
The Buckets tab allows you to create and delete buckets. Buckets are a named location to store data within InfluxDB. InfluxDB Data Model will cover buckets in detail.

Click the + Create Bucket button to name generate a new bucket.
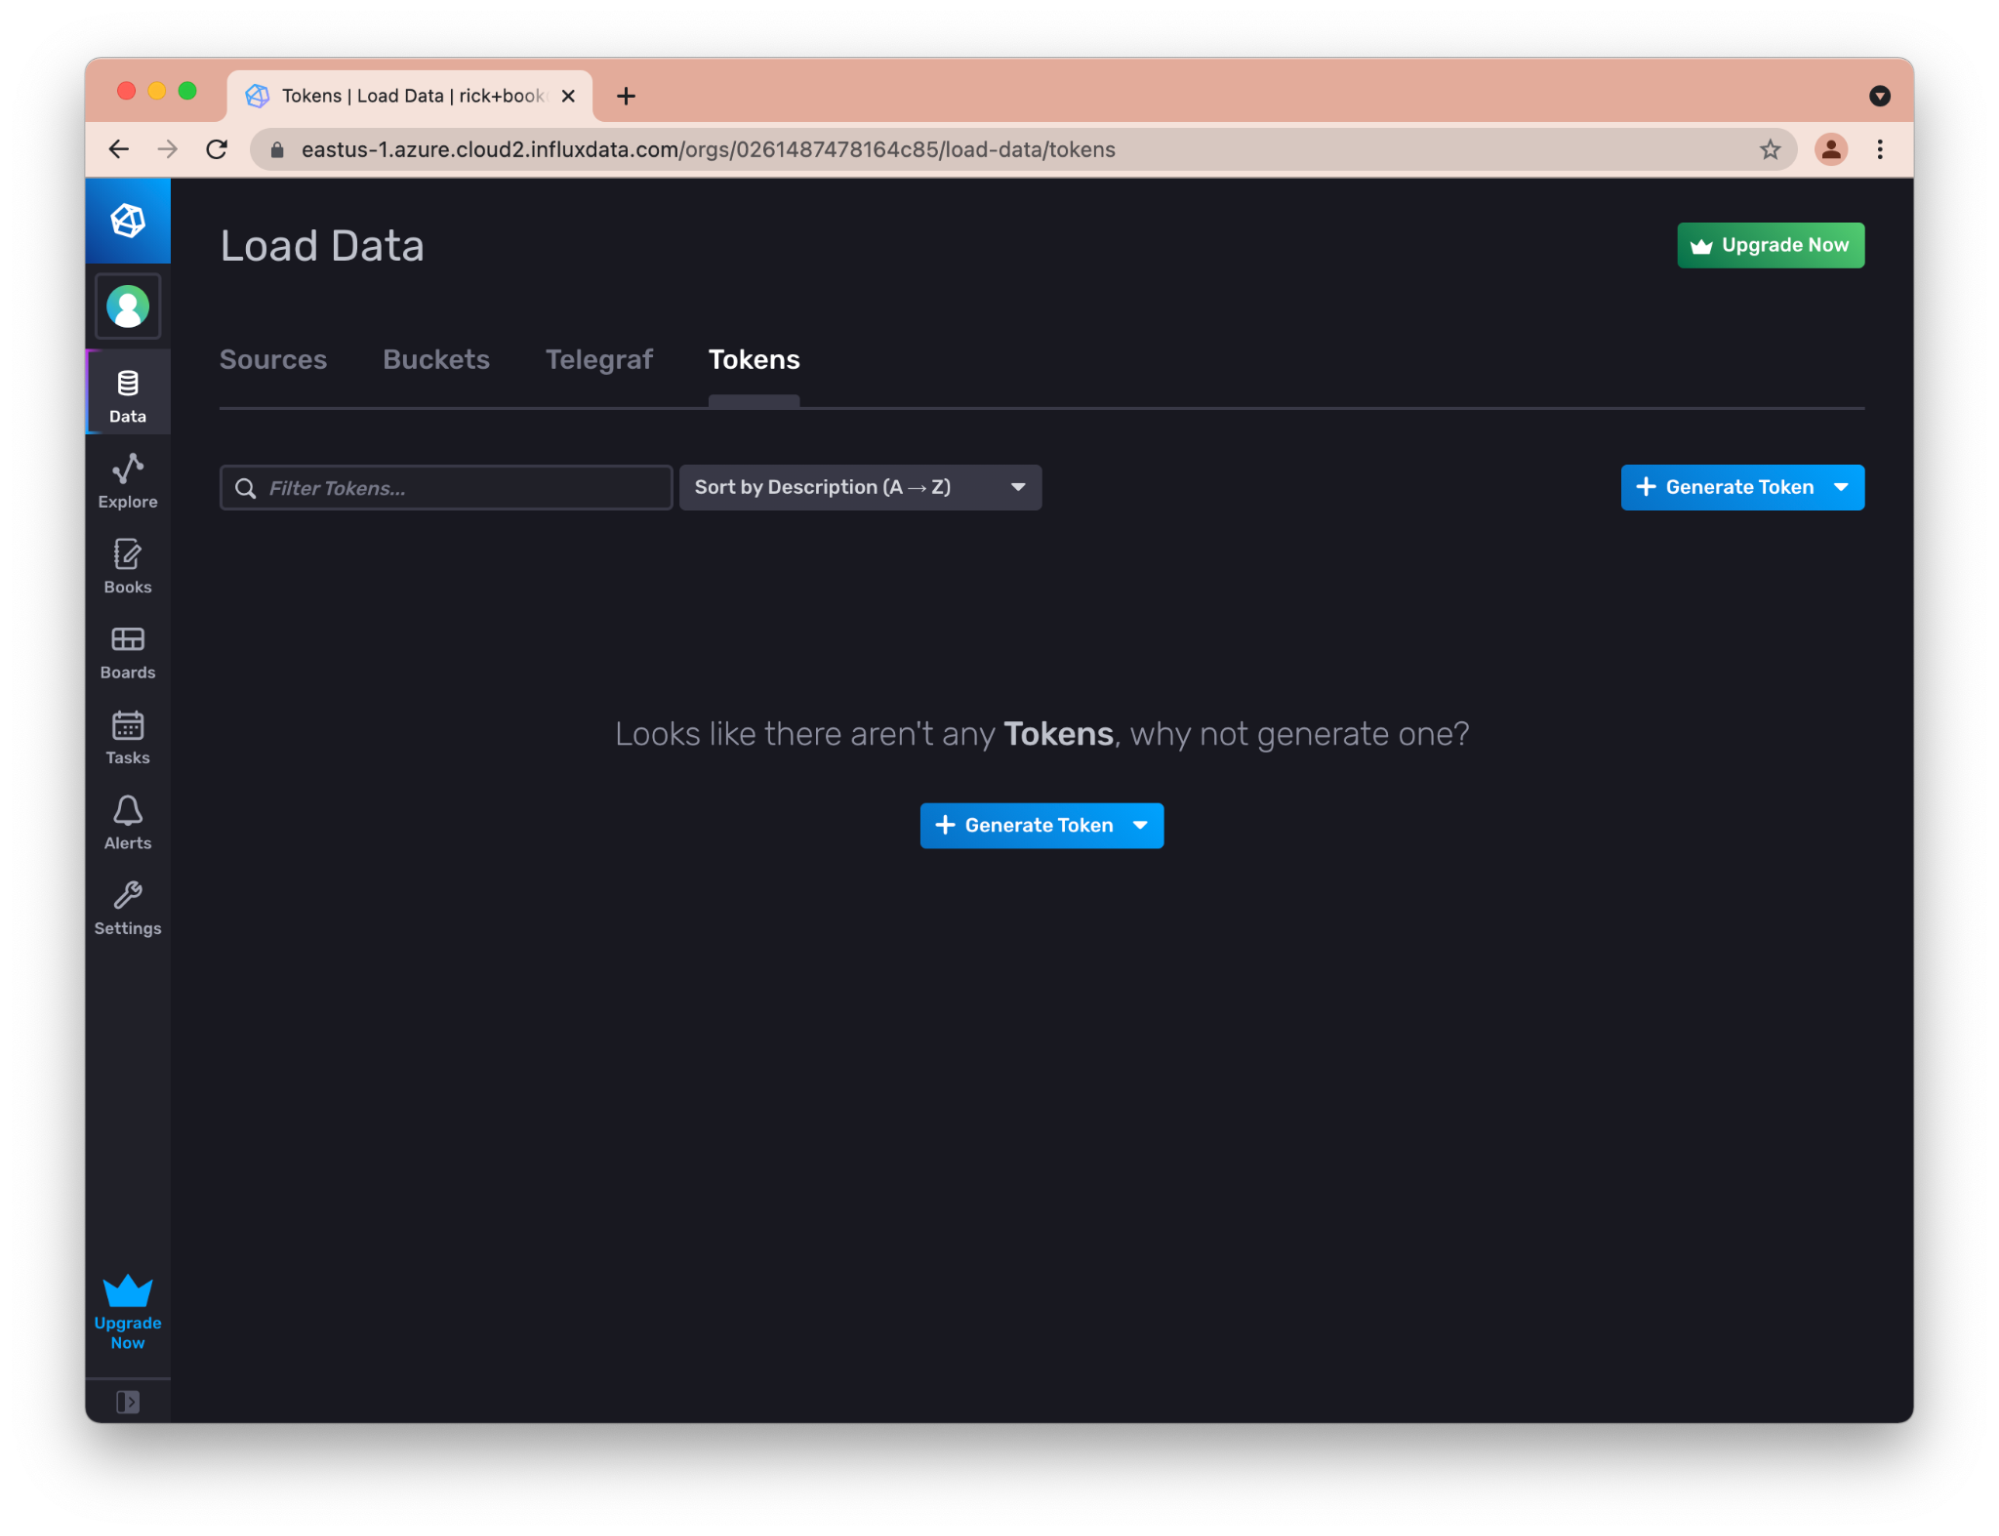
Tokens
The Tokens tab allows you to create and delete tokens. InfluxDB Authentication tokens ensure secure interaction between users and data. You’ll need an Authentication token to configure the CLI, use a Client, and more.
Important Note: The only way to create an All-Access token is through the InfluxDB UI. An All-Access token grants full access permissions to all resources in an organization.
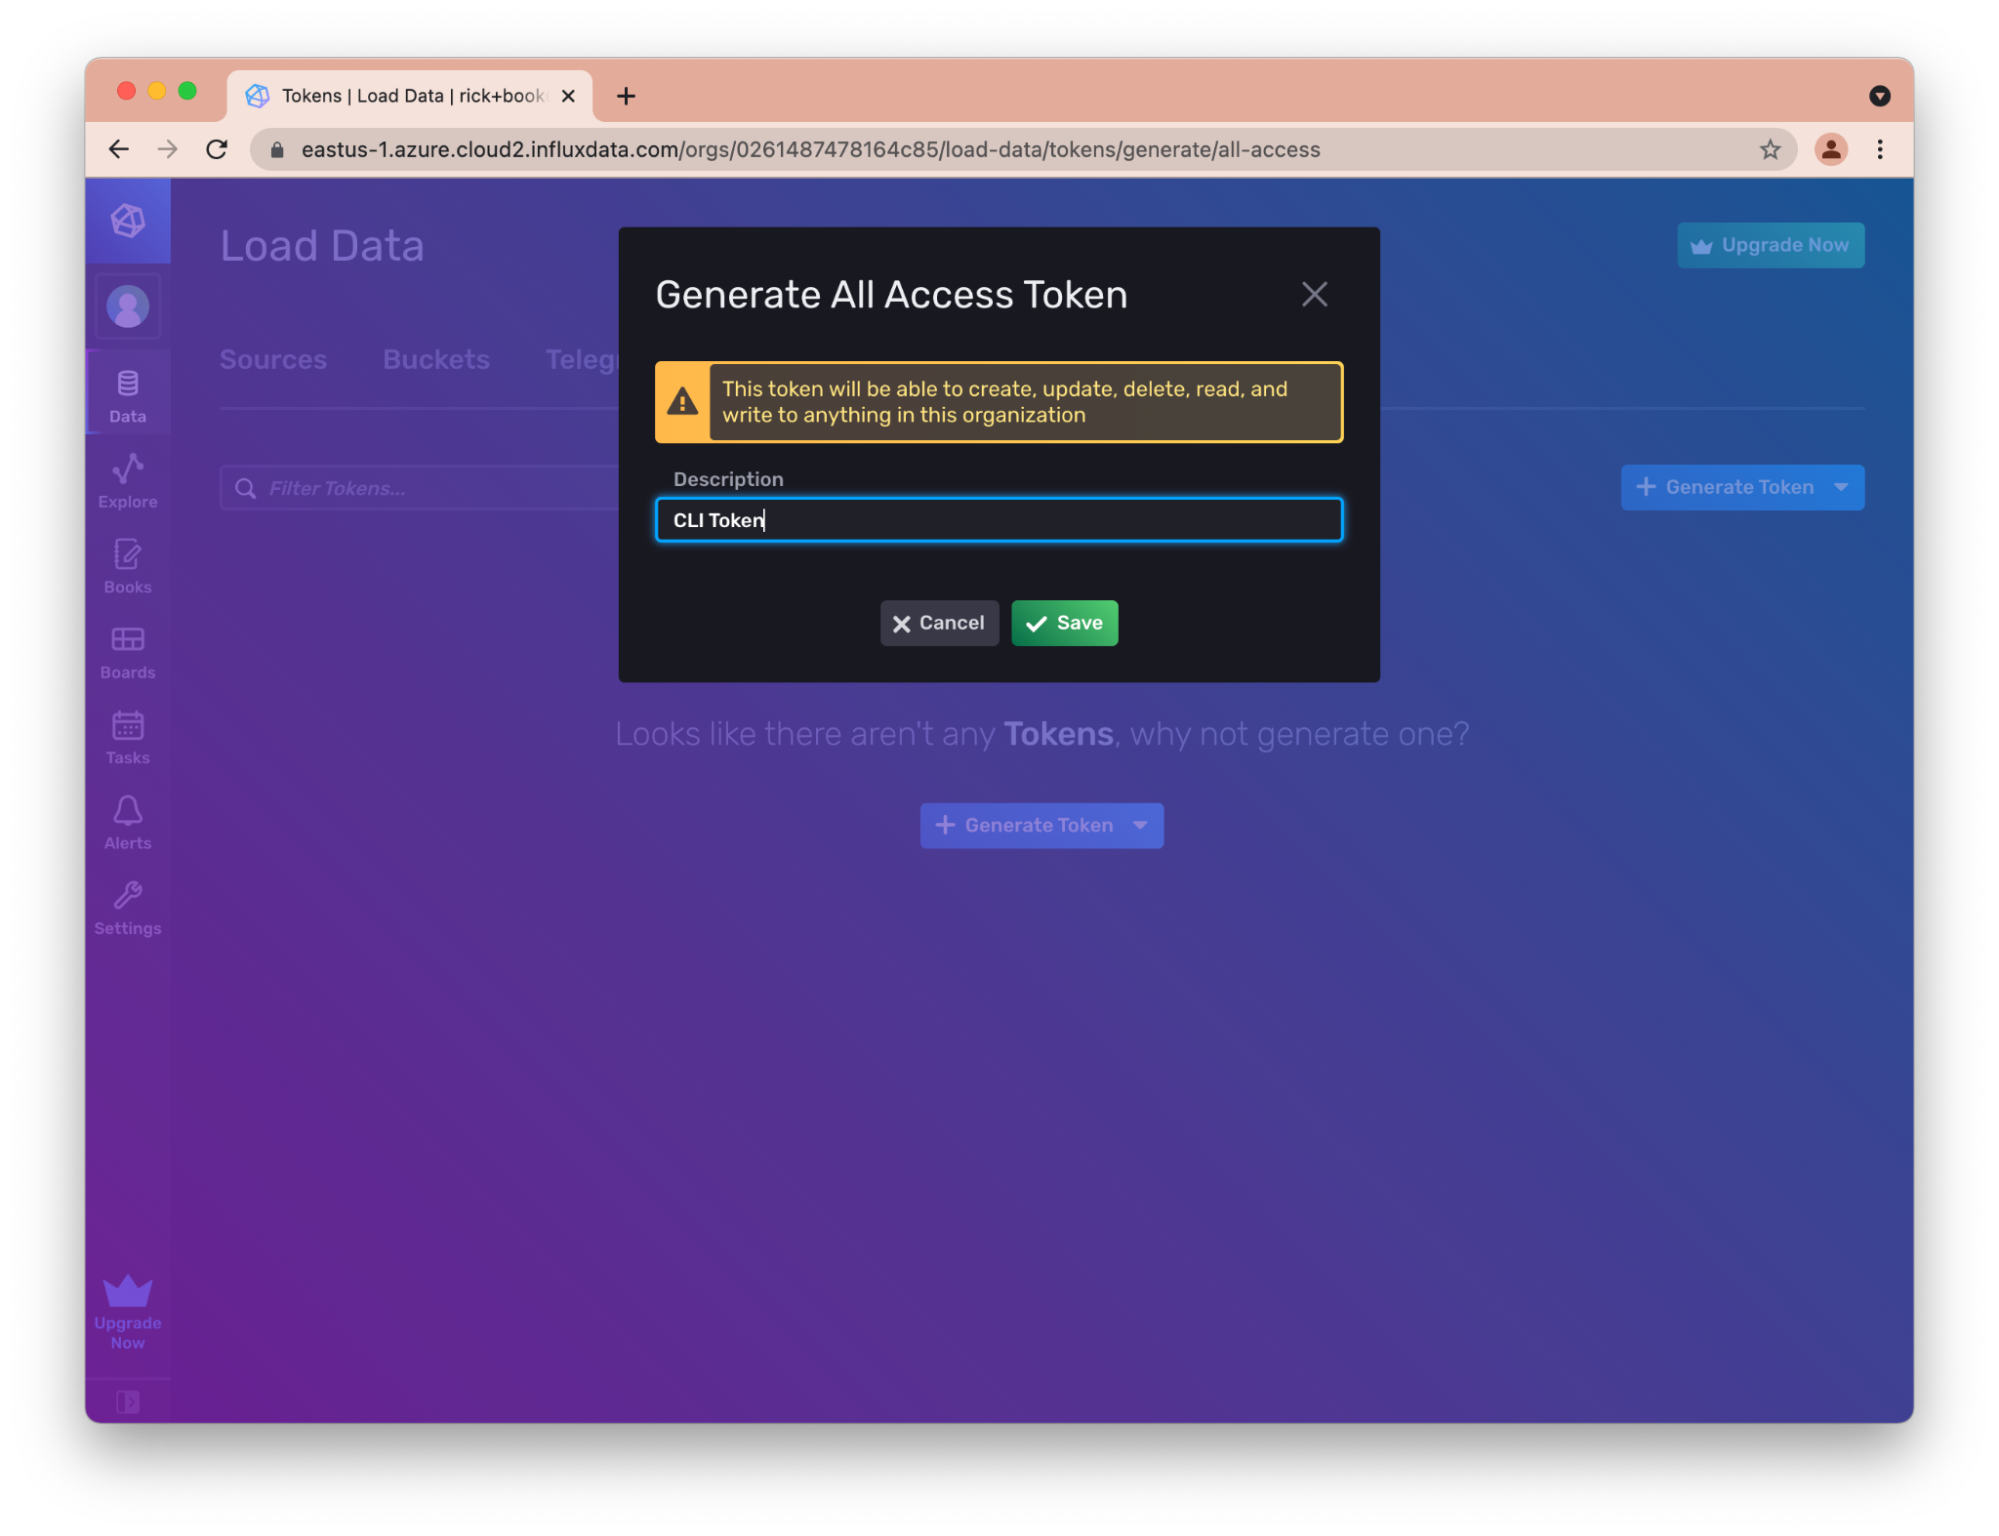
To create an All-Access token click the + Generate Token dropdown button and select All Access Token from the list.
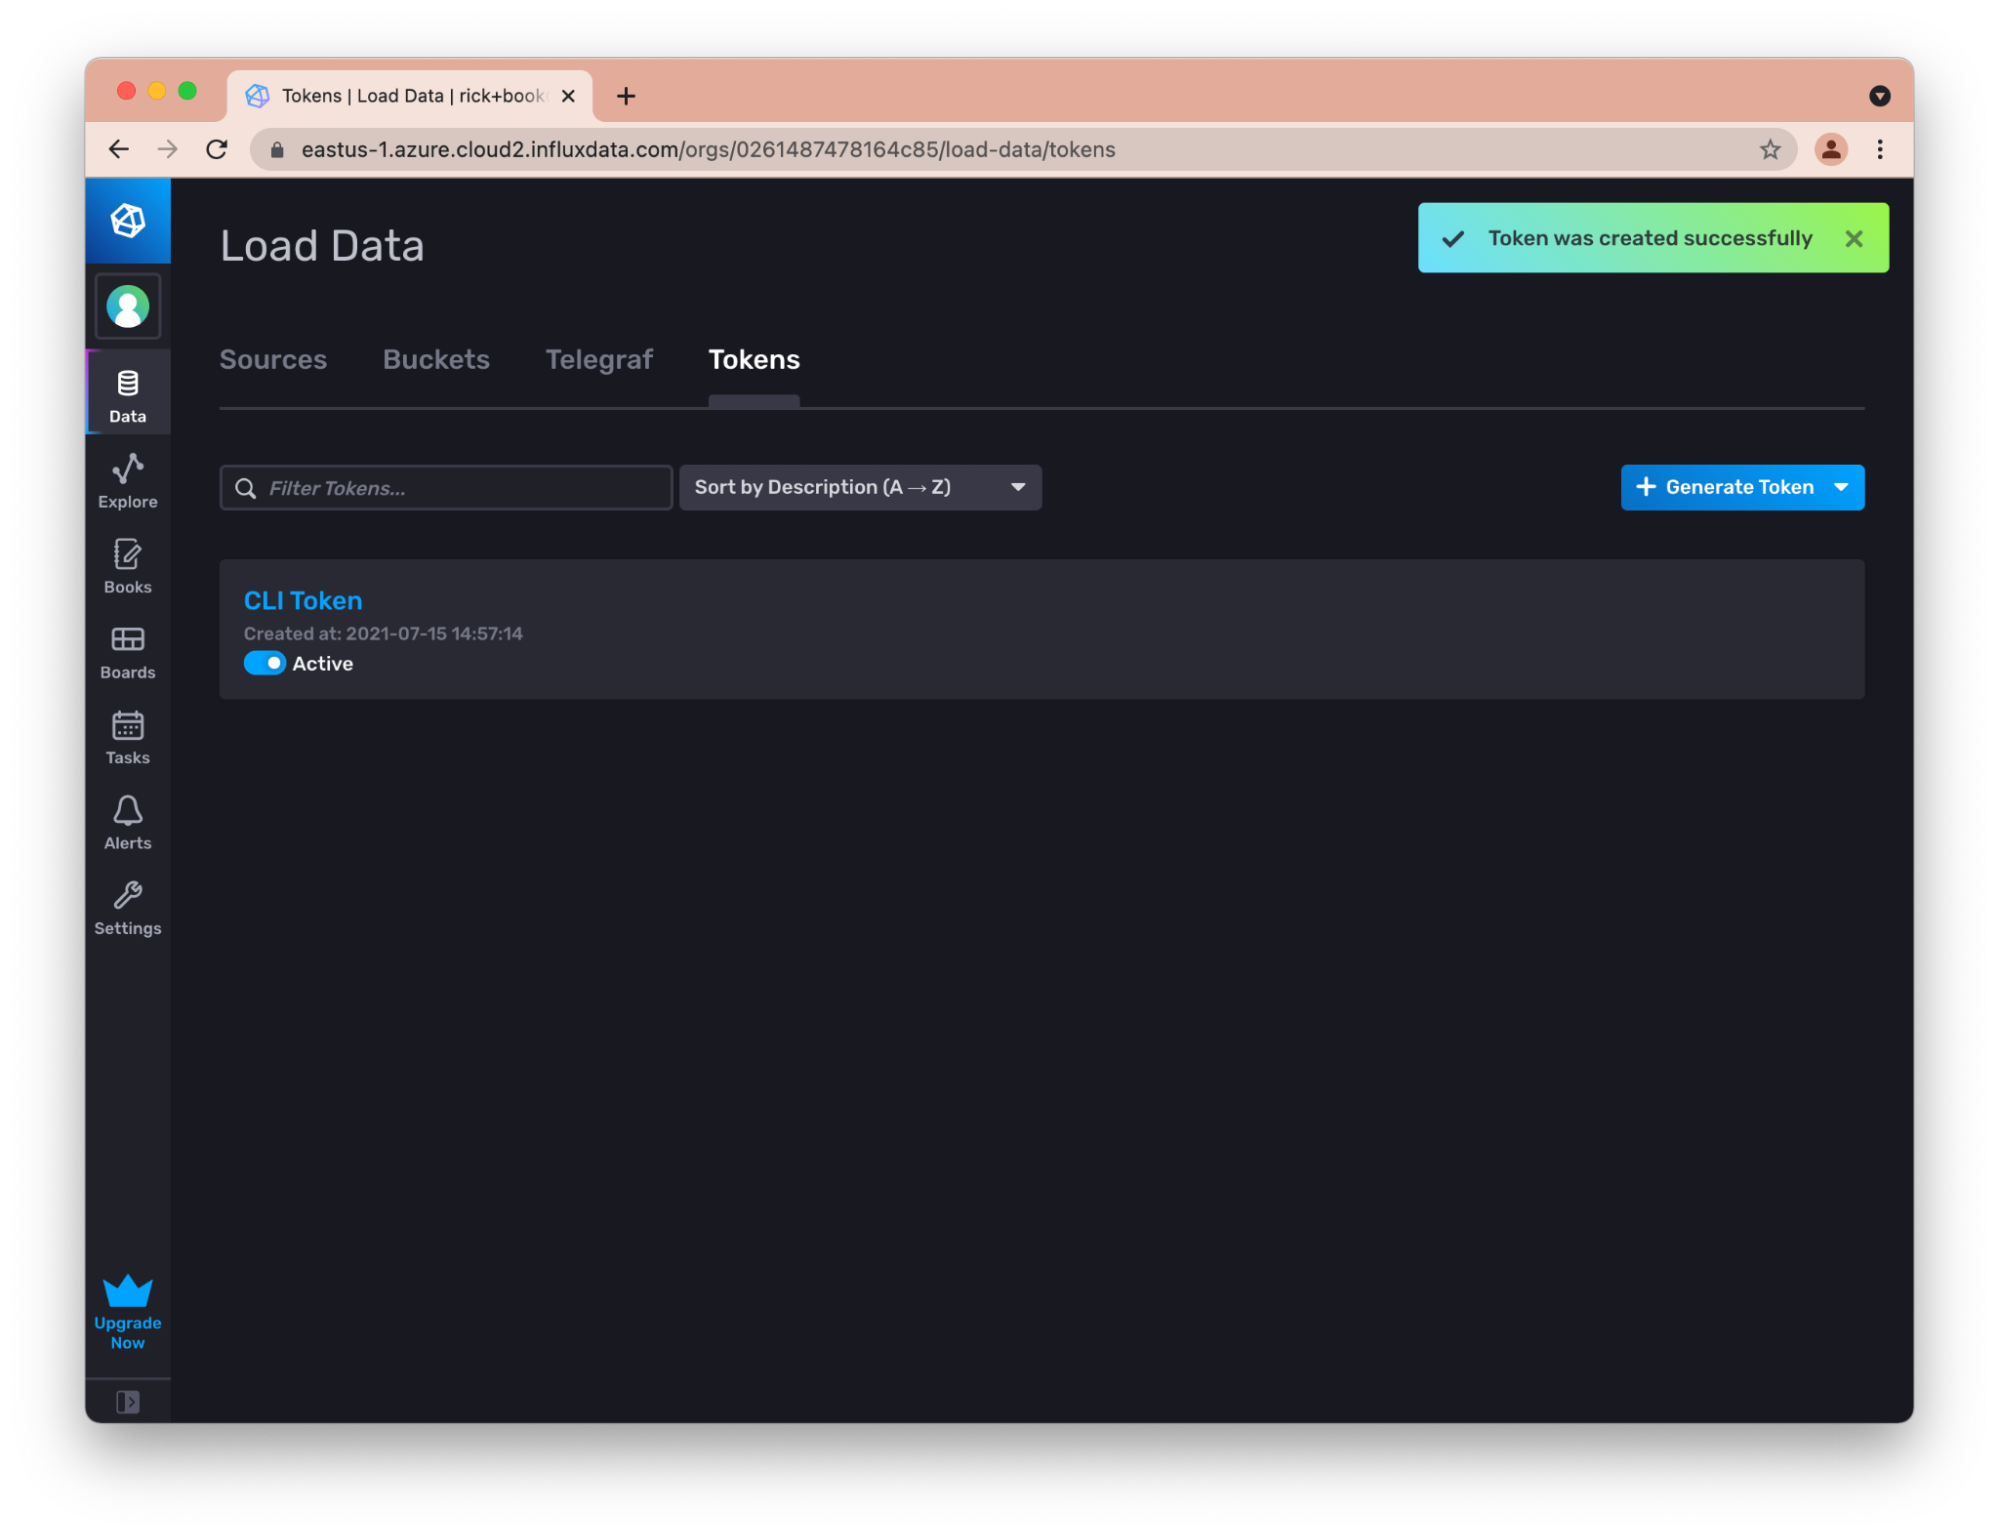
Name the token something meaningful and click Save.
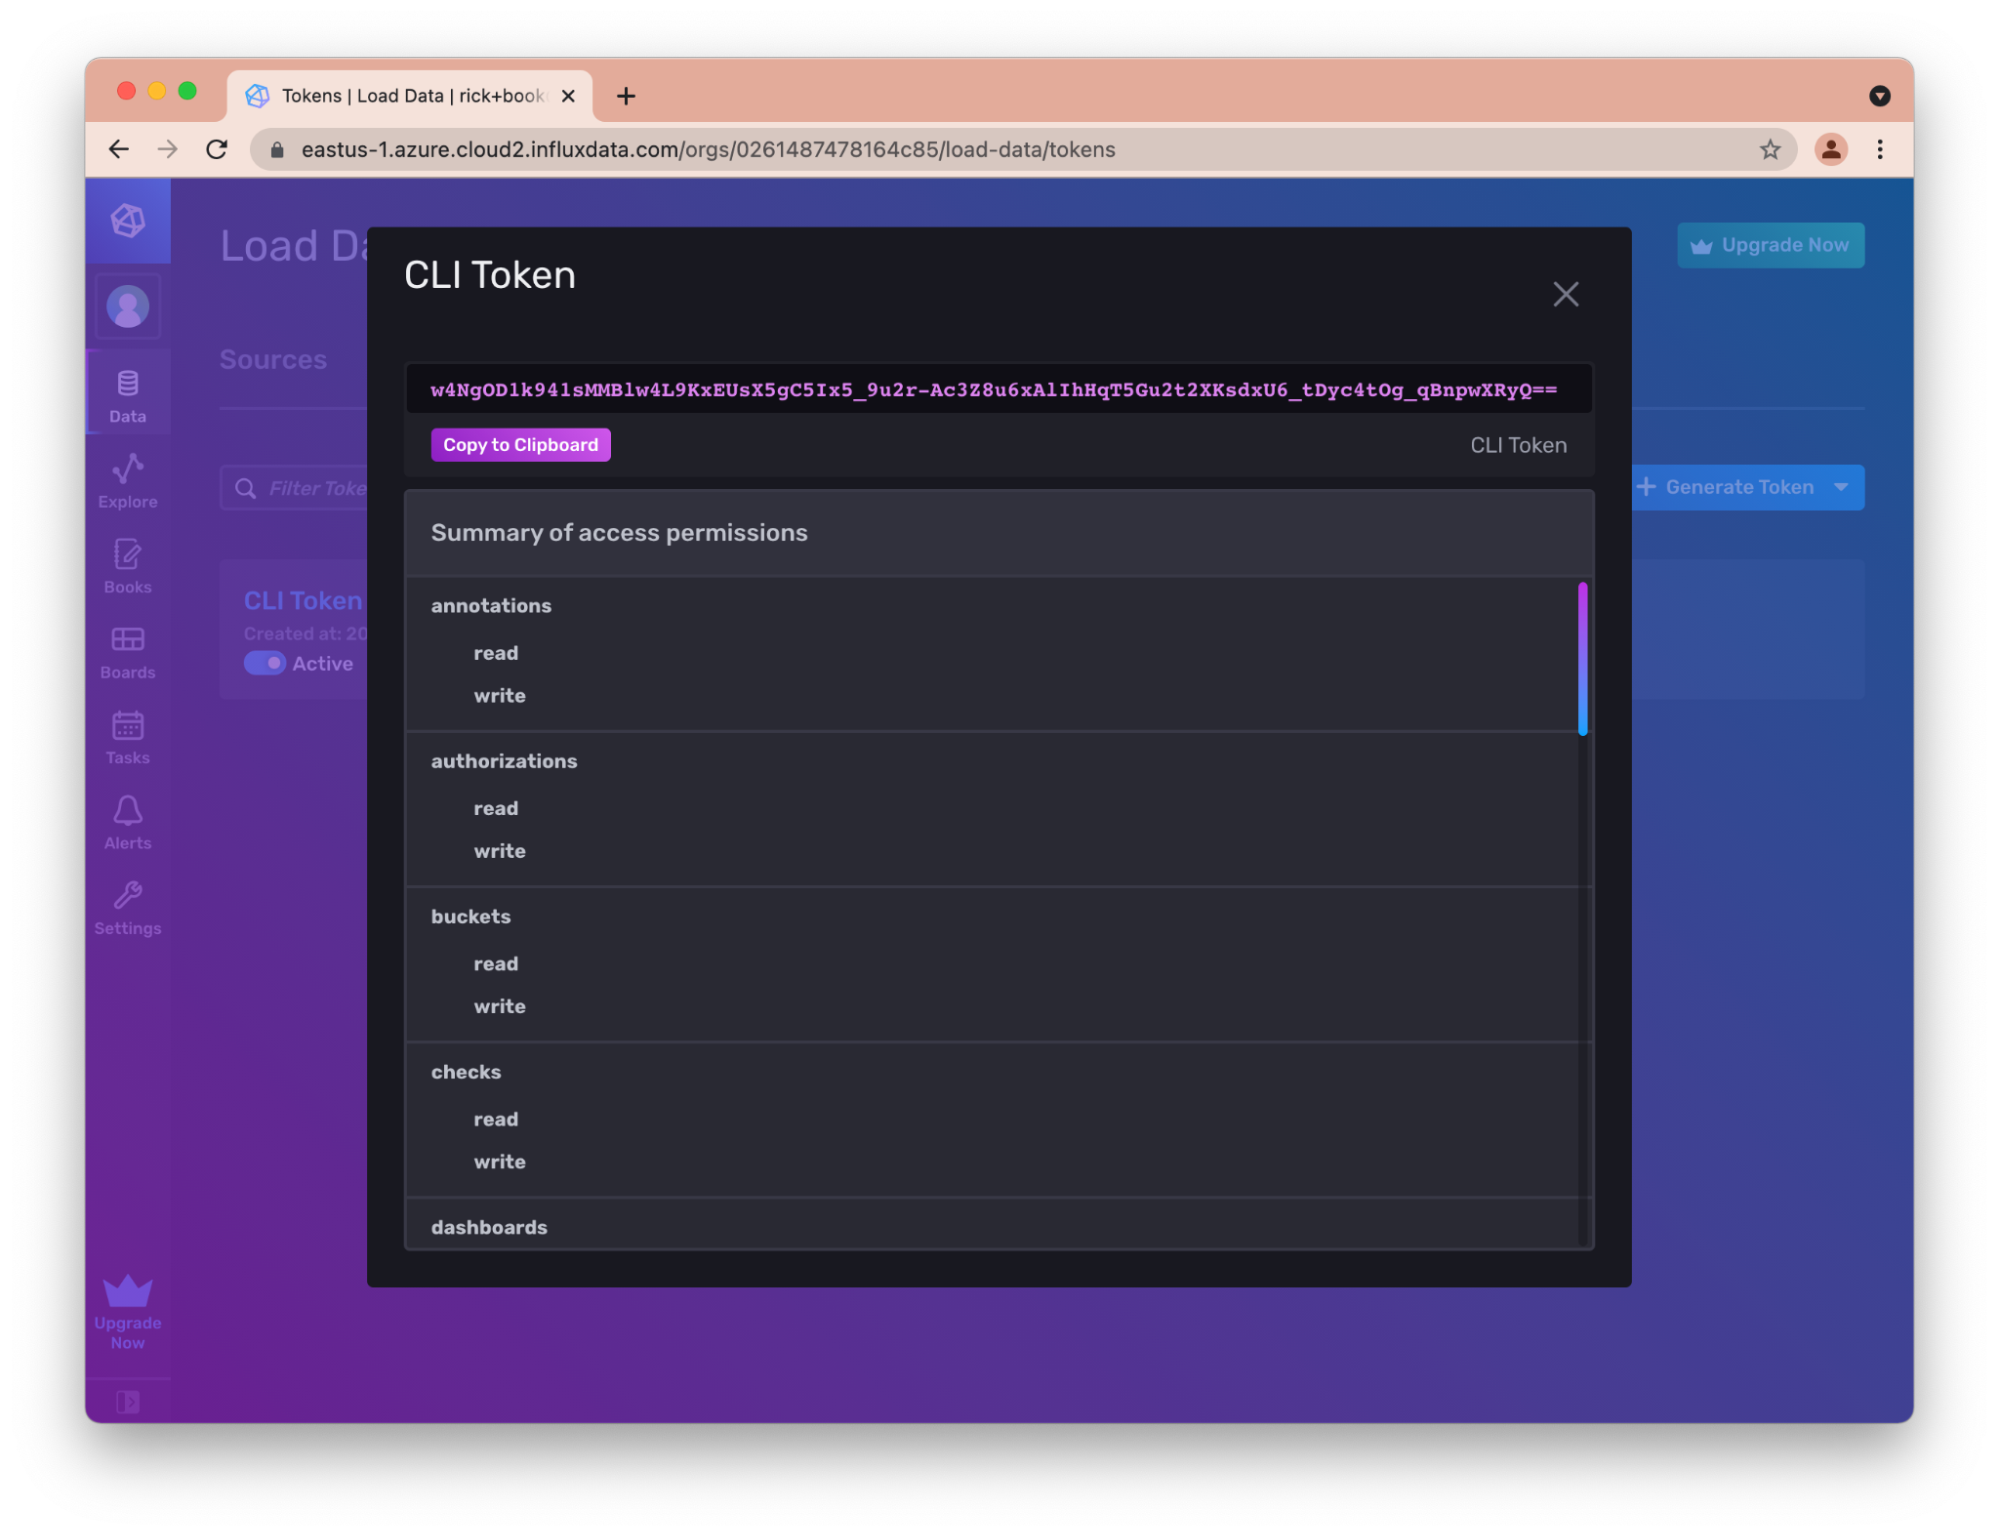
Click on the token name in the list to view and copy the token string out of the InfluxDB UI. It’s a good practice to save the token string somewhere safe outside of InfluxDB, like a password manager.
Select **Copy to Clipboard **to copy your token.
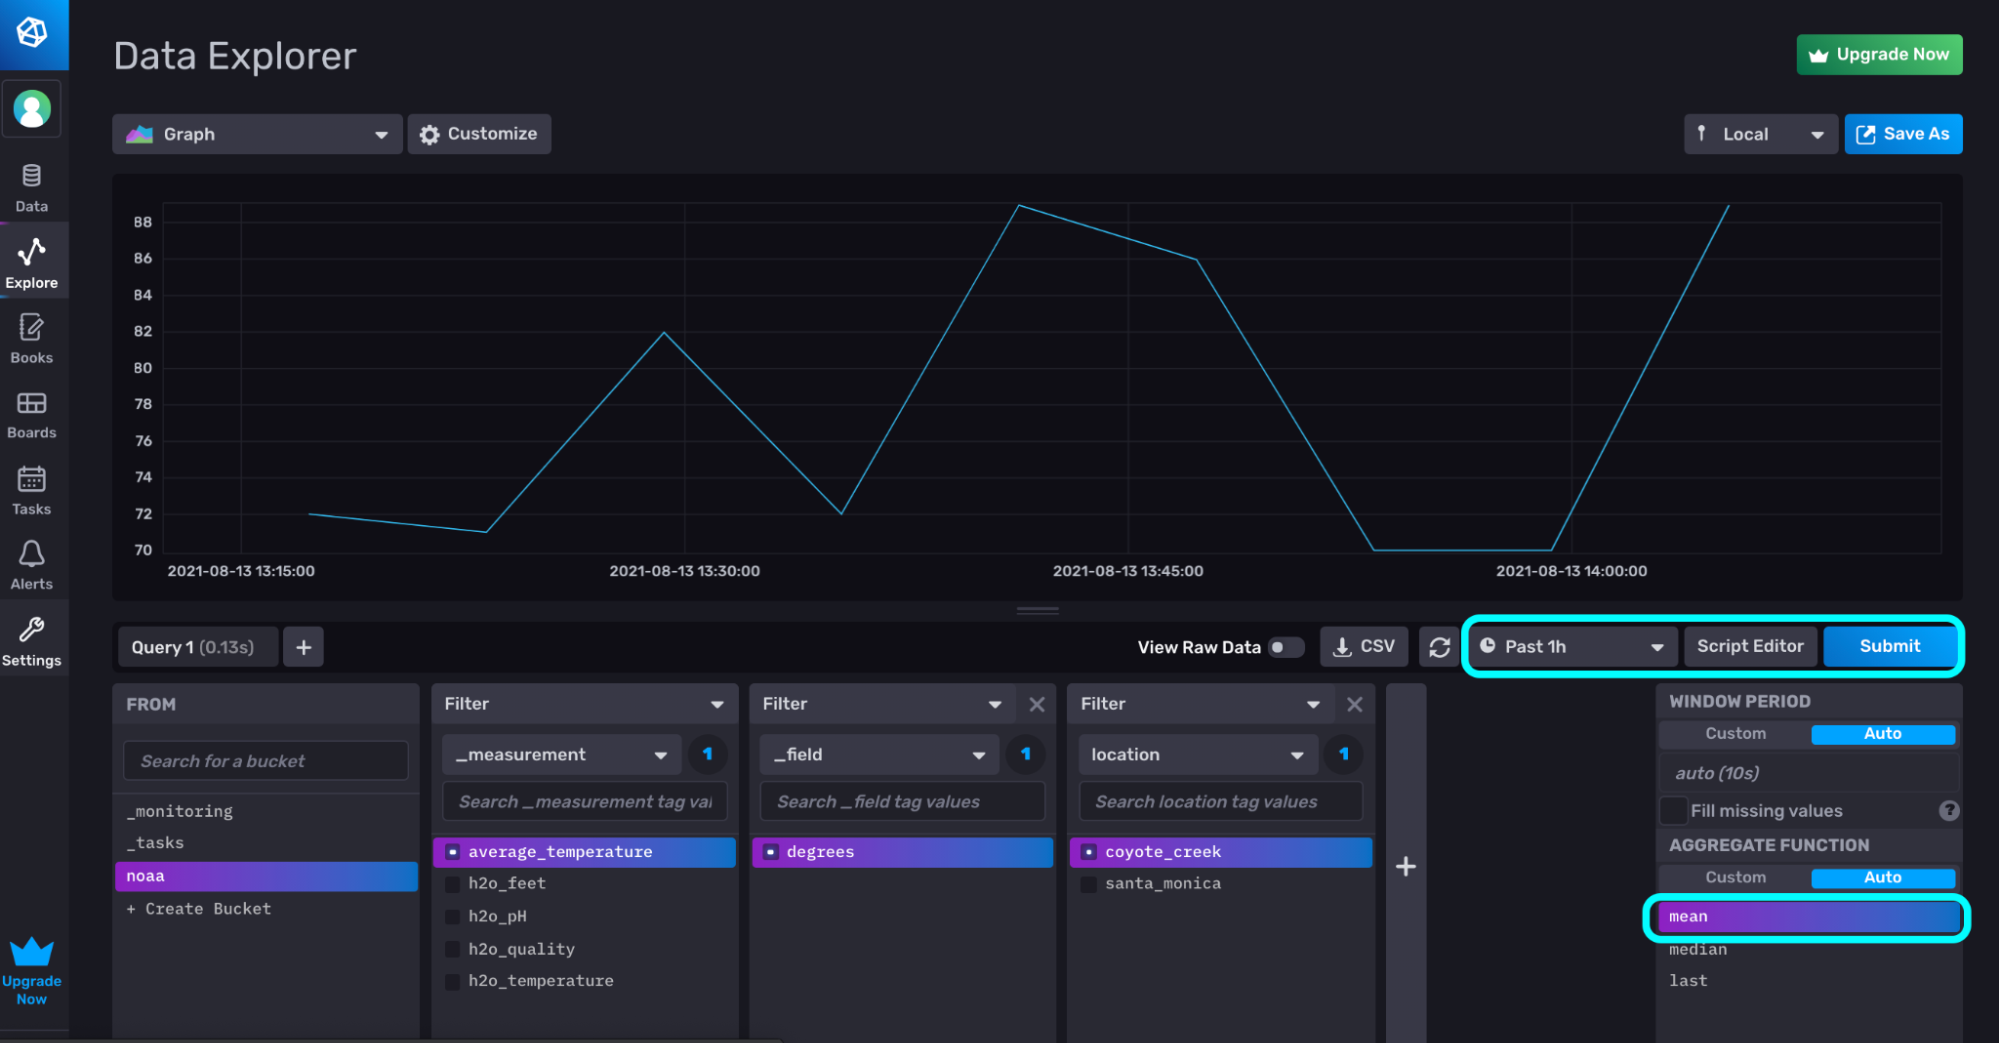
Explorer
The Data Explorer in the InfluxDB UI enables you to build, execute, and visualize your Flux Queries. The Query Builder offers you a no-code solution to building Flux queries, and the Script Editor is a Flux code editor where you can manually edit the query. These two Flux building and editing solutions enable both beginners and advanced Flux users alike. When you navigate to the Data Explorer page you’ll be placed in the Query Builder by default.
Query Builder
Build a Flux query with the Query Builder by clicking on the data you want to visualize, selecting a time range, and applying an aggregation to your data. Hit Submit to run the query.
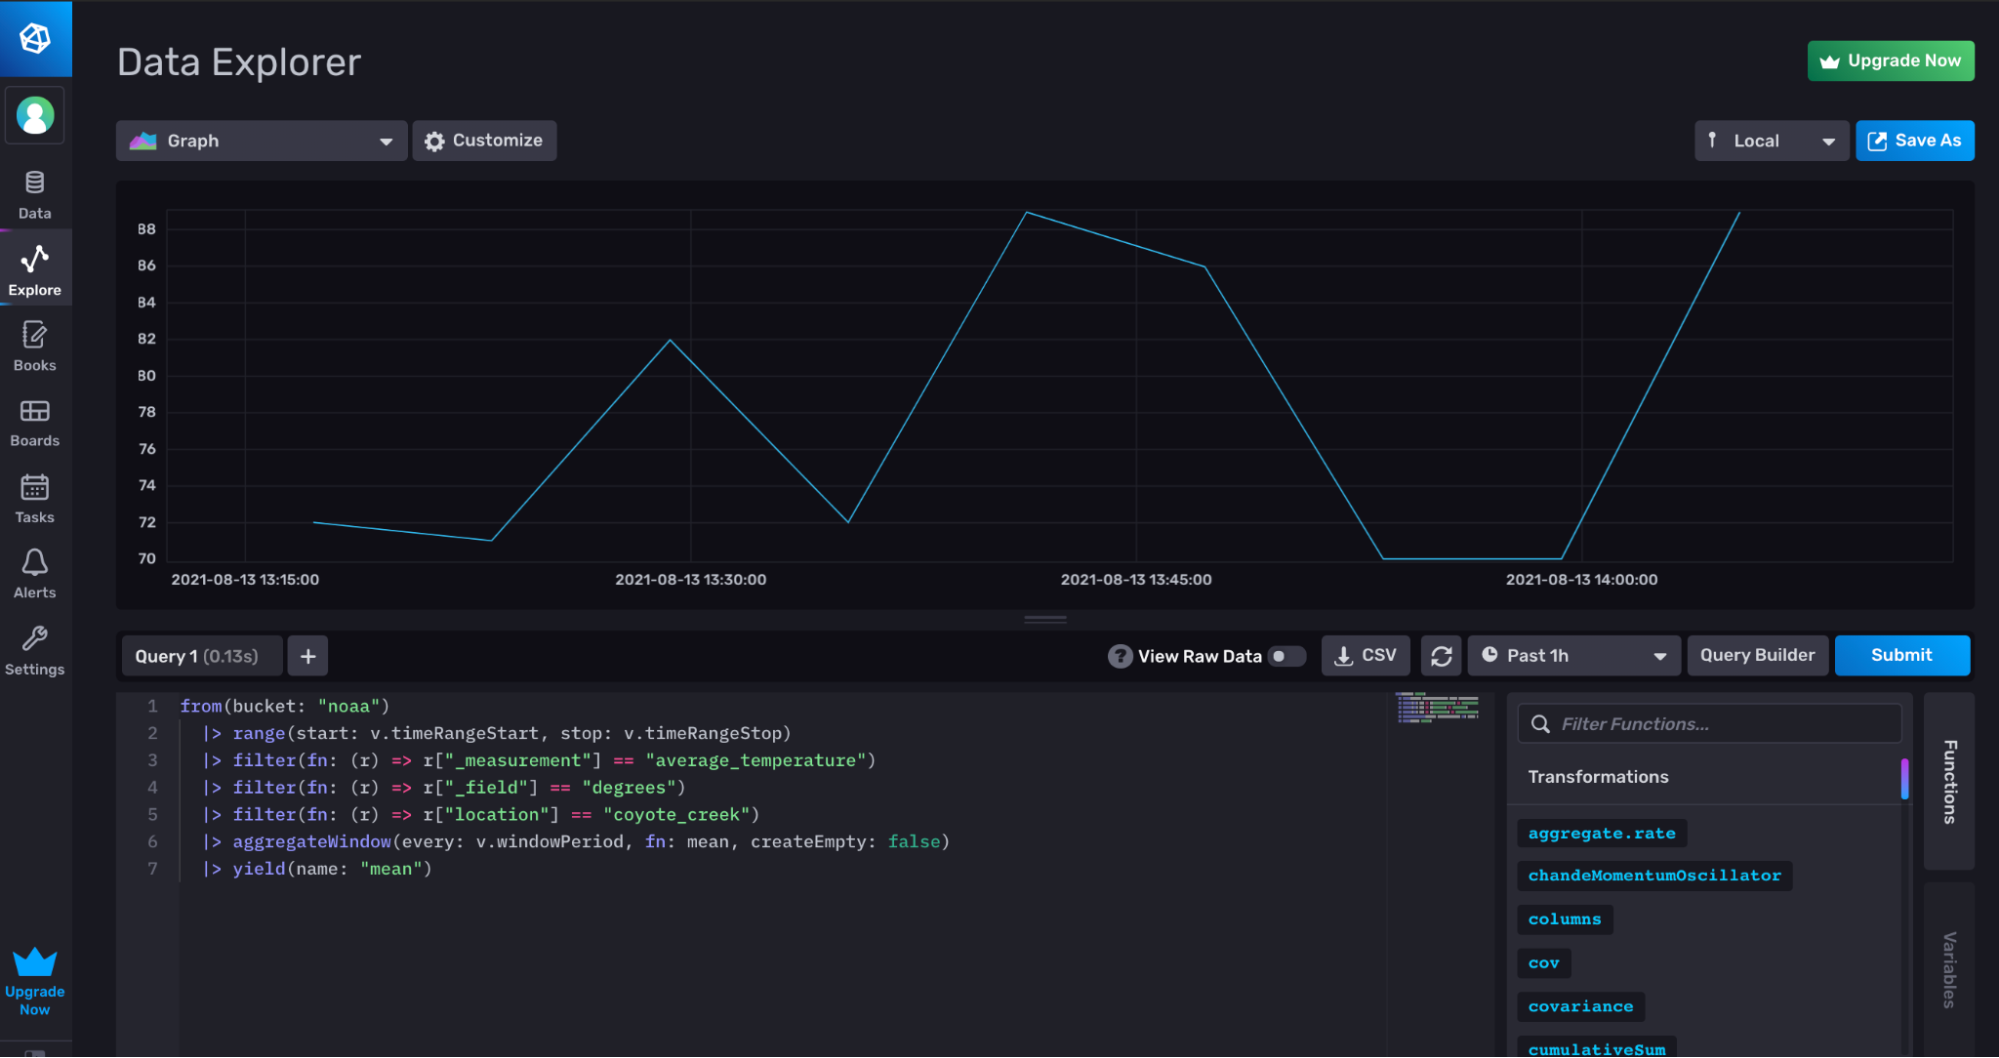
Flux Editor
Click the Script Editor button to see the corresponding Flux that you generated with the Query Builder.
Setting Up the CLI
The InfluxDB CLI works equally well for both Cloud and OSS. This section will cover setting up the CLI and setting up a configuration to make the CLI easier to use.
If you downloaded and installed InfluxDB OSS, you most likely already have the CLI installed. Otherwise, you can pick it up from the downloads page.
Though optional, using the CLI is much easier if you set up a config. Instructions for creating a config are easily available at the command prompt.
% influx config create -h

	The influx config create command creates a new InfluxDB connection configuration
	and stores it in the configs file (by default, stored at ~/.influxdbv2/configs).

	Examples:
		# create a config and set it active
		influx config create -a -n $CFG_NAME -u $HOST_URL -t $TOKEN -o $ORG_NAME

		# create a config and without setting it active
		influx config create -n $CFG_NAME -u $HOST_URL -t $TOKEN -o $ORG_NAME

	For information about the config command, see
	https://docs.influxdata.com/influxdb/latest/reference/cli/influx/config/
	and
	https://docs.influxdata.com/influxdb/latest/reference/cli/influx/config/create/

Usage:
  influx config create [flags]

Flags:
  -a, --active                 Set as active config
  -c, --active-config string   Config name to use for command; Maps to env var $INFLUX_ACTIVE_CONFIG
  -n, --config-name string     The config name (required)
      --configs-path string    Path to the influx CLI configurations; Maps to env var $INFLUX_CONFIGS_PATH (default "/Users/rickspencer/.influxdbv2/configs")
  -h, --help                   Help for the create command
      --hide-headers           Hide the table headers; defaults false; Maps to env var $INFLUX_HIDE_HEADERS
  -u, --host-url string        The host url (required)
      --json                   Output data as json; defaults false; Maps to env var $INFLUX_OUTPUT_JSON
  -o, --org string             The optional organization name
  -t, --token string           The token for host (required)
So you will need:
- The URL pointing to your Influxdb account or host URL .
- The Org ID for your account.
- An All-Access token.
Find Your Host URL
For a cloud account, the base url is easiest to find in the web browser. For the rest of the book we’ll use the following host URL:
https://eastus-1.azure.cloud2.influxdata.com
Additionally if you know the region and cloud provider you selected during account creation, you can lookup your host URL in this complete list of host URLs.
If you are using Open Source, it is most likely:
http://localhost:8086
Finding Your Org ID
You can find your org ID in the UI by navigating to the about page, as described above. For the rest of the book we’ll use the following Org ID: 0261487478164c85.
Generating Your All-Access Token
You can generate an All-Access token through the InfluxDB UI, as described above. For the rest of the book we’ll use the following All-Access token:
w4NgOD1k941sMMBlw4L9KxEUsX5gC5Ix5_9u2r-Ac3Z8u6xAlIhHqT5Gu2t2XKsdxU6_tDyc4tOg_qBnpwXRyQ==
Create and Test the CLI Config
Now I you can issue the command to create the config:
% influx config create -u https://eastus-1.azure.cloud2.influxdata.com -o 0261487478164c85 -t w4NgOD1k941sMMBlw4L9KxEUsX5gC5Ix5_9u2r-Ac3Z8u6xAlIhHqT5Gu2t2XKsdxU6_tDyc4tOg_qBnpwXRyQ== --config-name cloud
Active	Name	URL						Org
	cloud	https://eastus-1.azure.cloud2.influxdata.com	0261487478164c85
We can make sure the CLI is working by issuing a simple influx bucket list command:
% influx bucket list
ID			Name			Retention	Shard group duration	Organization ID
964221964e8fa8ab	_monitoring		168h0m0s	n/a		0261487478164c85
31ad8b129cd7db7a	_tasks			72h0m0s		n/a		0261487478164c85=
You should expect a list of your buckets with additional detail about them. Every InfluxDB instance contains two default system buckets:
- _monitoring
- _tasks
We’ll dive into more detail about these buckets later on, but you should always expect two buckets in the output from your influx bucket list command at a minimum.
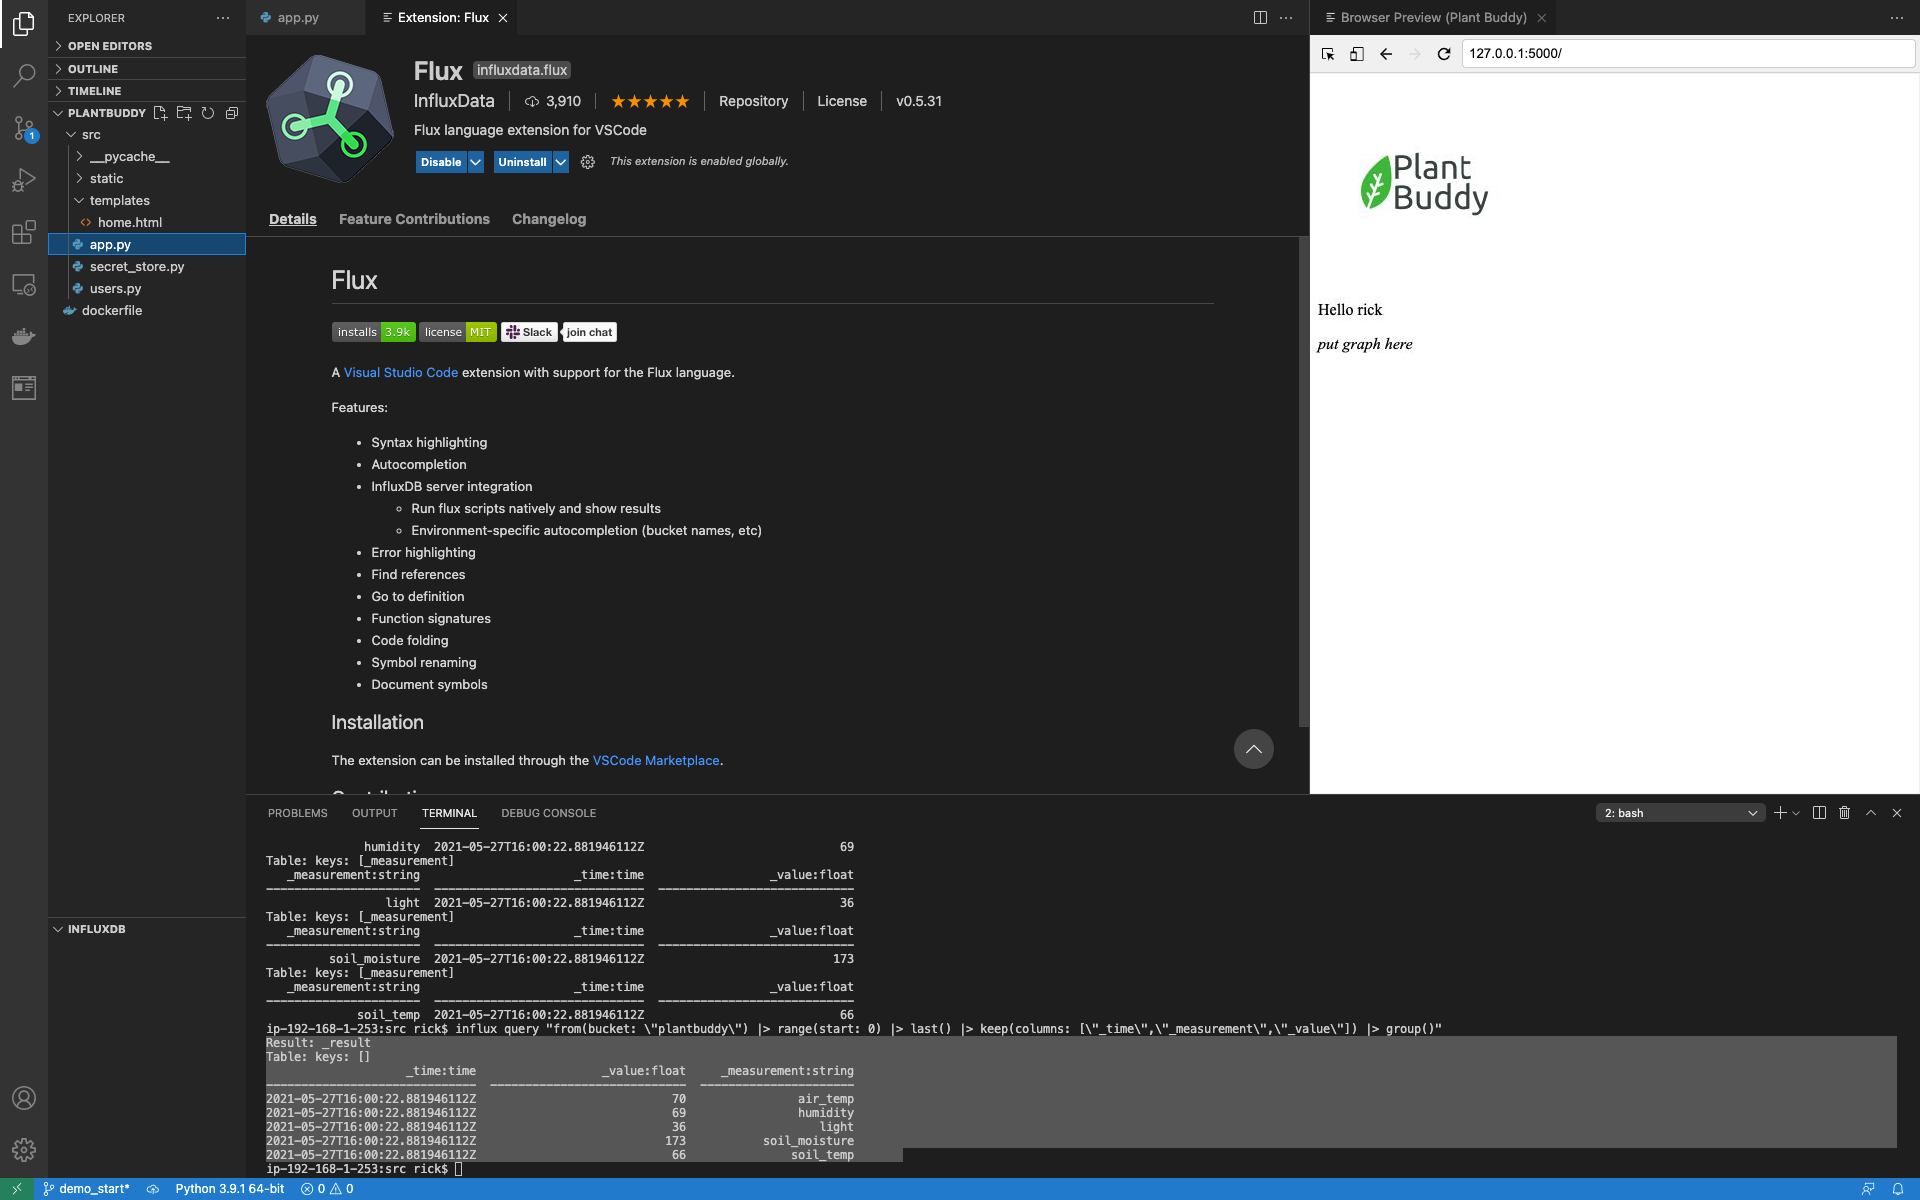
Setting Up VSCode
The Visual Studio Code Flux Plugin is designed to allow you to integrate InfluxDB as a backend into your existing application development process, and it is relatively easy to set up the InfluxDB VSCode Extension. The Flux extension is easy to find by searching for “Influx” in the extension manager.
After installing the extension, you can see an InfluxDB window added to the bottom left.
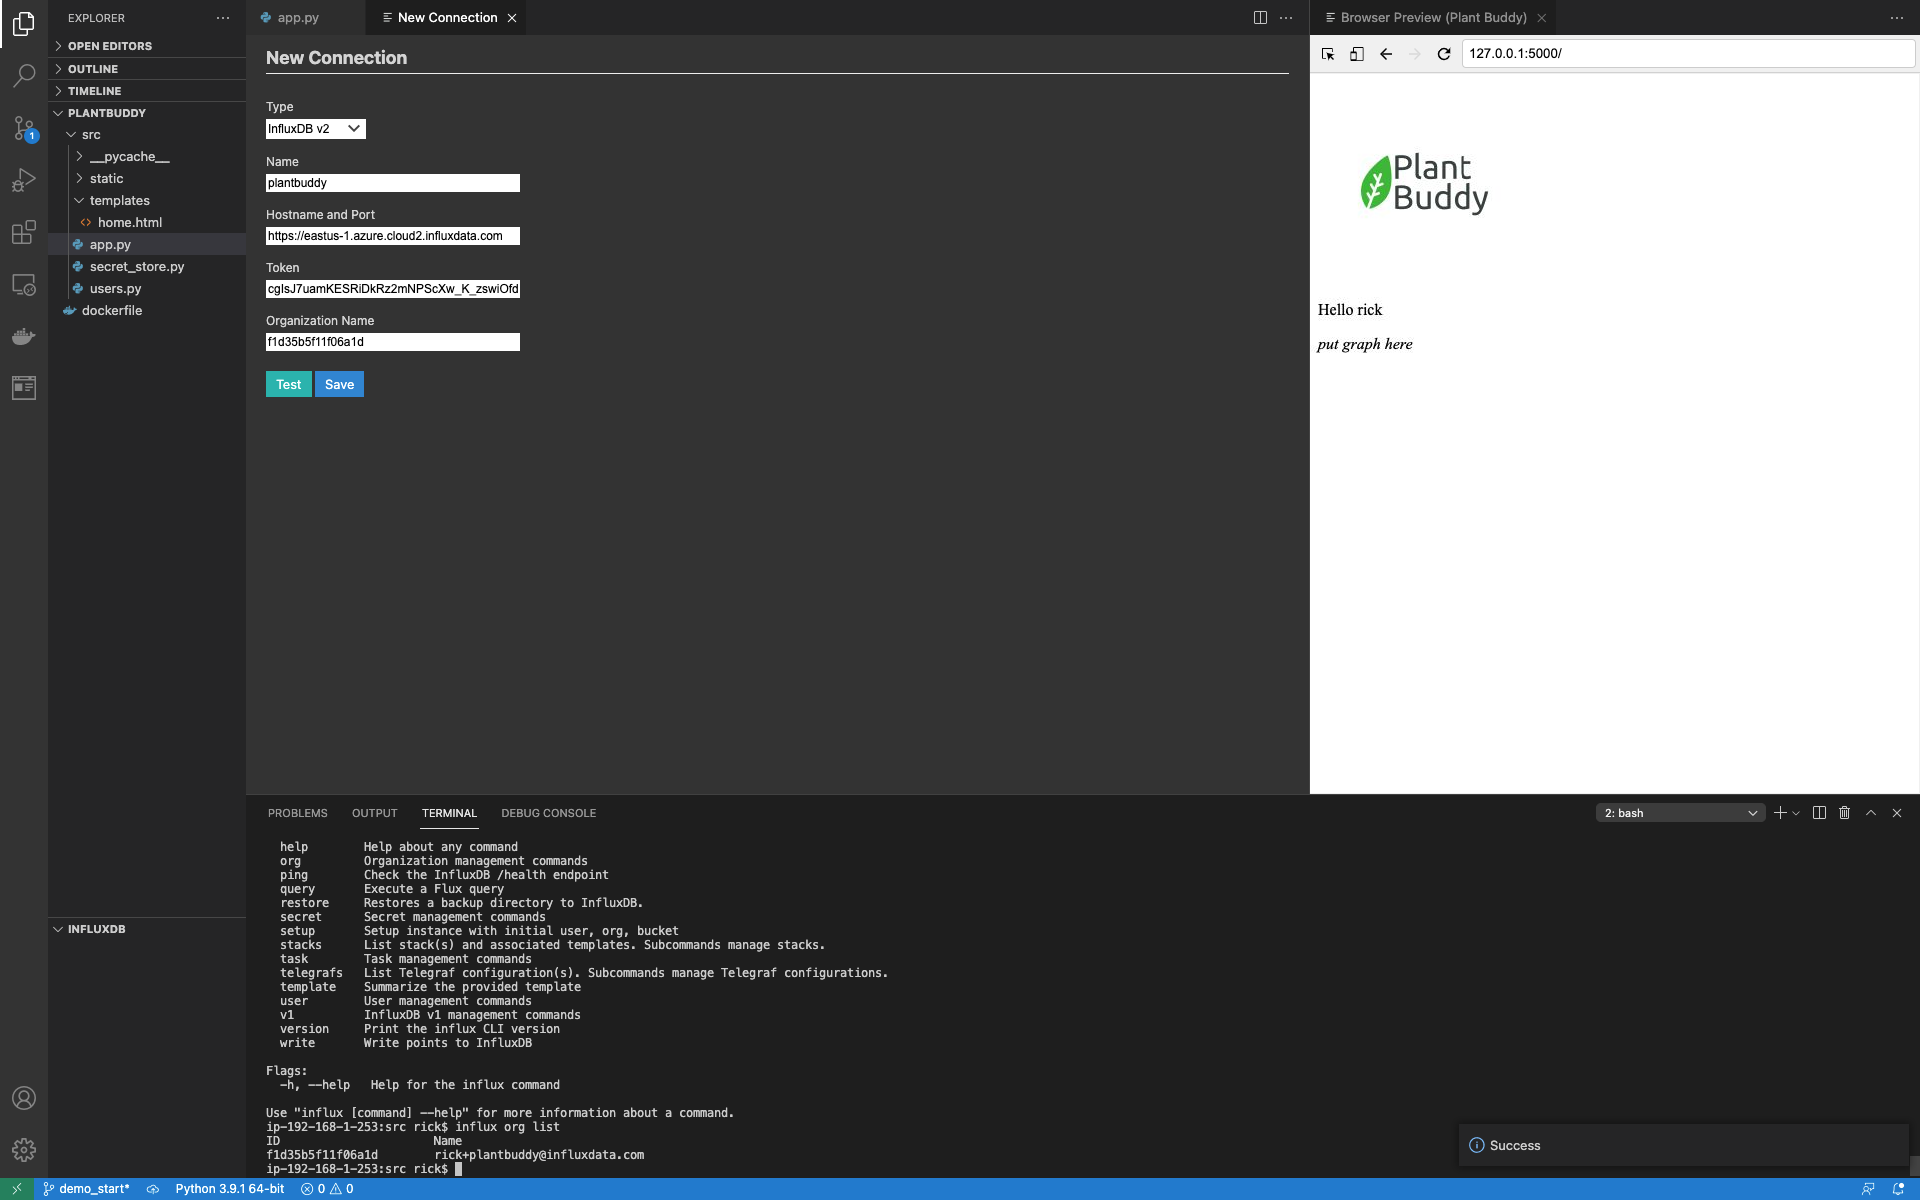
Begin setting up a connection with my Cloud account by giving focus to the InfluxDB window and clicking the + button, and complete the form.
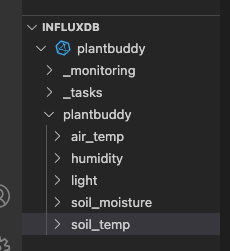
After saving, the InfluxDB window should be populated.
Further Reading
- Using the Flux VS Code Extension for IoT Application Development
- TL;DR InfluxDB Tech Tips – How to Use the CLI Locally to Access the Flux REPL and Write a Regular CSV to InfluxDB Cloud
- TL;DR InfluxDB Tech Tips — the Easiest Way to Use and Create InfluxDB Templates